
Spring Boot + Docker + AWS | Starting with AWS
Chapter 2 | Starting with AWS


Before you start reading, you have to know that this tutorial series is designed to be the most simpliest and easiest way for begginers, our aim here is to get beginners to start and get dirty on this type of stuff, we are not considering that this will create a professional and complete structure of service or services that you can use on production but at least will help anyone out there.
This is the second part of the Spring Boot + AWS series, check the first part here.
So... AWS, right?
First thing to know.. you need a credit or debit card, yep, buuuut don't worry, this is just to check some payment methods into AWS, AWS will charge you with $1 USD but it will give it you back after some time so don't worry. Also, AWS will give 1 year of free tier, this can give you access to a lot of services into AWS. Imagine that AWS have some bounds of use per service that you can use, while you don't traspass this bounds the costs will maintain free. AWS have a specific information of all the services for free tier accounts and how and which resources you can use. You can check that info here. Though, if you have any problem check this out.
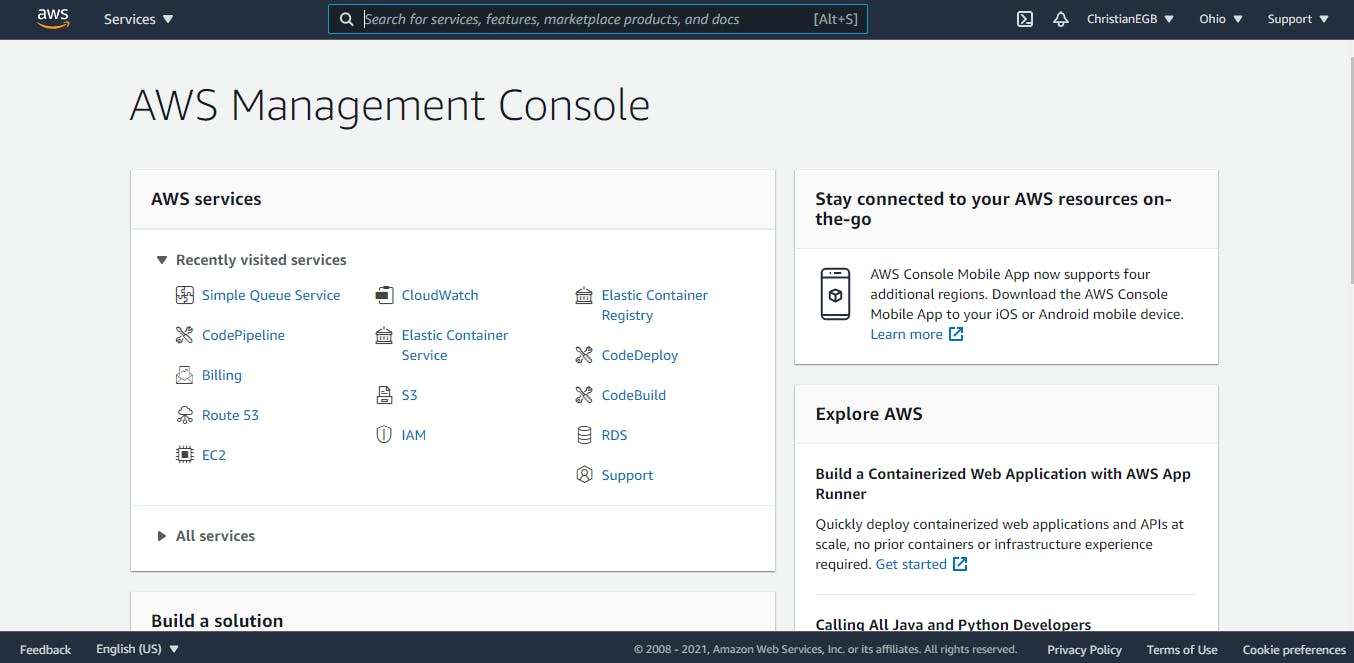
Ok, so let's say that you already have an AWS account so you can go to try to log in into the AWS console here clicking in a button like the next one:

You will find it in the upper-right corner of the page. Once you log in you will see something like this:
Ok, now we need the AWS CLI so let's continue...
Installing AWS CLI
As a Windows user, I will give you Windows resources hahaha... Hey but you are a software developer, right? And if you are riding this is because you are a self-learner, give a try to search how to install the AWS CLI for Linux or MacOS. OK Windows user, you have luck, you can find the MSI installer here. You know, the normal next, next... stuff. Install it then try to run the next command into the CMD (command line):
aws --v
That should give you:
aws-cli/2.2.18 Python/3.8.8 Windows/10 exe/AMD64 prompt/off
Ok man, yeah, you rock, you are close. Ok let's continue let's configure credentials in your local machine in roder to use AWS from you command line.
AWS IAM and CLI configuration
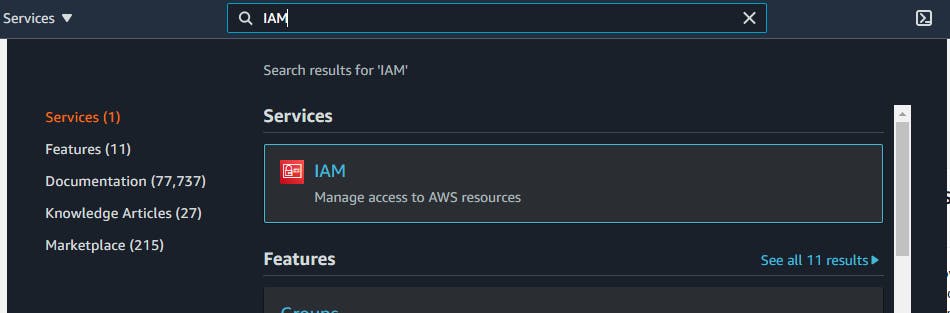
Into the search input in the AWS console, write IAM and you will see that list of services will appear below the search box, in there choose IAM.
Click and that will take you to the IAM console. IAM stands for Identity and Access Manager (if you asked xD hehehe). You will see something like this:
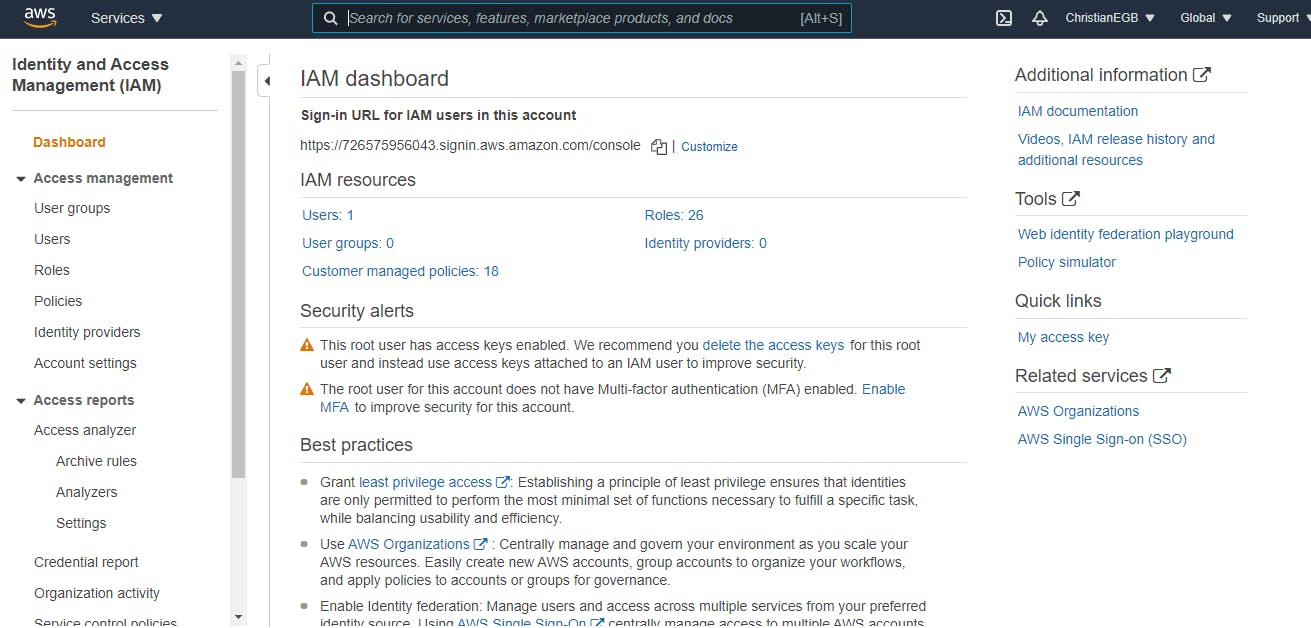
Numbers can vary, like the number of roles or users that you have, for example, I only have 1 user and 26 roles (^o^ I need to delete some). Click on users and then you will see something like this:
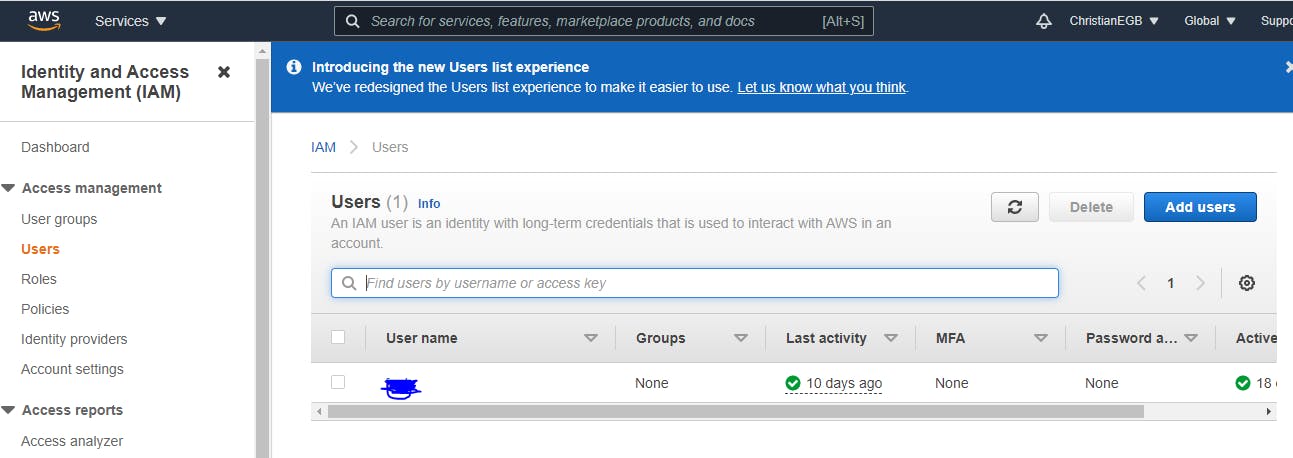
In my case I already have one user, but I will create another one in order to show you how: Click on the button Add user in the upper-right corner:

You will see something like this:
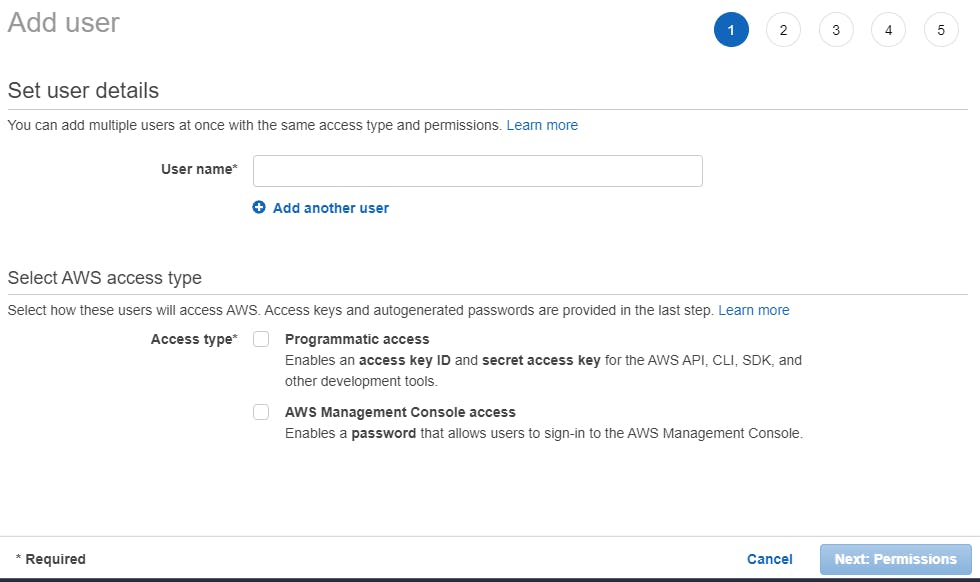
Now, add a name for the user that you are going to create, this can be your name or any other name that you want to use to log into the CLI, something like this:
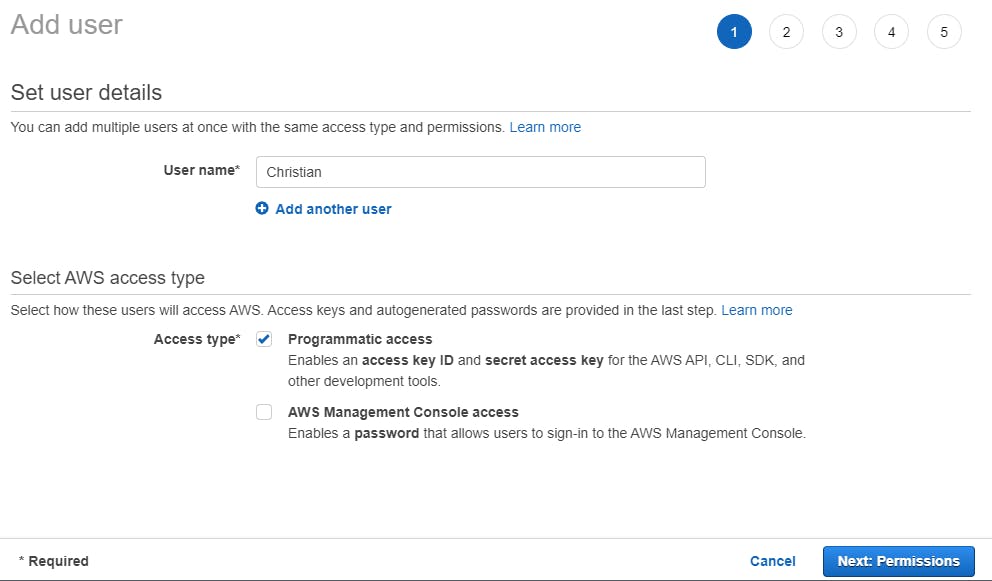
Click over the Next: Permissions button, yeah man the big and bluw button in the bottom right corner, yeah that one.
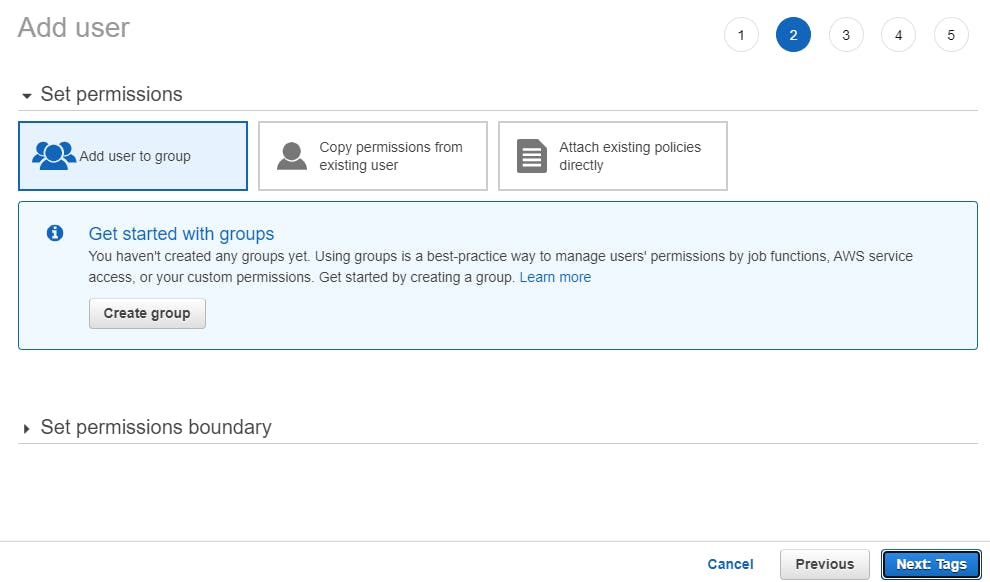
 Now, you will see this:
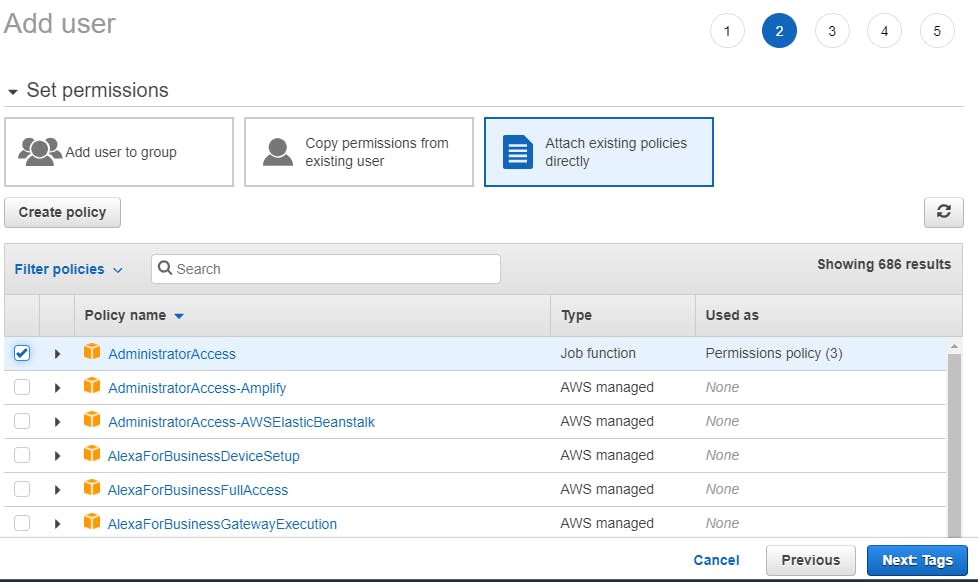
 Click on Attach existing policies directly and then check the AdministratorAccess in the list below, you should have something like:
Click on Next: Tags

Don't do anything here, just click the Next: Review blue button:

You will see something like this:
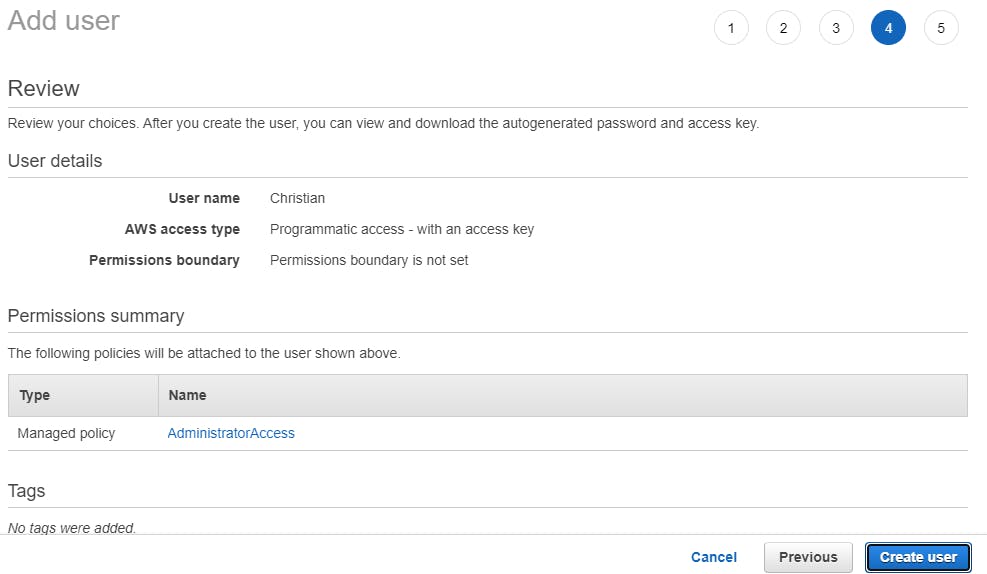
Now click on Create user:

Once you click, you will see something like this:
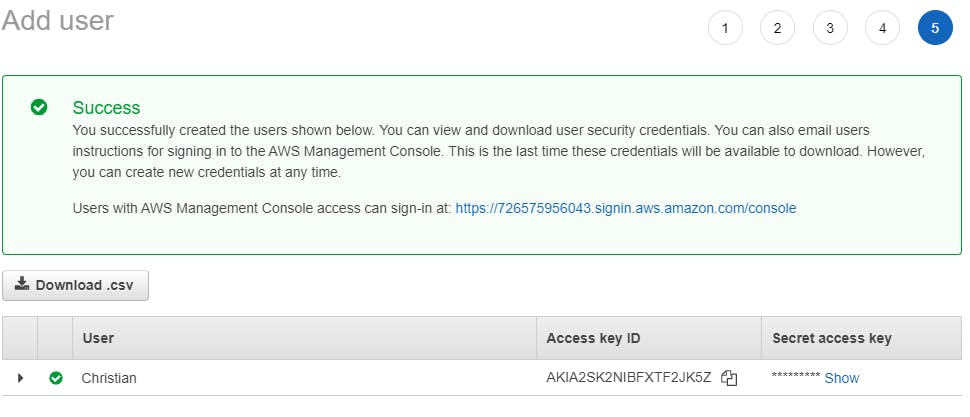 Ok pay attention here, you have two choices and depends on how trustfull you are with yourself (hahaha)
- You download the CSV file clicking in the next button:

Or 2. You copy the text under the Access key ID column, paste it in a note or in your favorite editor, then click over the show text, this will show you the content of the Secret access key, copy it and again paste it in your favorite editor, don't forget to add some text to differentiate which is which. (Or just do the step 1 xD). Now you can click close:

Ok man, now open your CMD and write:
aws configure
You will see something like:

As you can see I already have an access key (Dah! because I already use AWS CLI) but you need to paste here the access key ID that you have in the CSV file of the past point number 1, then hit ENTER. Yeah! you guessed, now copy the secret access key and paste it in the next:

Again, I already have one, now hit ENTER. Now the default region. Ok, AWS sparates the services that you can use by region, you can use all the same services but depending on the regions is how available is going to be for you, also depends a lot of from where are you from, in my case I use the us-east-2 region which corresponds to Ohio, you can see this in the AWS console web page in the upper-rightm you will see the name of your region:
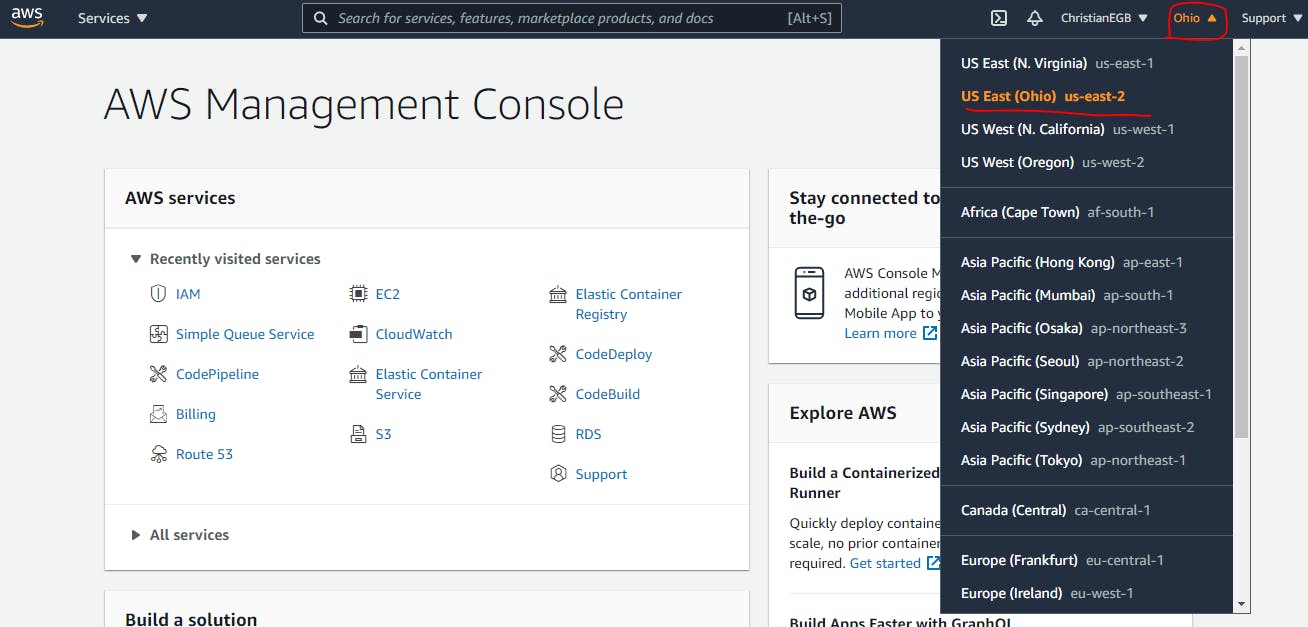
Now, going back to your CMD, write the name of the region that corresponds for you AWS console and where you created the IAM user, in my case is Ohio (us-east-2) so you write us-east-2 in the console:
 Now the next thing to enter in the configuration will be how AWS CLI will manage the information, you can write json, just like this:

Then hit ENTER.
Now to test if everthing is setup you can run the next command:
aws s3 ls
This will list some resources from AWS S3 (Simple Storage Service), a service to store static files, you will see something like:

In my case I have 3 buckets (like containers or folders to store the static files) but if you can't see anything that's ok because you don't have any, its better to see and ampty space than see an error because of a bad configuration with your credentials. If you have an error just write a comment.
And that's it, we finished the configuration for the CLI in your console. This is enough for now, you have an AWS account, you configure the CLI, hey you also created a user using AWS IAM, that should count as some experience there. In the next tutorial we are going to push the docker image that we created in Chapter 1 and we are going to deploy the service user AWS ECS. So see you tomorrow dev. <3
Also, if you want to know more about this type of topics please go and check out some tutorials in Amigoscode. We have a lot more regarding Backend and Frontend development and DevOps too!