Spring Boot + Docker + AWS | CodePipeline
Chapter 6 | Creating a codepipeline for your code


Before you start
For this tutorial we are going to use the next file called buildspec.yml, check that in here you will find the URL of the repository from ECR where your docker image is stored, please remove the existing one in this file and add yours.
The buildspec is a file that will tell to AWS CodeBuild the stages of build your project, for instance the file contains various phases, such as pre_build, build and post_build. Take a look to the next one, which is the one that we are going to use, at least for the spring boot project that we have.
version: 0.2


phases:
  pre_build:
    commands:
      - mvn clean install
      - echo Logging in to Amazon ECR...
      - aws --version
      - $(aws ecr get-login --region $AWS_DEFAULT_REGION --no-include-email)
      - REPOSITORY_URI=726575956043.dkr.ecr.us-east-2.amazonaws.com/demo
      - COMMIT_HASH=$(echo $CODEBUILD_RESOLVED_SOURCE_VERSION | cut -c 1-7)
      - IMAGE_TAG=build-$(echo $CODEBUILD_BUILD_ID | awk -F":" '{print $2}')
  build:
    commands:
      - echo Build started on `date`
      - echo Building the Docker image...
      - docker build -t $REPOSITORY_URI:latest .
      - docker tag $REPOSITORY_URI:latest $REPOSITORY_URI:$IMAGE_TAG
  post_build:
    commands:
      - echo Build completed on `date`
      - echo Pushing the Docker images...
      - docker push $REPOSITORY_URI:latest
      - docker push $REPOSITORY_URI:$IMAGE_TAG
      - echo Writing image definitions file...
      - printf '[{"name":"demo","imageUri":"%s"}]' $REPOSITORY_URI:$IMAGE_TAG > imagedefinitions.json
      - cat imagedefinitions.json
artifacts:
  files:
    - imagedefinitions.json
    - target/rmnd.jar
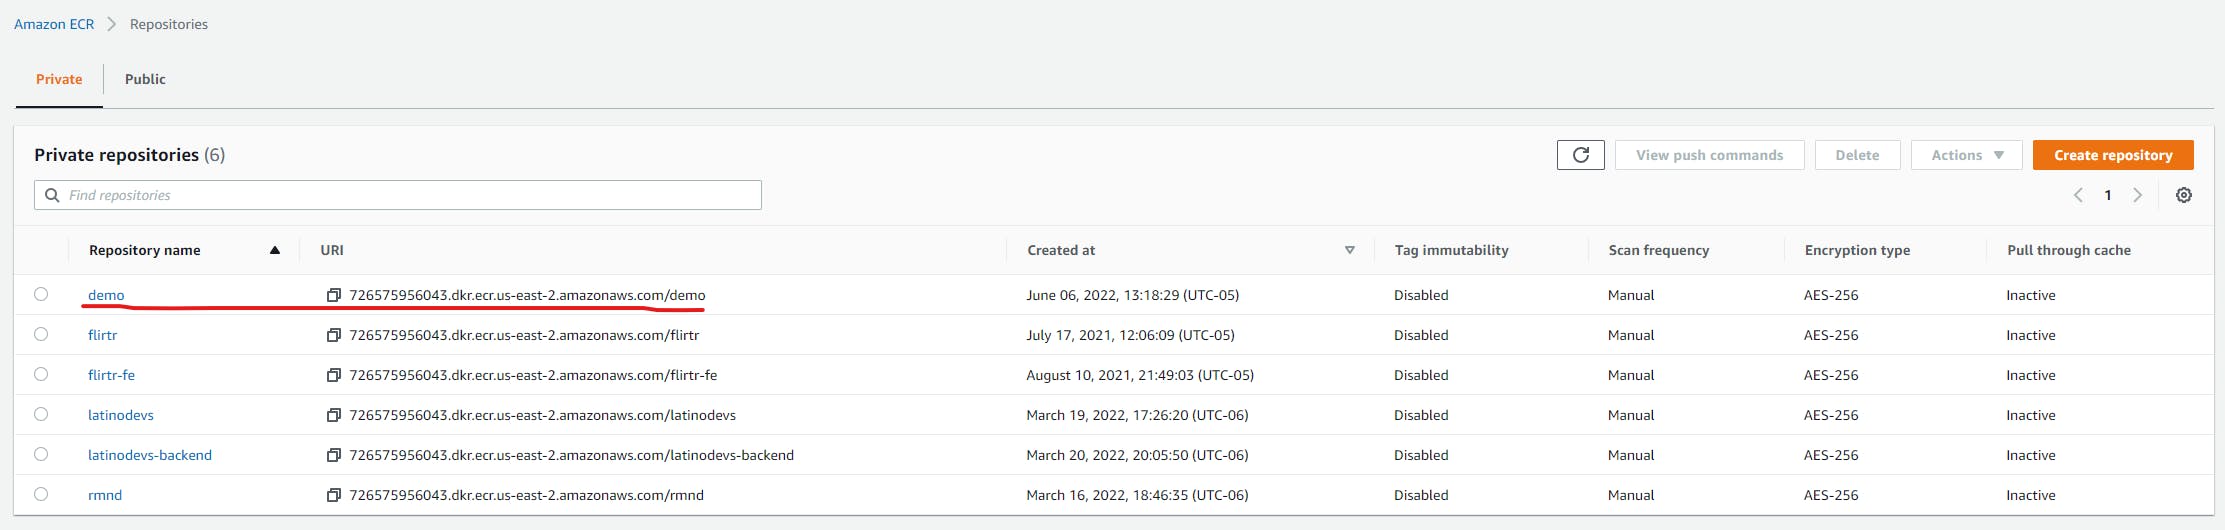
The part that you need to remove and add yours is: 726575956043.dkr.ecr.us-east-2.amazonaws.com/demo. You can find the URL name of your repository going to ECR:
Also there is a part in the buildspec.yml file that says printf '[{"name":"demo","imageUri":"%s"}]' $REPOSITORY_URI:$IMAGE_TAG > imagedefinitions.json, change the "name" attribute to the name of your project. For this example the name is "demo".
What you have to do is:
- Add this buildspec.yml file to your root folder of your spring boot project.
- Change the name of the repository inside the buildspect.yml file.
- Change the name of the application in the
printfpart. - Push the changes to your repository.
Starting creating the pipeline
Ok, time to start creating the pipeline, will be a long road so take your time to breath and let's go!!!
Go to your search box in AWS and type CodePipeline, click over the first option and you will see a dashboard as the next:
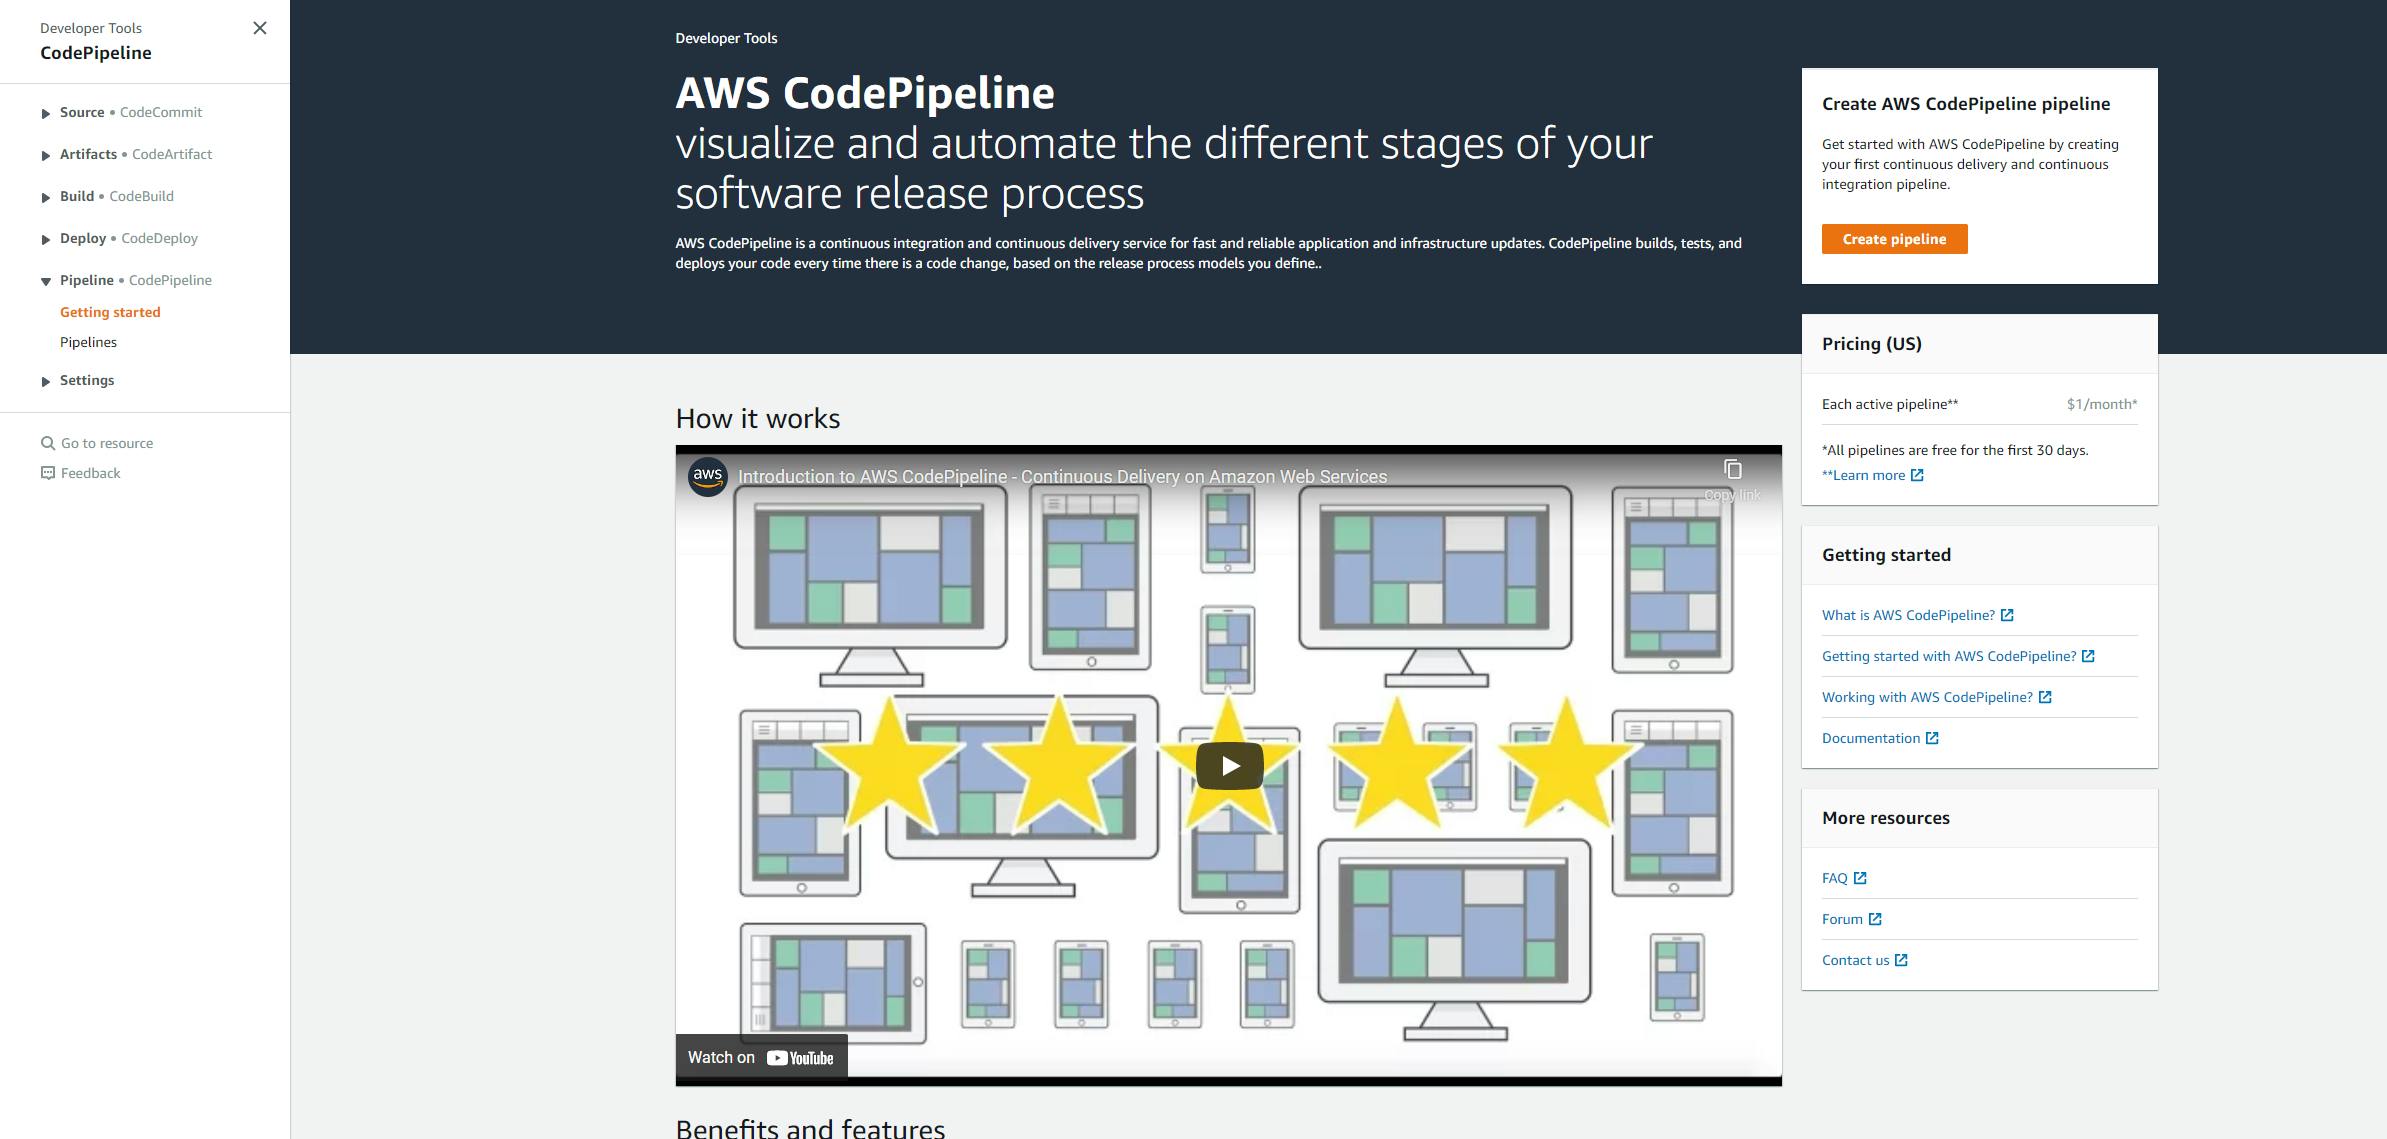
Obviuosly to start you need to click over the Create pipeline button and will open the first form like:
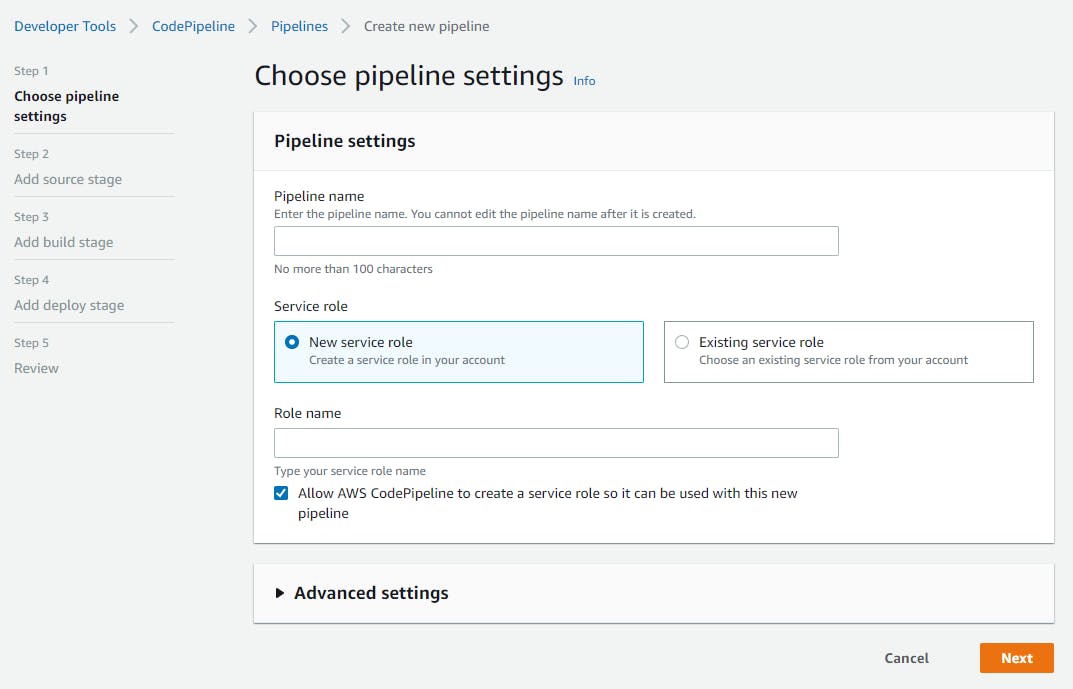
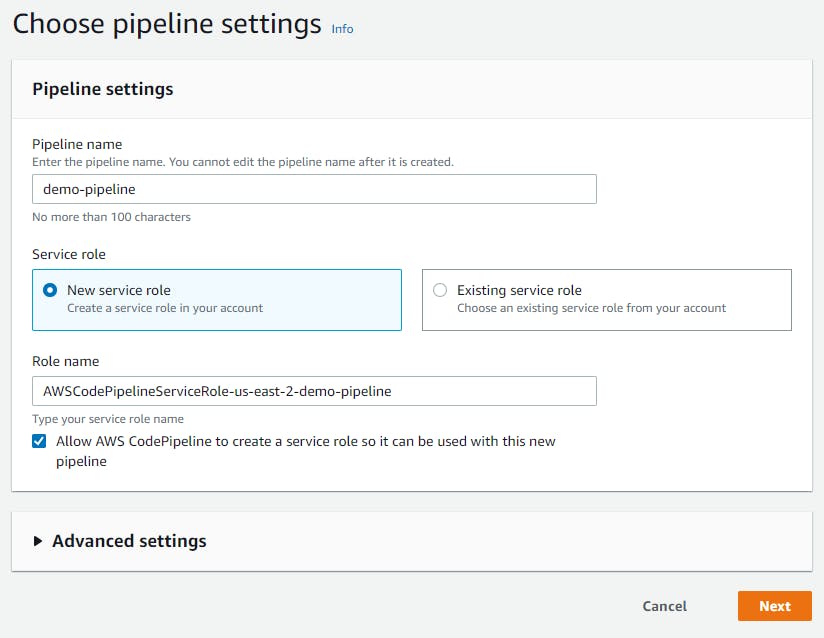
Give a name to your pipeline and click Next, my pipeline will be called demo-pipeline. What will be yours?
Phase 1: Source
Next, you will have the source provider:
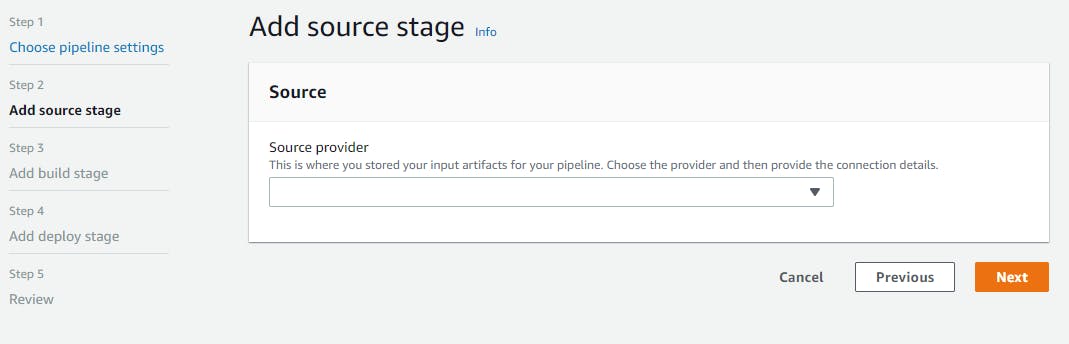
In here we are going to choose (as it says) the source provider, that is, where our code is comming from, AWS will give you some choices:
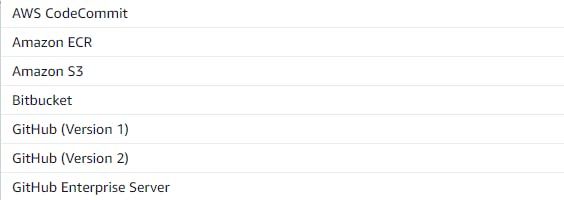
For this example I am going to use GitHub (Version 2), because I use GitHub as version control system and the version two because is the latest and safest one. Once you click over the version provider that you want to use, over the same page (view) a new form will be displayed:
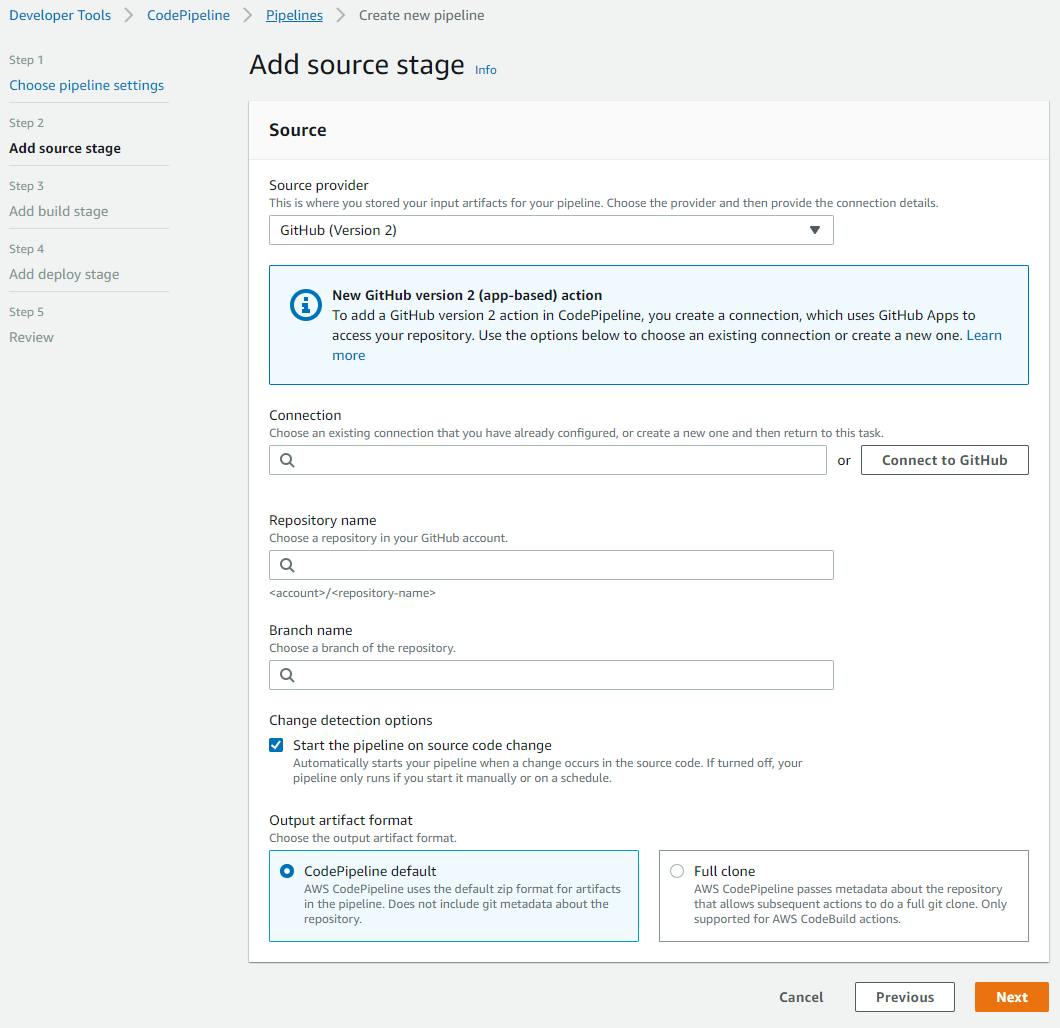
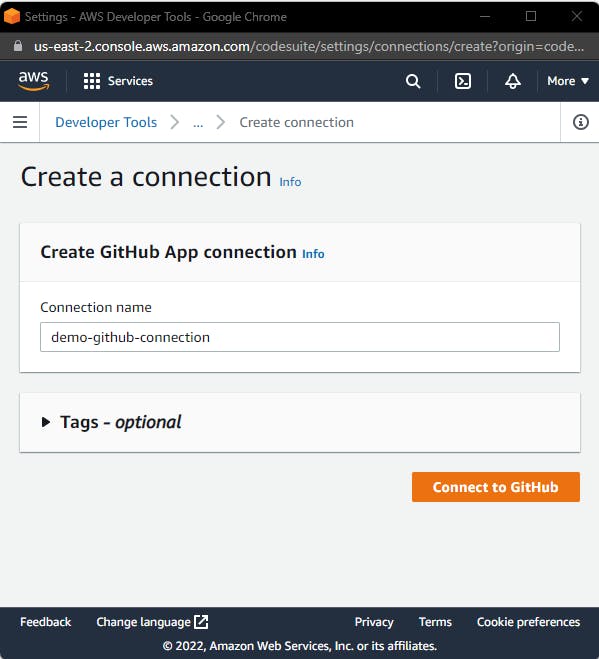
Here we are going to configure some other things like, adding a connection to GitHub, the name of your repo and the name of the branch that the pipeline will listen to start a the execute. First click over the Connect to GitHub button, this will open a pop-up window from your browser like:
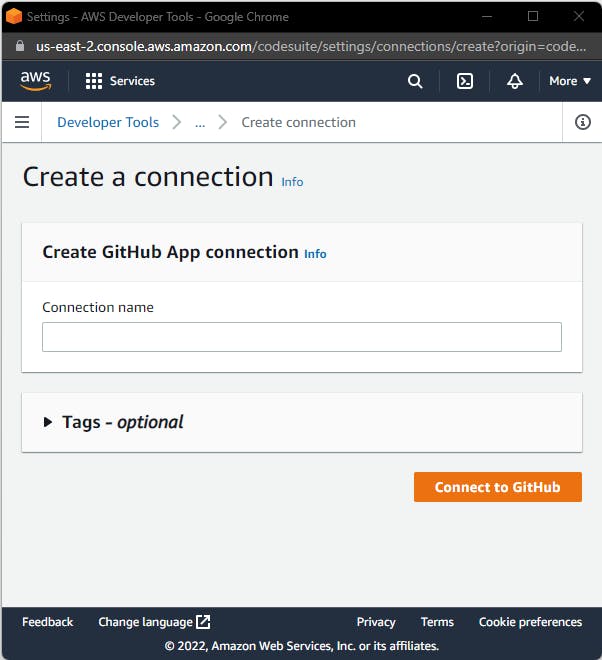
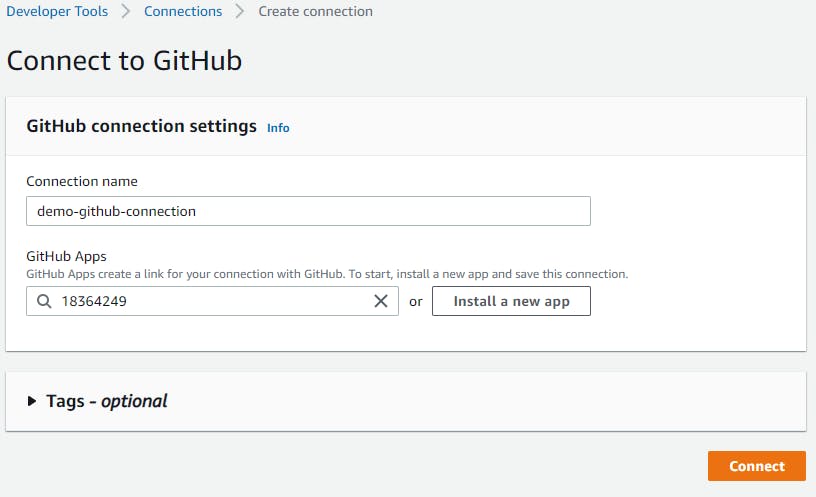
We need to configure a new connection to GitHub, this is to create an app inside GitHub choosing the repository that we are going to use and allowing the access from your GitHub account so AWS can retrieve information without any problem. Give a name to the new GitHub connection and click over the Connect to GitHub button.
Let's see what it appears next:
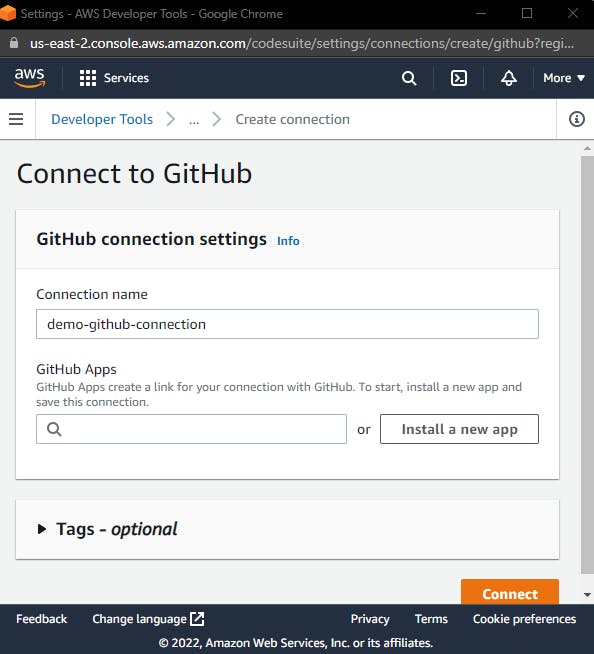
Now you need to add a new app, this will add an app connection from AWS to GitHub, I already have an AWS application that is living inside GitHub but I will create a new one, that will be the same thing that you need to do. Click over the Install a new app button.
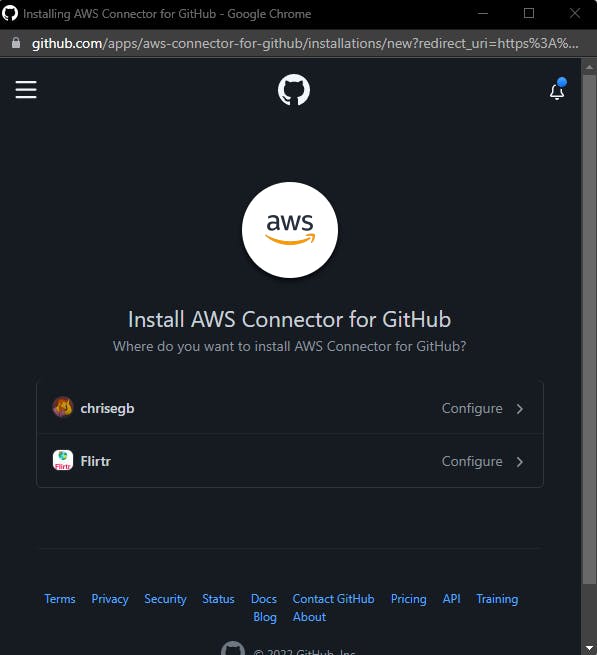
This, open a GitHub window where you need to choose you GitHub account, this view will not appear like mine if you are not logged in with GitHub, so be sure to login first. Now choose your account, maybe will request you your GitHub password. Once inside:
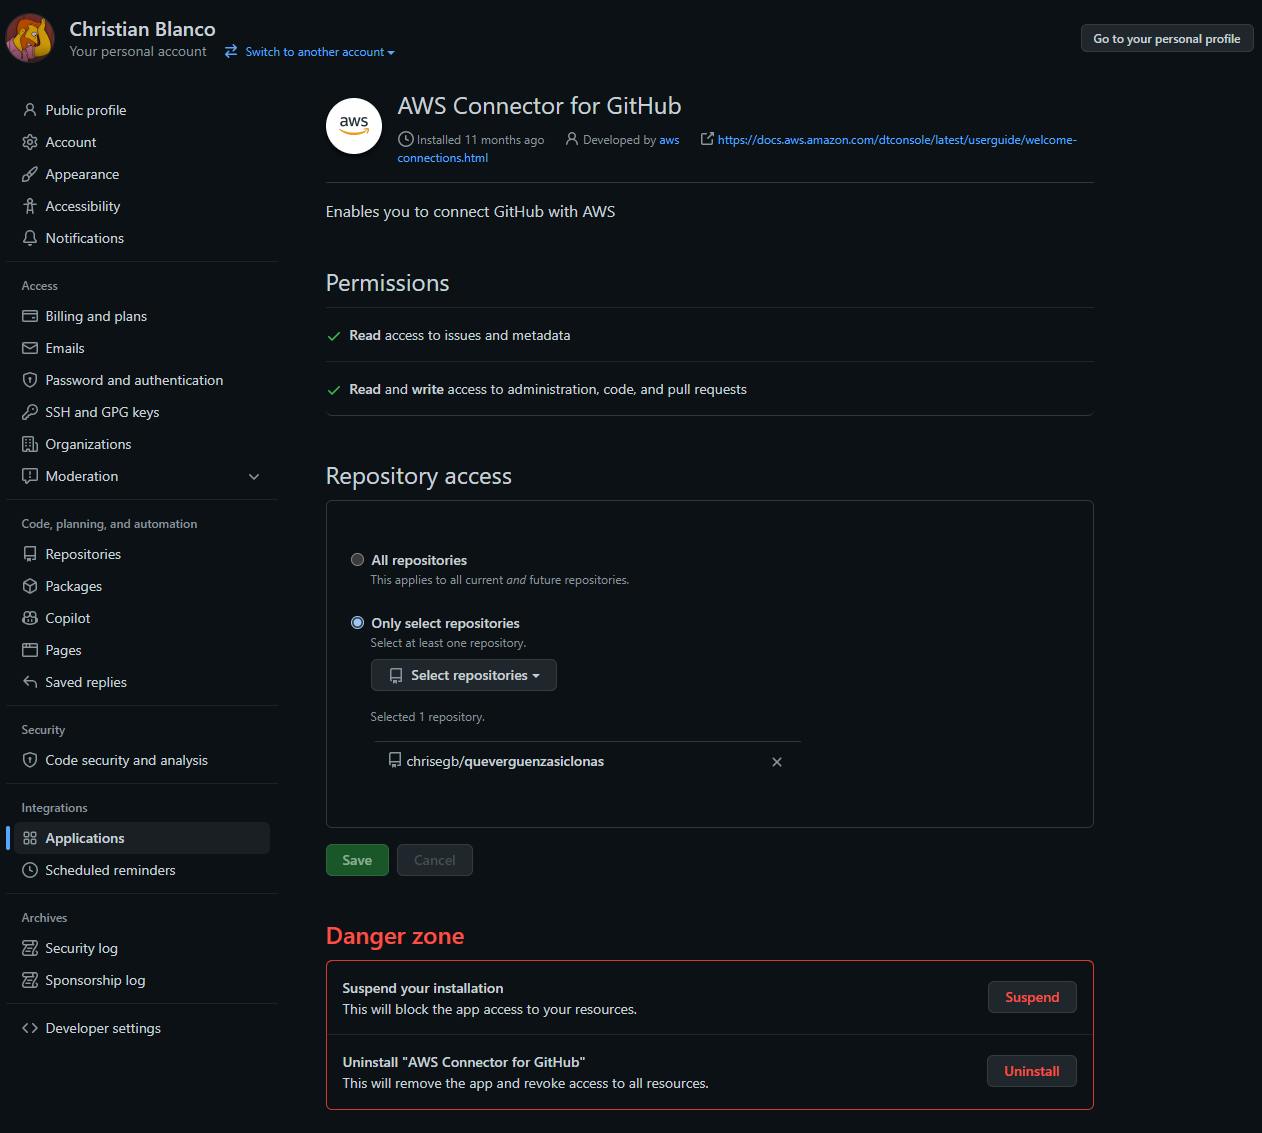
Choose Only select repositories and search for the repo that you want to connect:
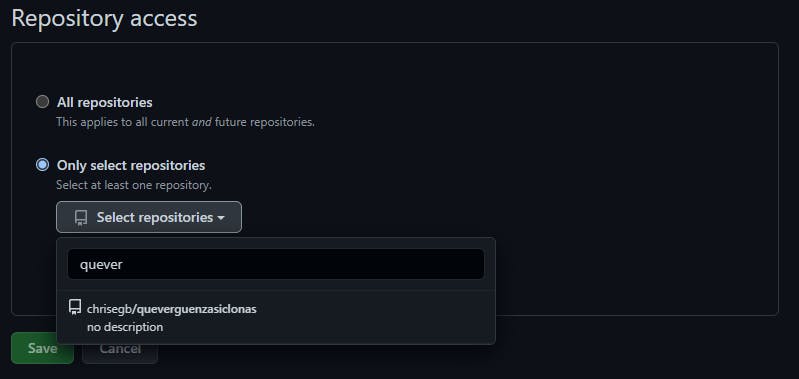
Then click save. This will return to the AWS view again:
Now you have the app installed in your GitHub account, let's click over the Connect button. This will close the pop-up window and now the last form that we were seeing will change with a new meesage that says "Ready to connect".
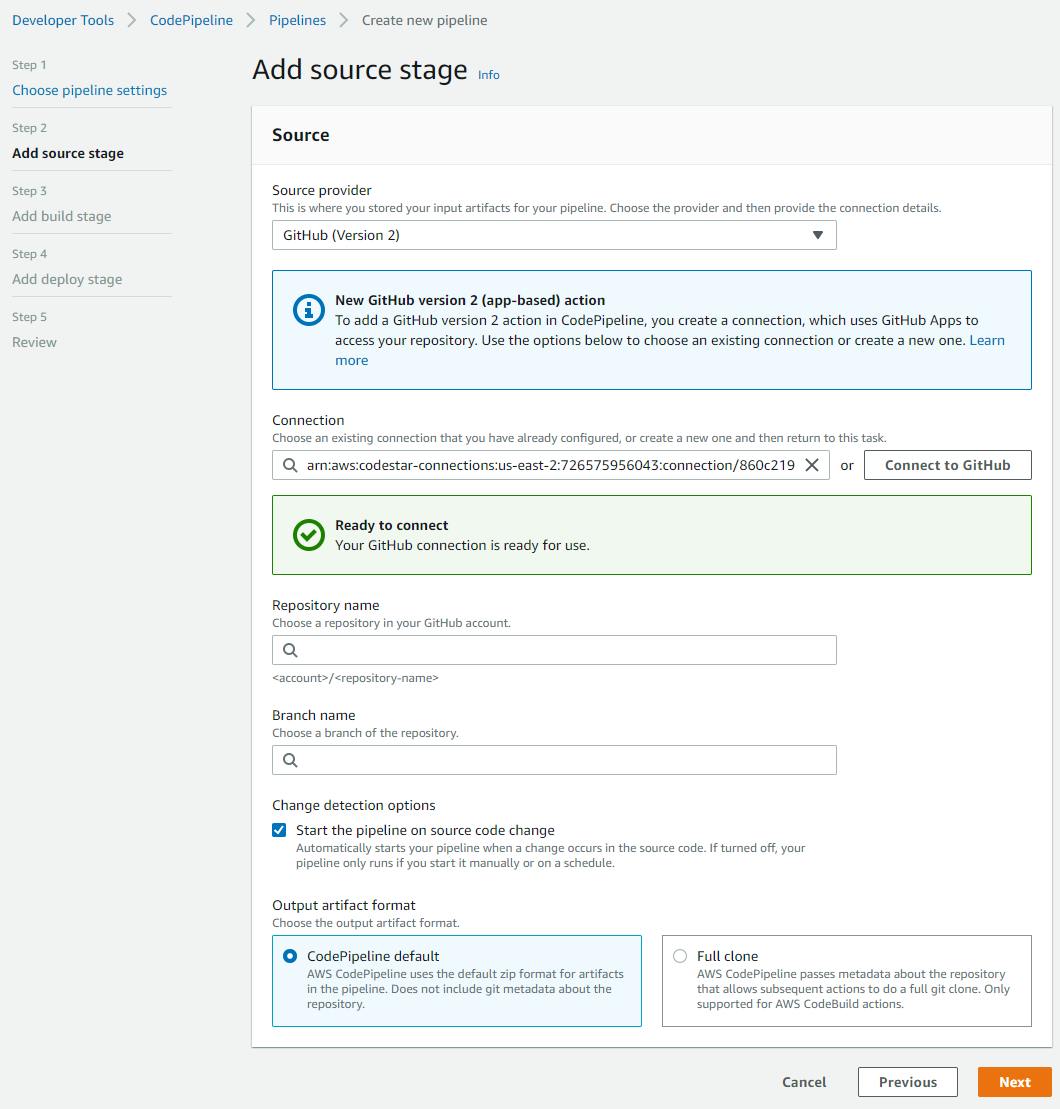
Now fill the other inputs, the name of the repo, that it should be only one, in this case the one that we chose while connecting with GitHub and then the name of a branch, in this case the only one that I have is the "master" branch. You can pick what you want, maybe develop. Also you will find a check box that is already checked, it says "Start the pipeline on source code change", well, yes, we want to keep thic checked since we want to start this pipeline once a change in the code inside the master branch happens. Now click over the Next button.
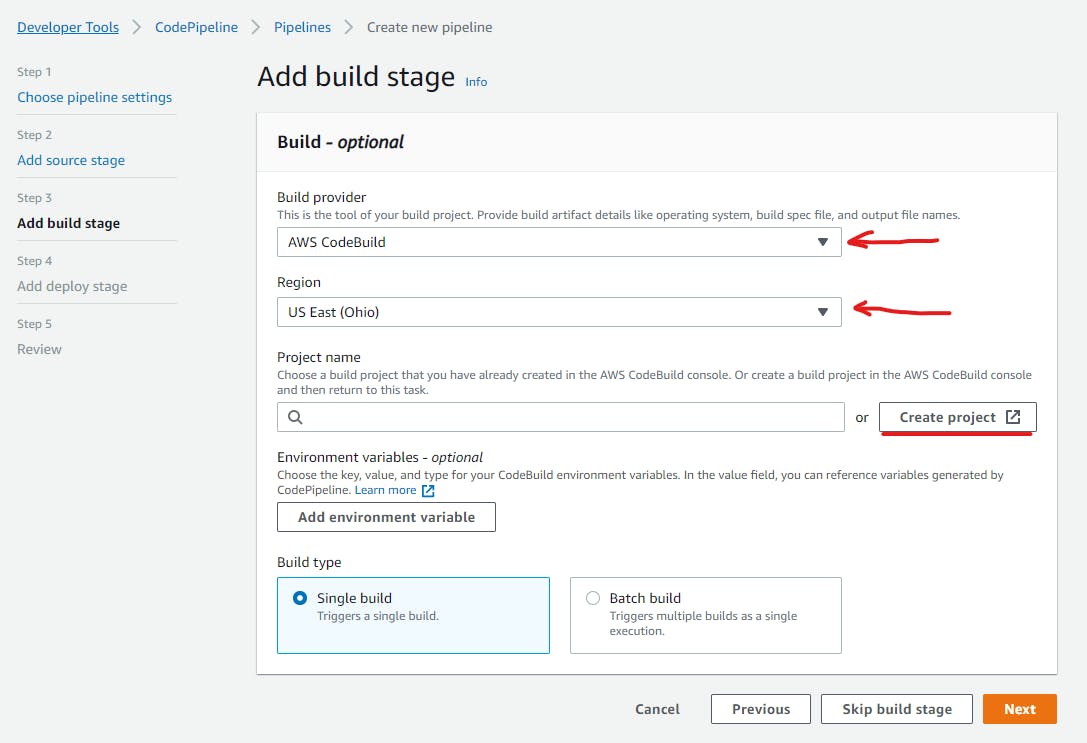
Phase 2: Build
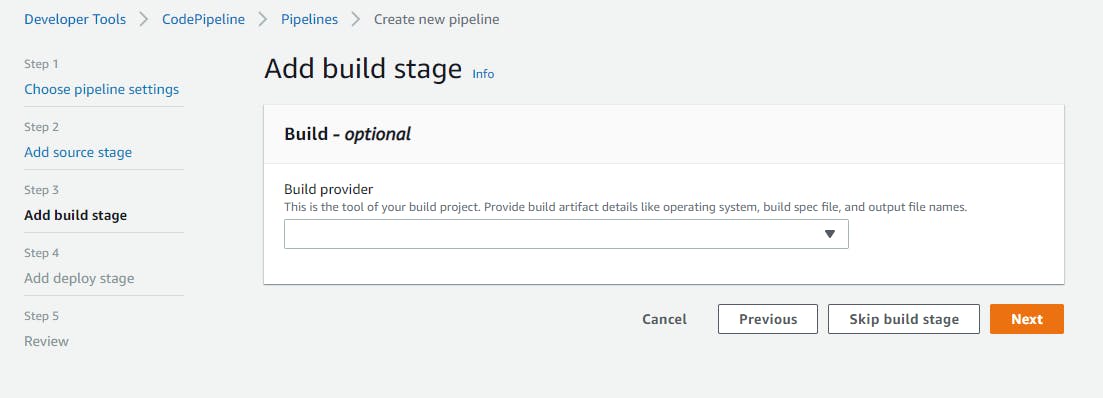
New form, new things to add. The build is the phase of the pipeline that will build your code, in here we are going to add the buildspec information that we talked about at the beggining of this post. Be sure that the buildspec.yml file is inside your root folder of your application and also that is already pushed in GitHub. Ok let's start. Choose AWS CodeBuild as the build provider, confirm the region that you are using, for me is US East (Ohio), and the project name, well this is maybe the difficult part, you need to create a new CodeBuild project name, for that click over the Create project button:
Creating a new CodeBuild
It will open a new pop-up windows with a form like:
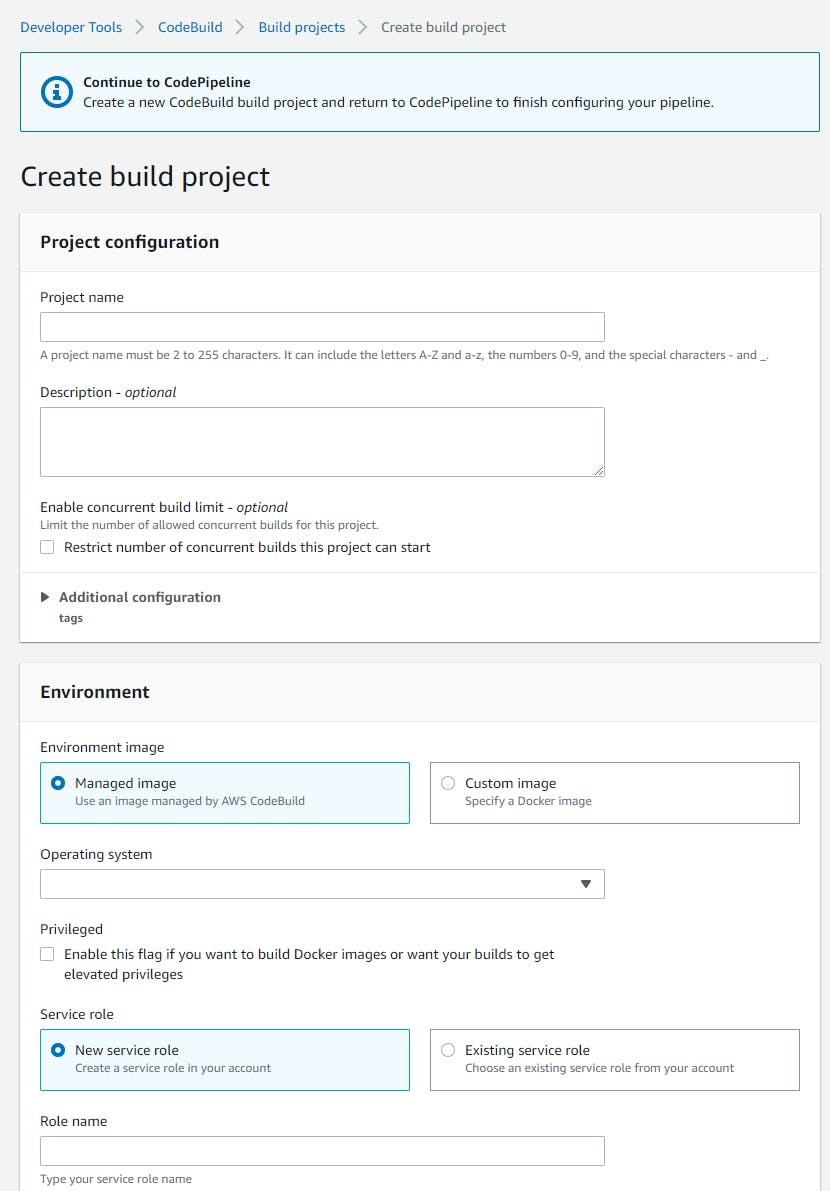
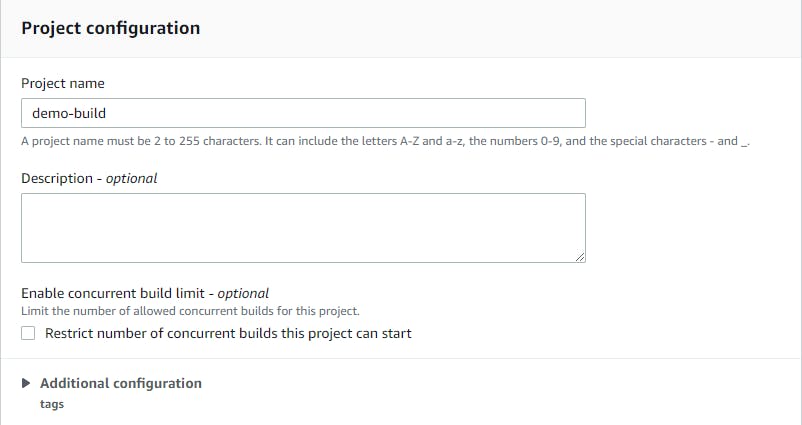
Let's fill everything! Give a name for this build:
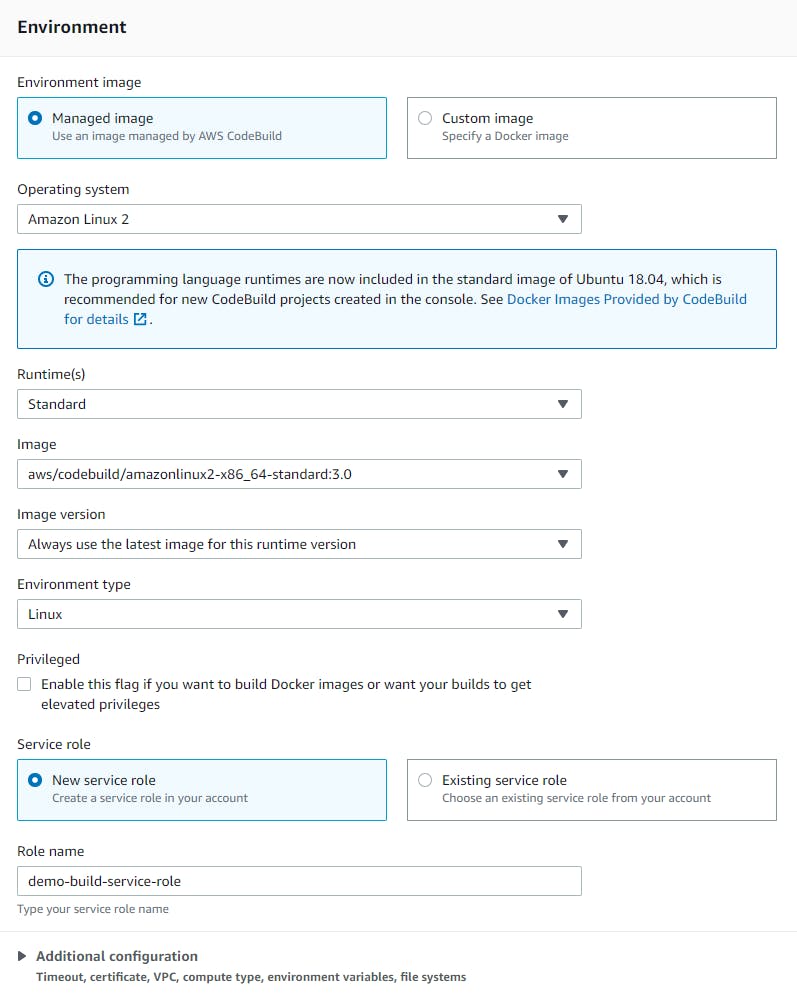
Now let the Environment part as:
Let the buildspec to be Use a buildspec file, this will grab the buildspec file inside your project in the root folder. Now hit the Continue to CodePipeline button. NOw you will see:
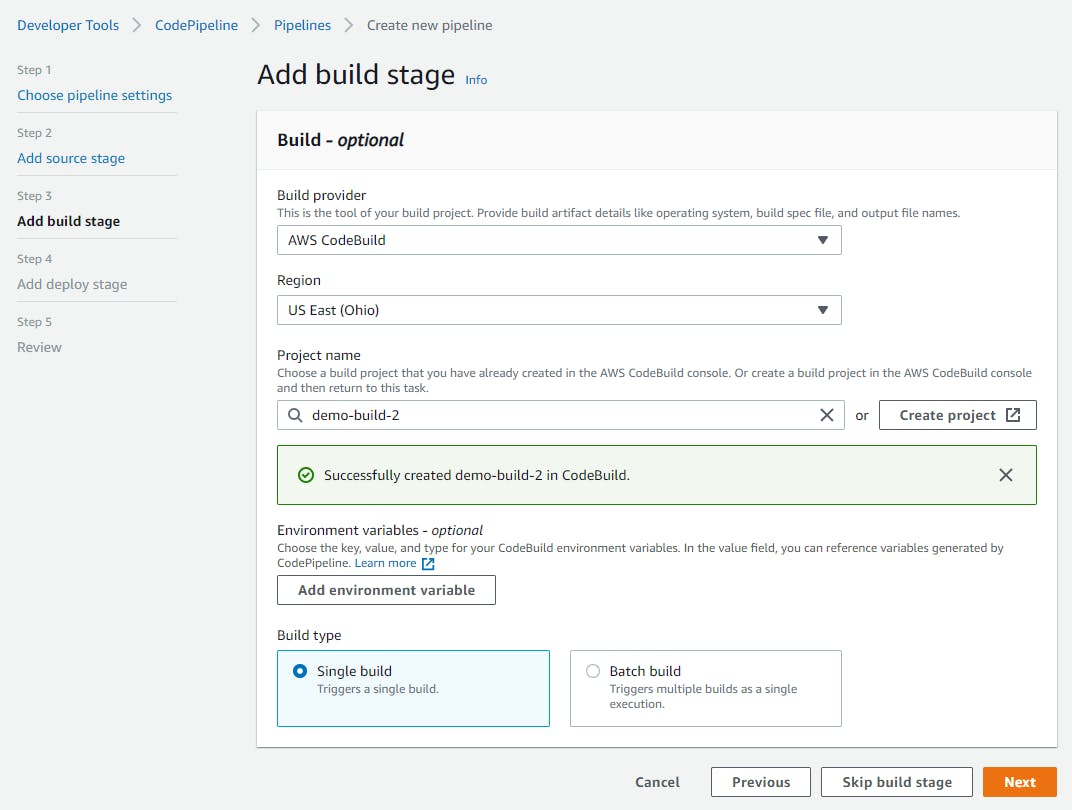
The green light is important. Now click over the Next button.
Phase 3: Deploy
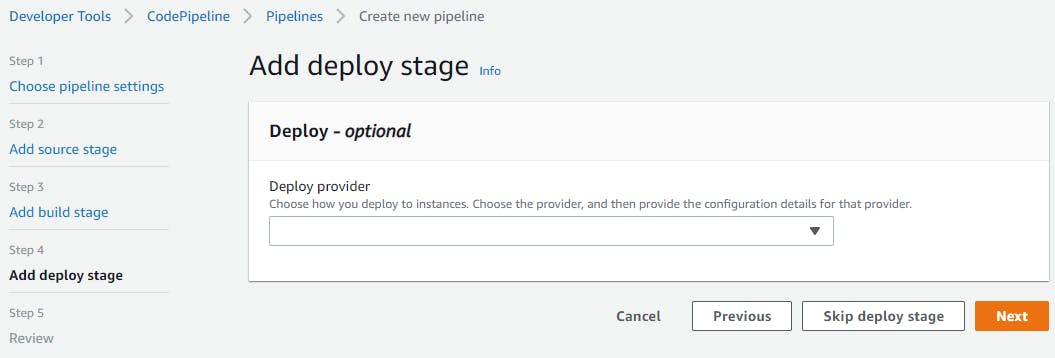
We need to choose a deploy provider, for this we are going to use the same thing as we were using in past chapters, Amazon ECS, choose and you will see a new form to fill:

We are going to choose the cluster and the service, remember chapters from 1 to 4? well this is time to pass through that again if you don't have a cluster and a service creted. You need to have something like:
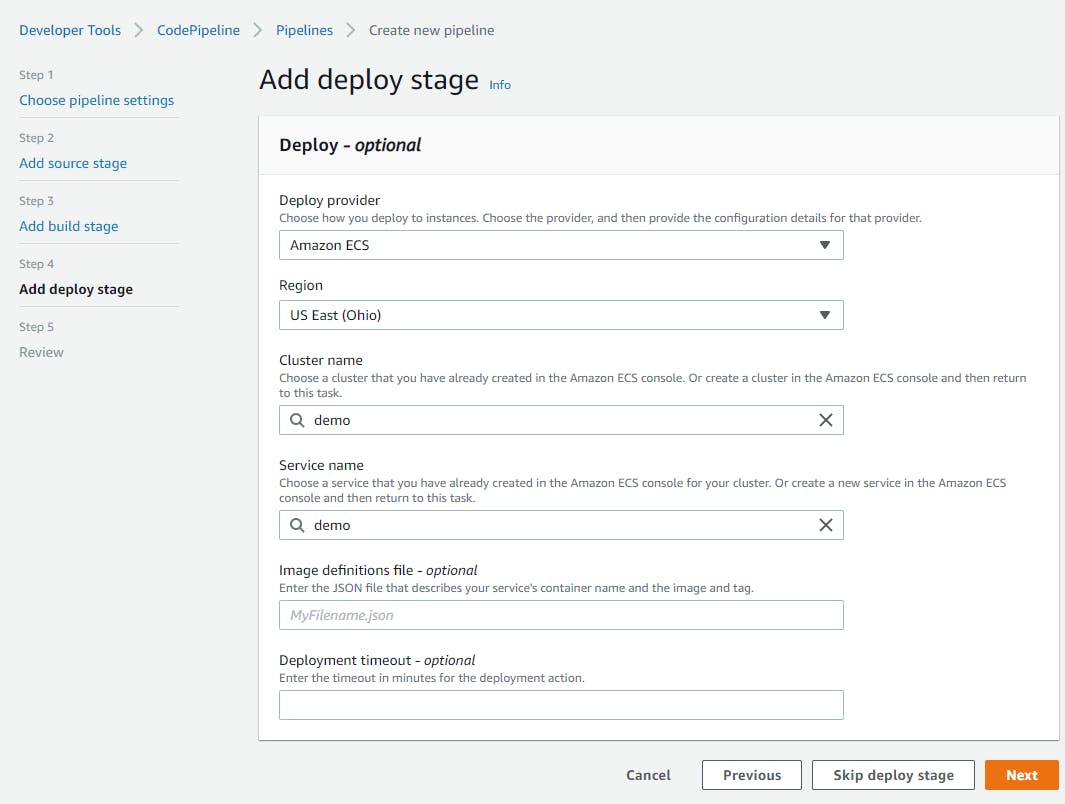
Now click over the Next button. Review all the configurations that you made and click over the Create pipeline button.
Execution and fixes to the creation
The pipeline will start executing:
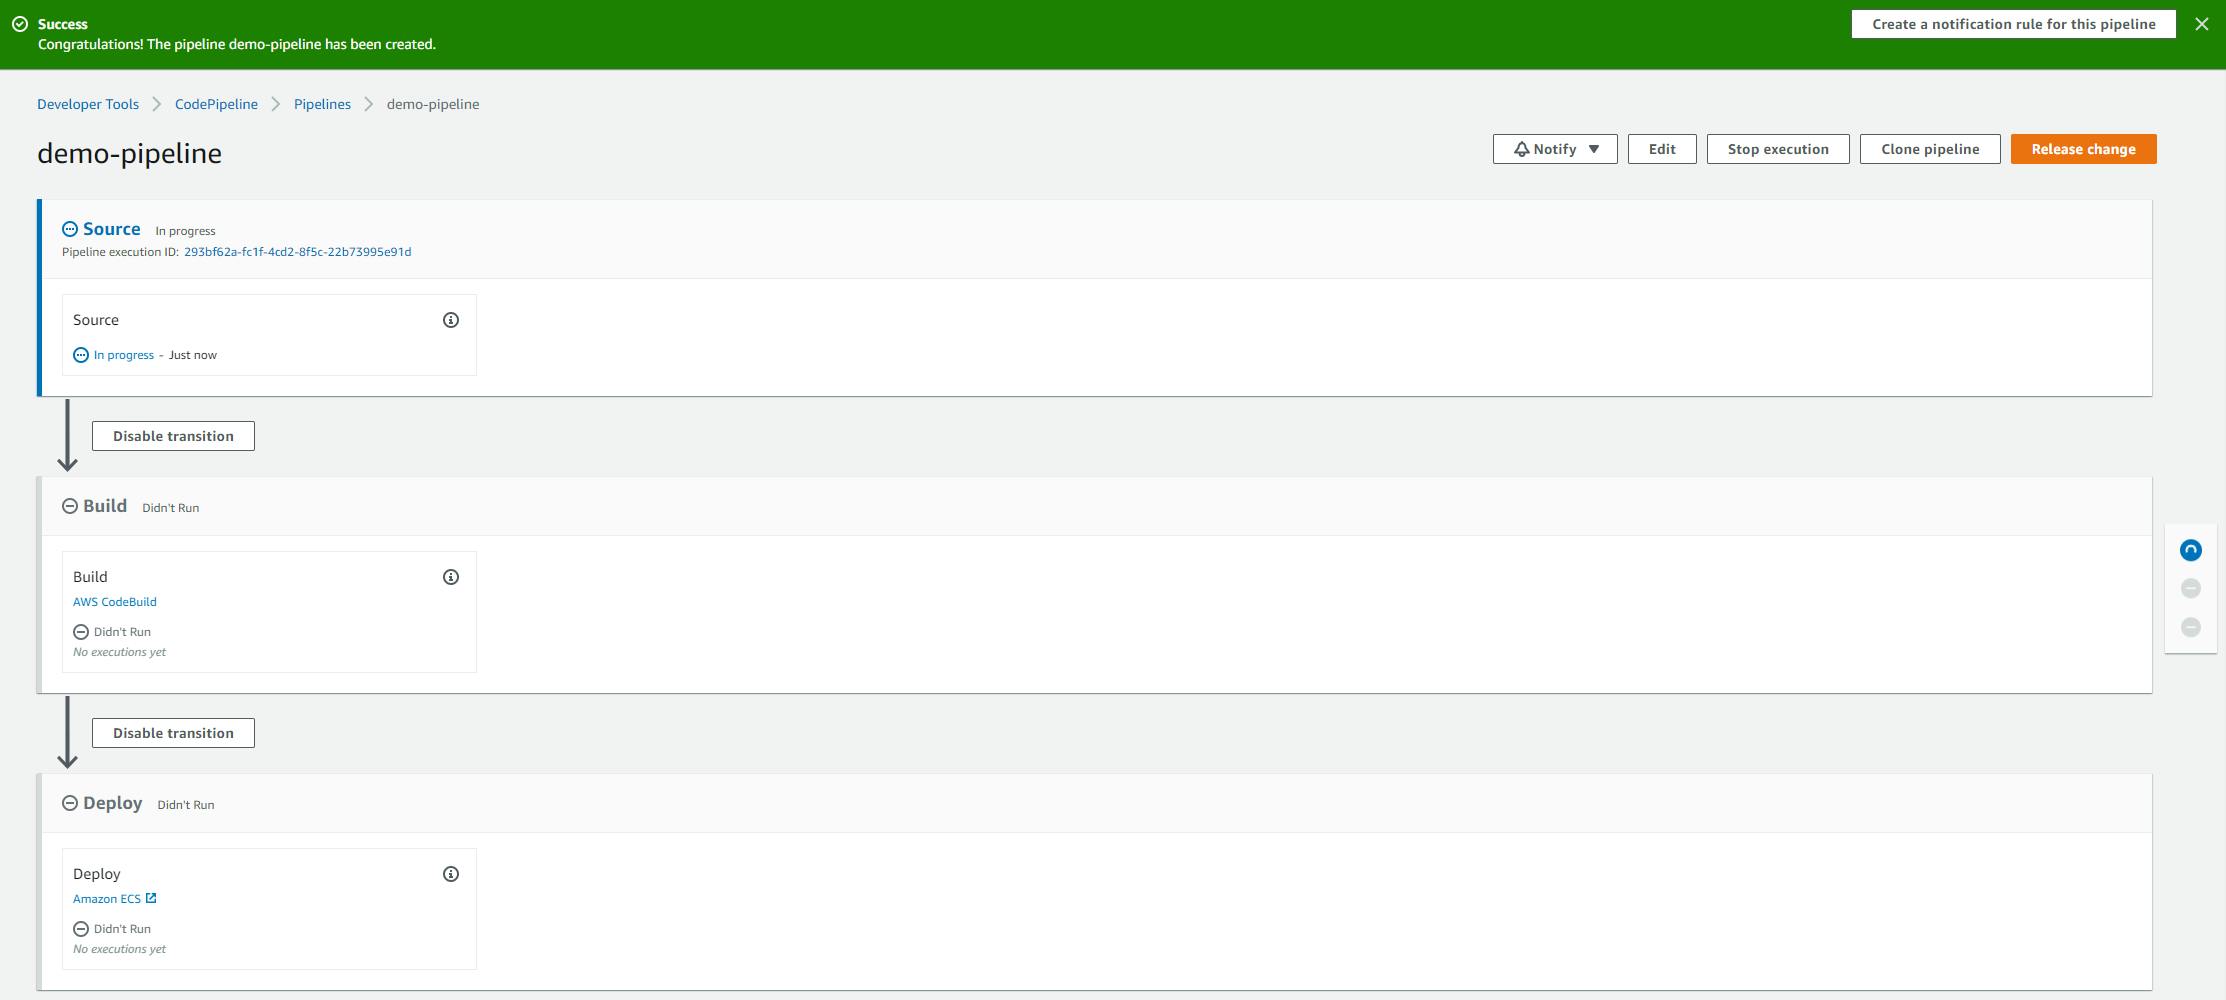
The first stage passed, so it took the code from GitHub:
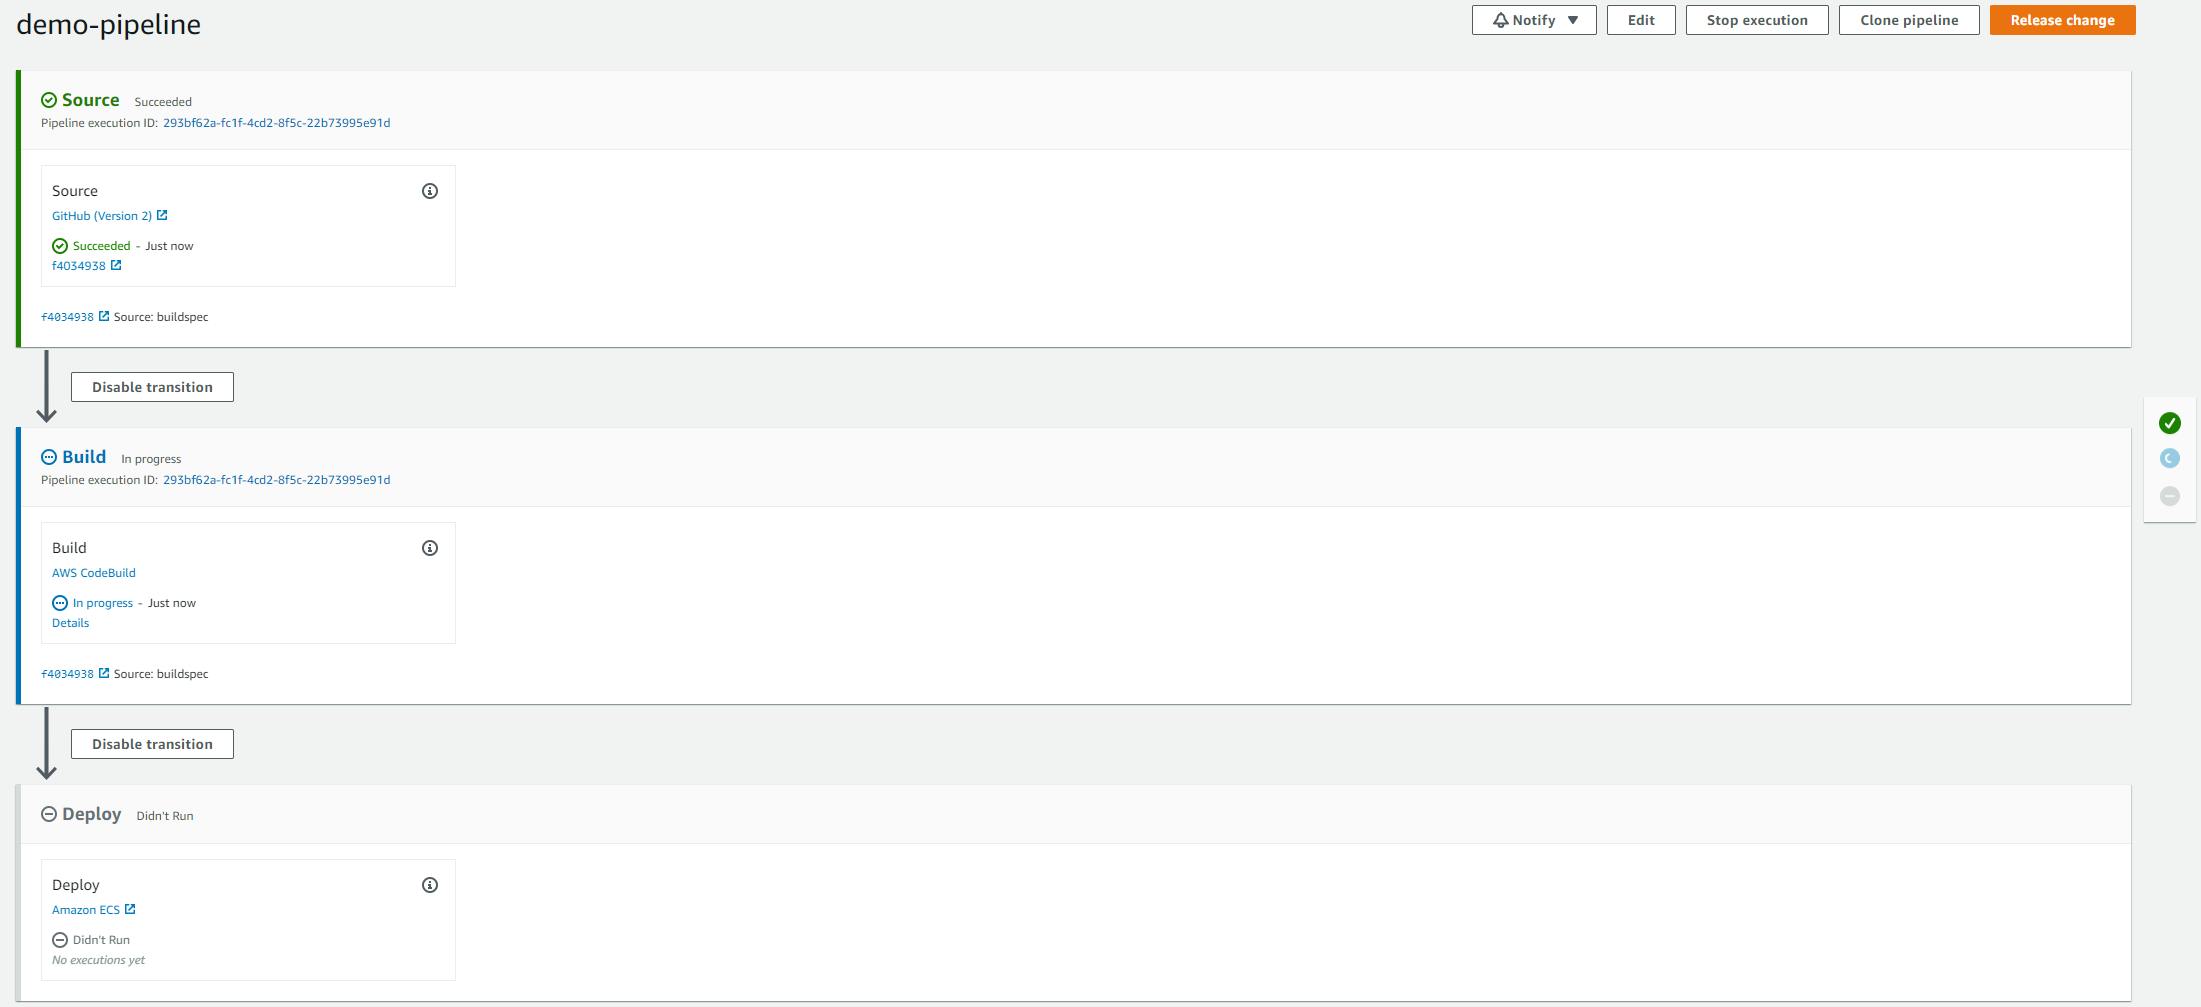
Now you need to wait for the build...

Aaaaaaaaaaaaaand... It failed. This is normal, let's see why:
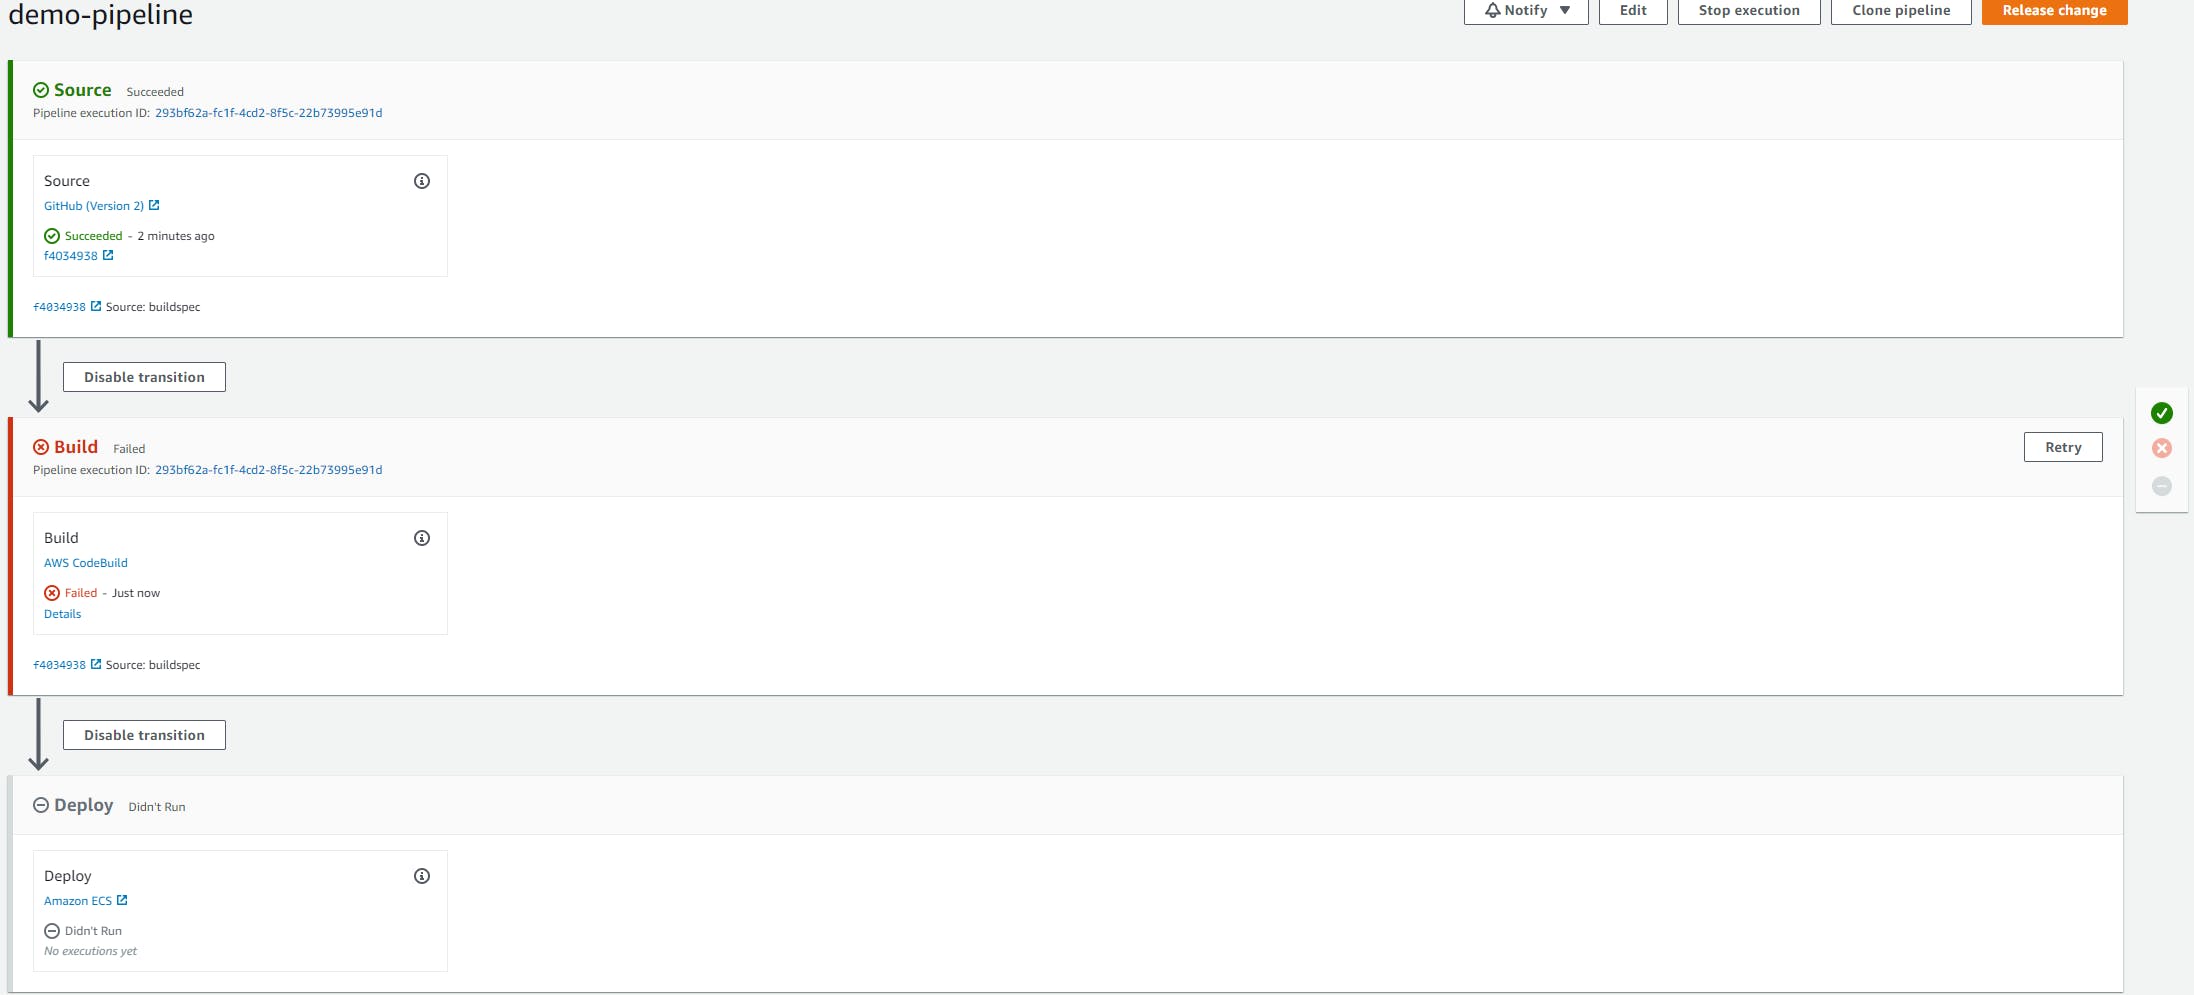
Well when you were creating the pipeline you created a service role, the name of the service role was generated automatically in the Phase 2: Build, check the images in that phase and you will see, for me a service role was created the name was demo-build-2-service-role, the name depends on the name that you gave to your build.
If you don't know what the name of your service role is, click over the "Details" link in the failed stage of the pipeline, this will open a view like the next:
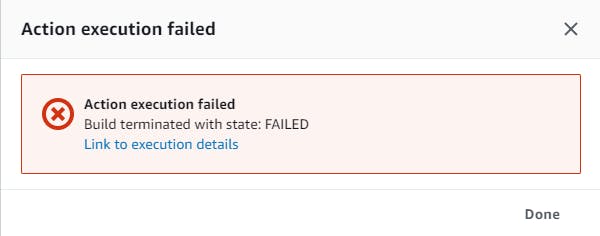
And Ctrl+click the Link to execution details link, in a new tab in the browser you will see:
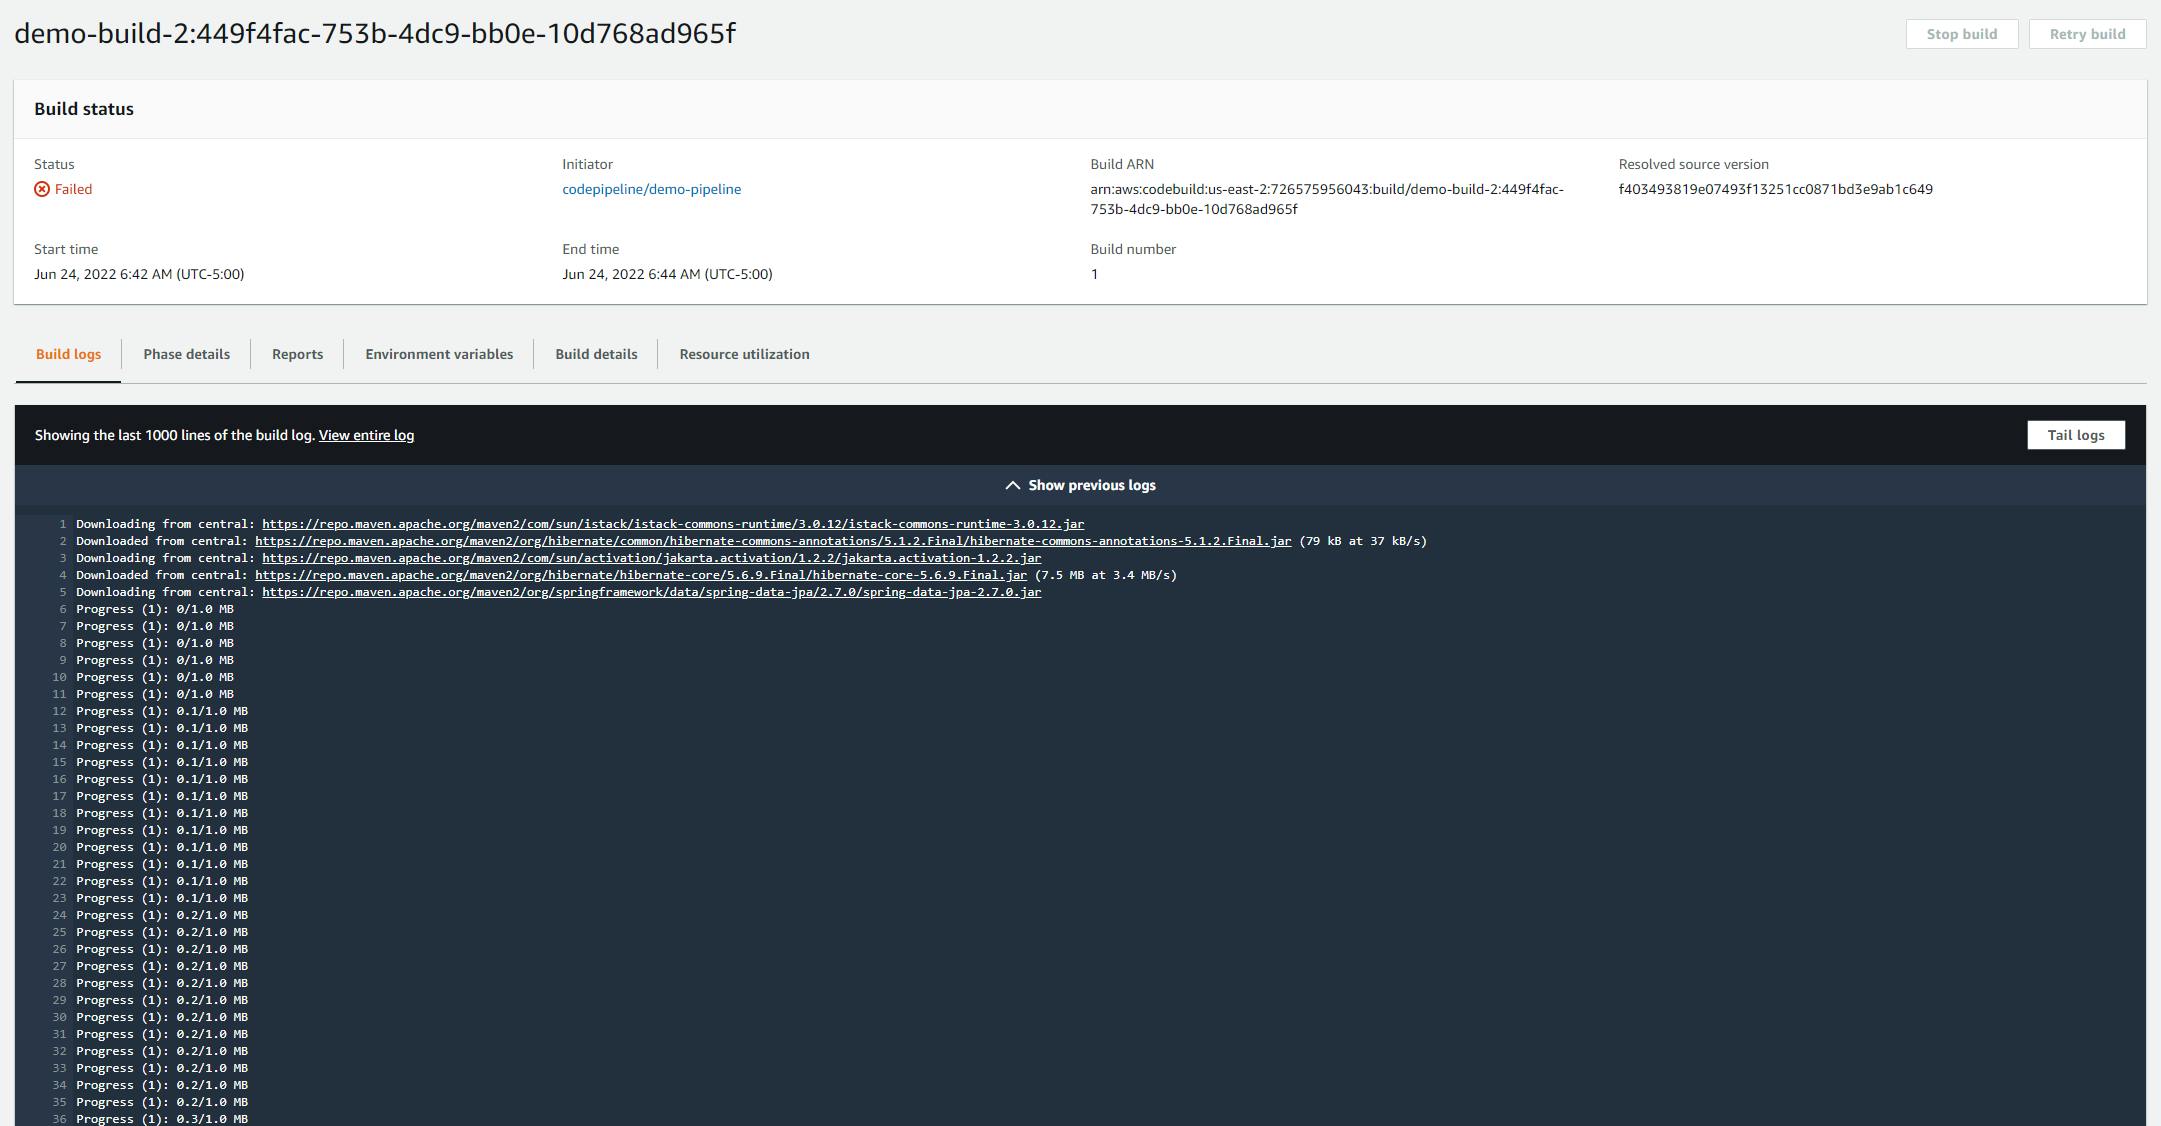
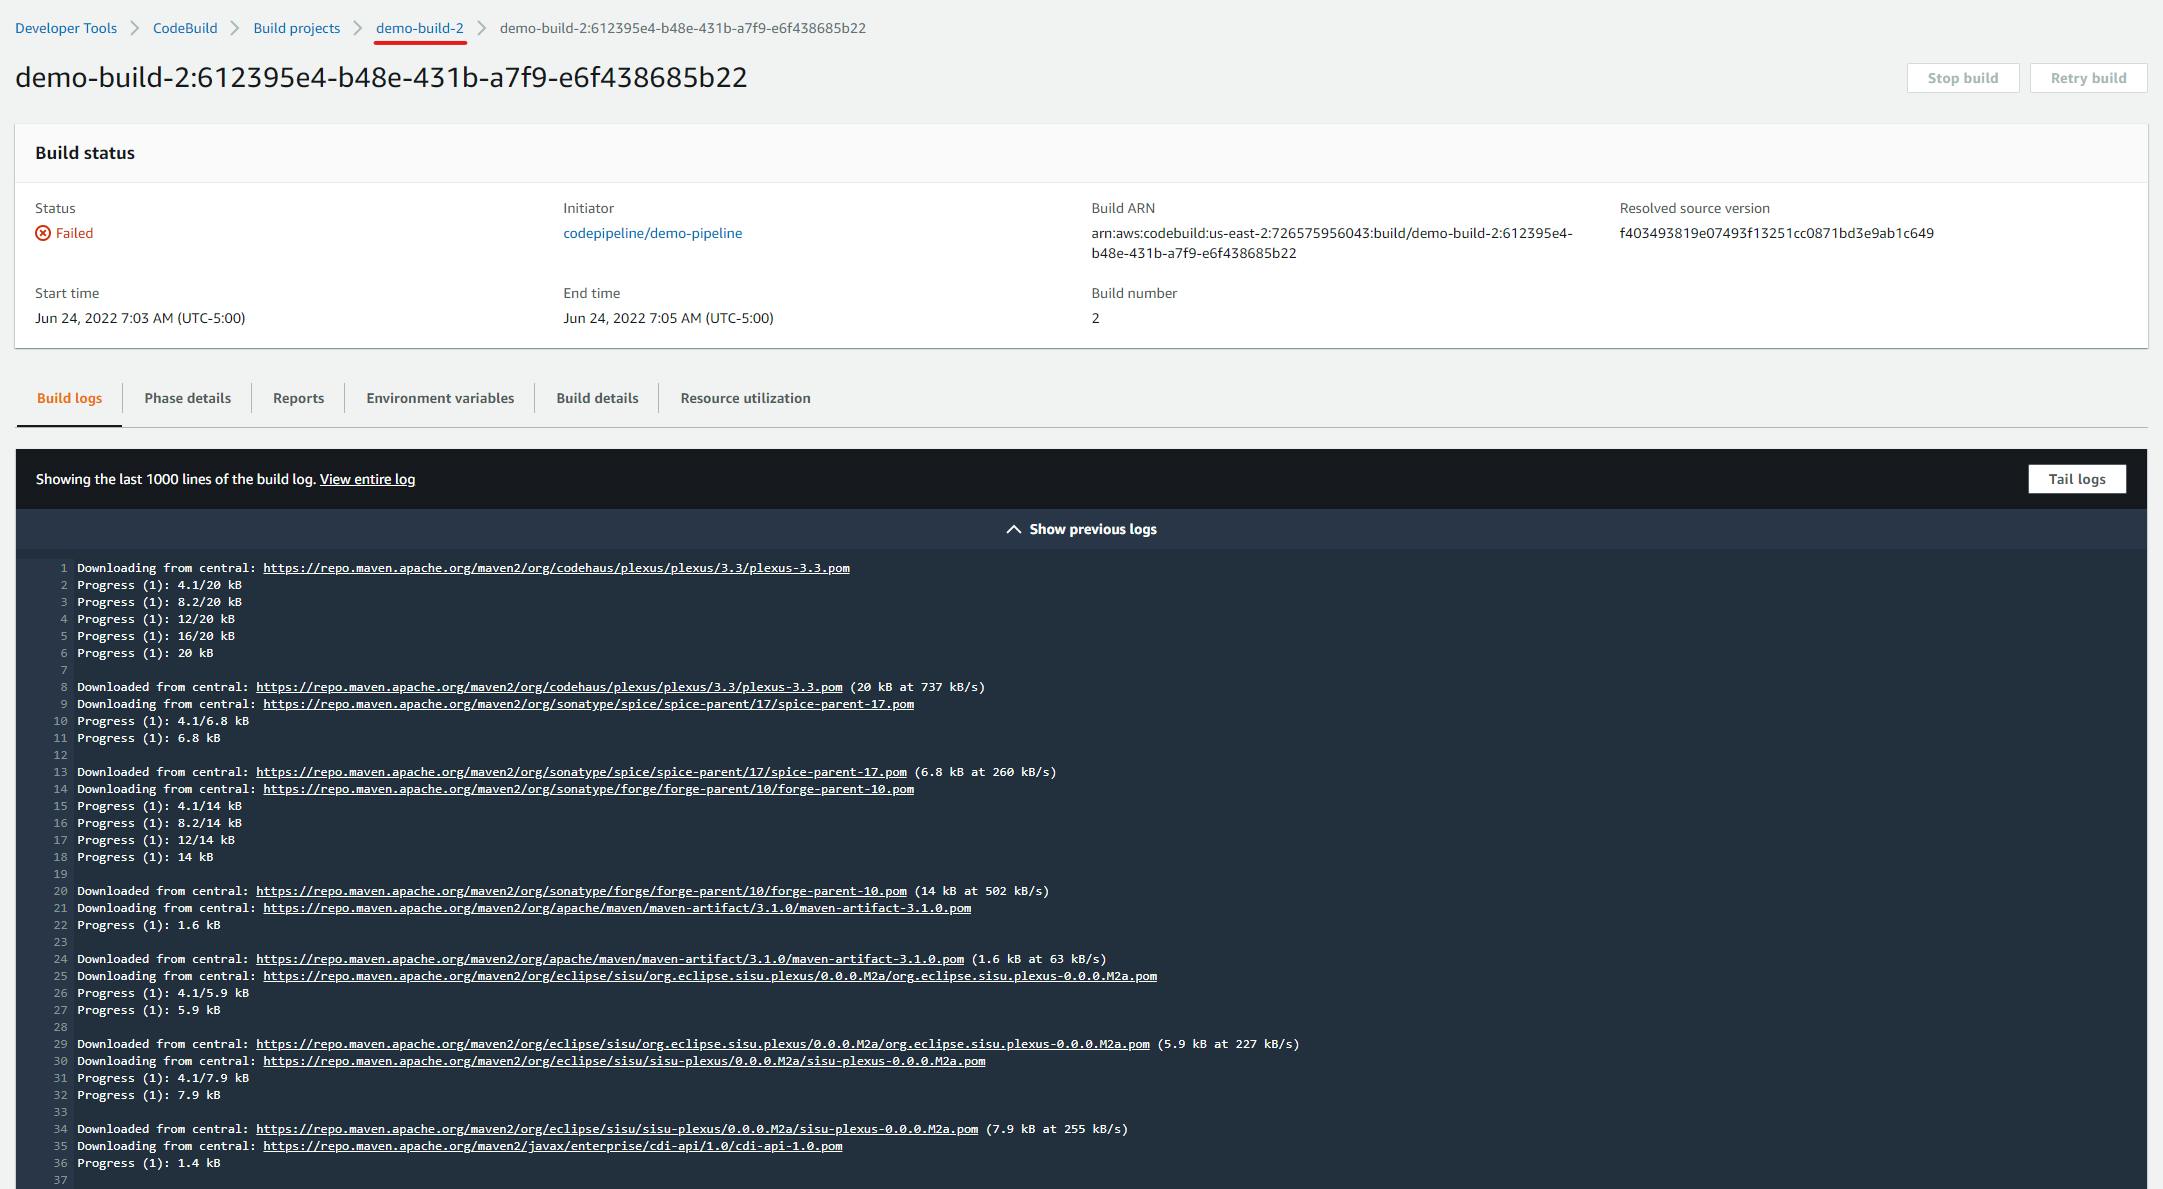
Click over the Tail logs button to check the error:
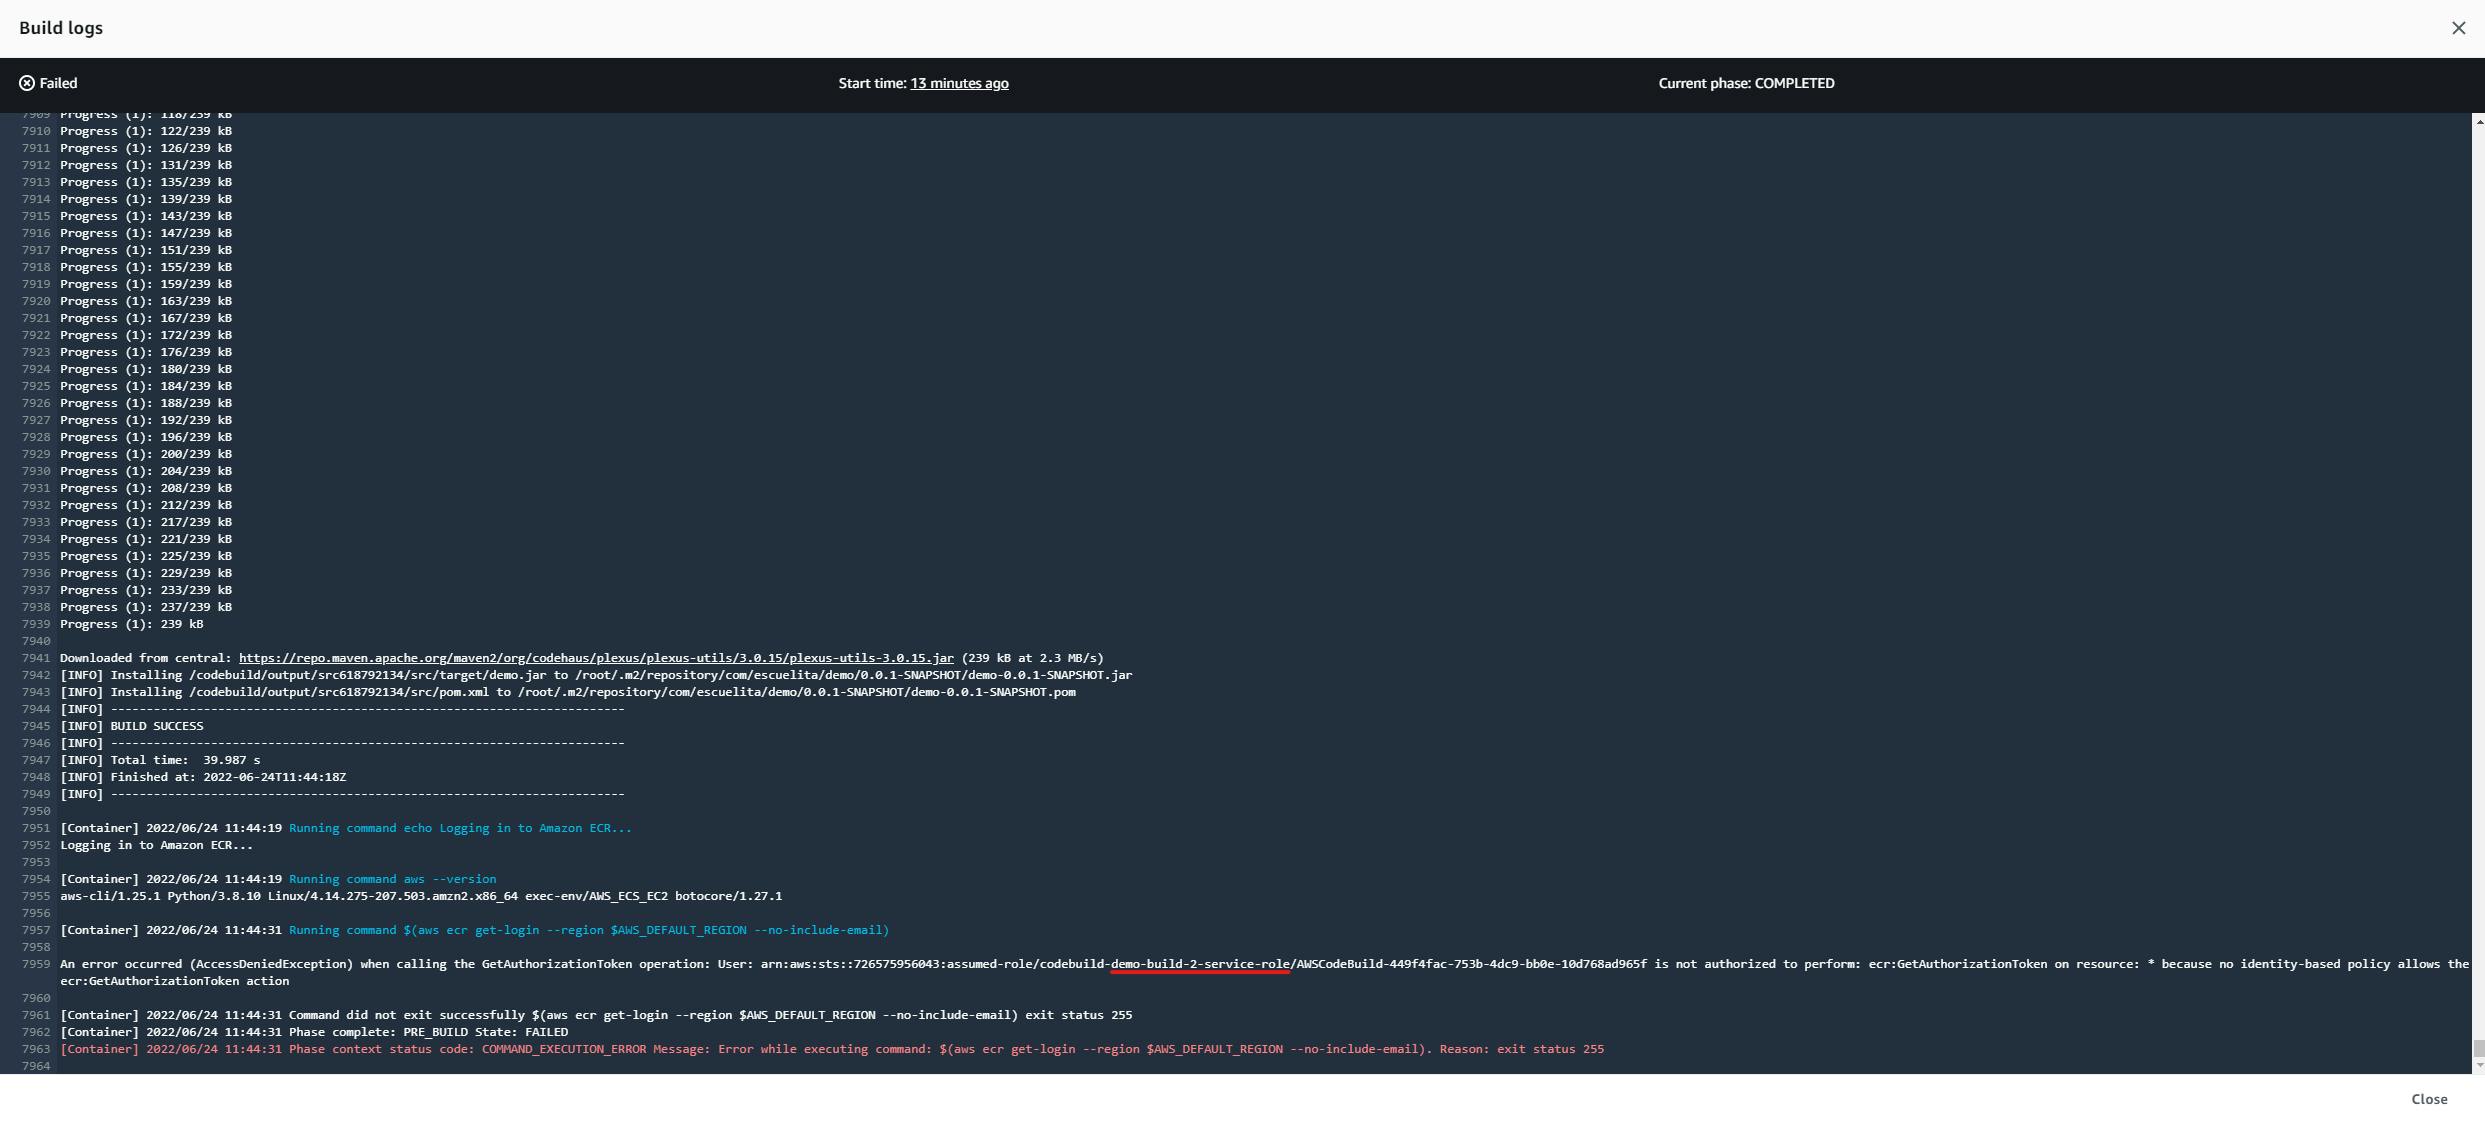
Here is the problem and the name of your service role.
Why is this happening?
Ok let's try to explain...
- Your build contains a buildspect.yml file and inside that file you have commands like:
$(aws ecr get-login --region $AWS_DEFAULT_REGION --no-include-email)where the build is trying to login AWS ECR. - The service role does not have permission in AWS IAM to do that.
So we need to add the permissions, let's go to AWS IAM and try to find the service role. If you passed through Chapter 1 to 4 you know how to go to AWS IAM. So see you there.
Giving permissions to the service role
Inside IAM dashboard at your left hand you will have a menu like the next one:
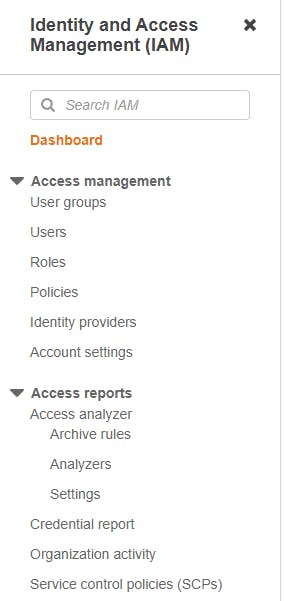
Click over the Roles part, you will see something as the next:
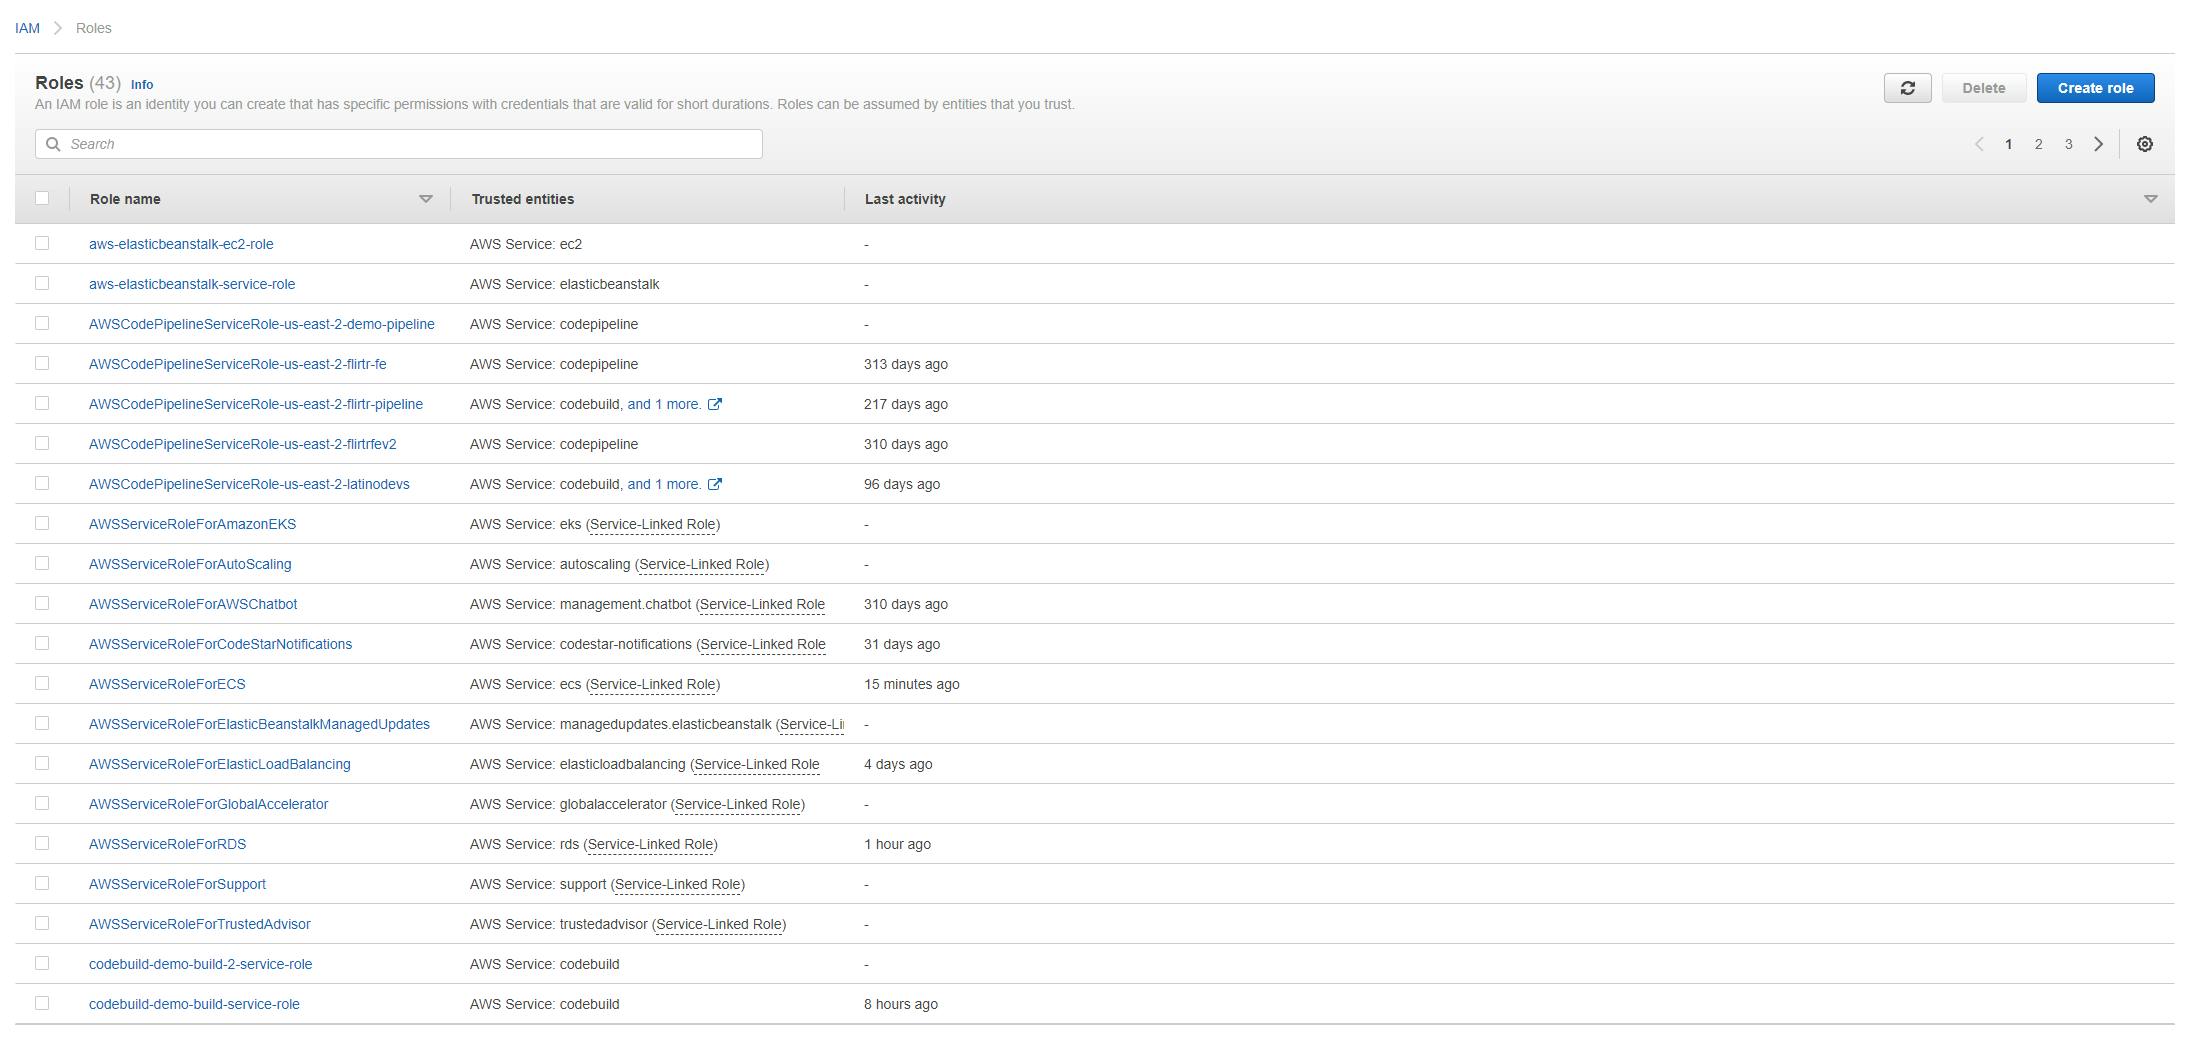
Now search for the service role, mine is: demo-build-2-service-role

Click over the name of the role and you will get something like:
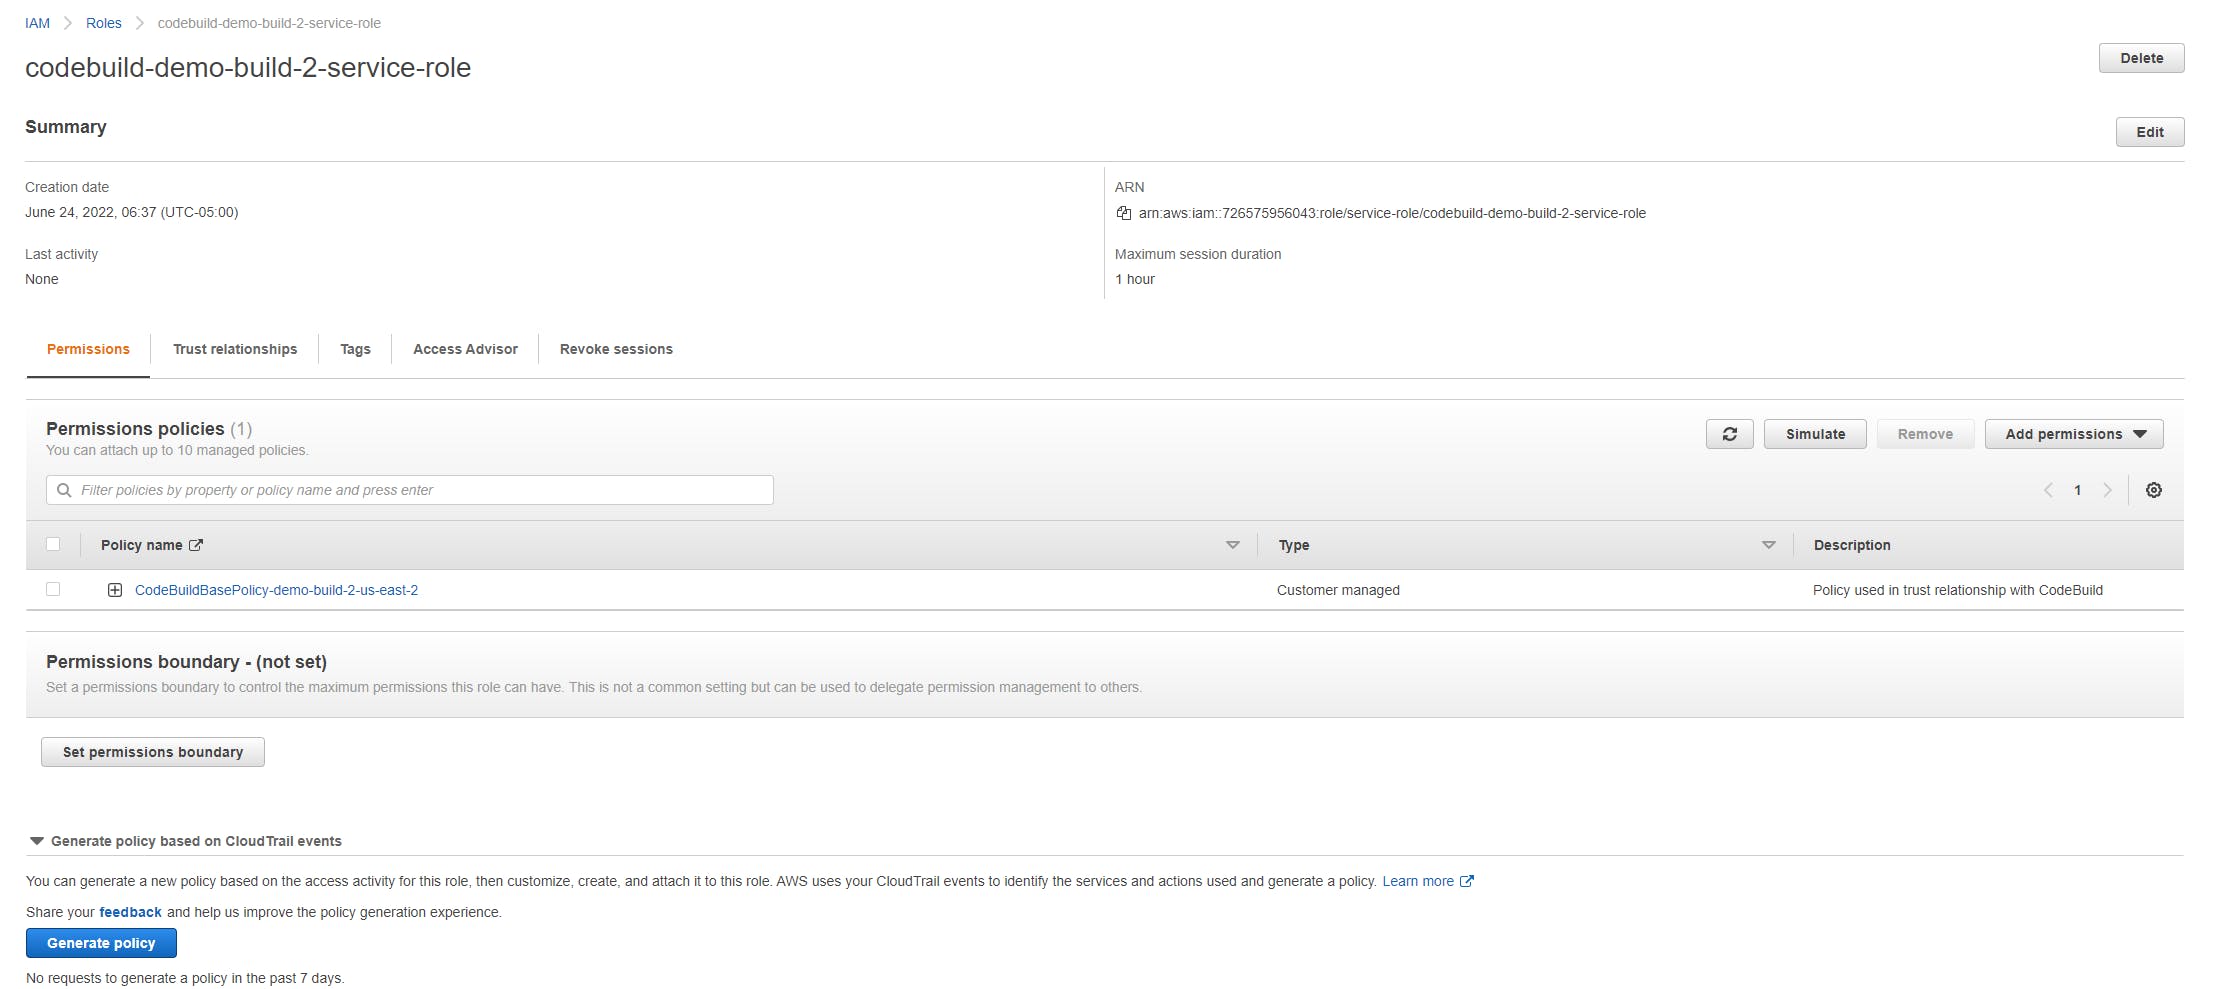
Add the permissions:
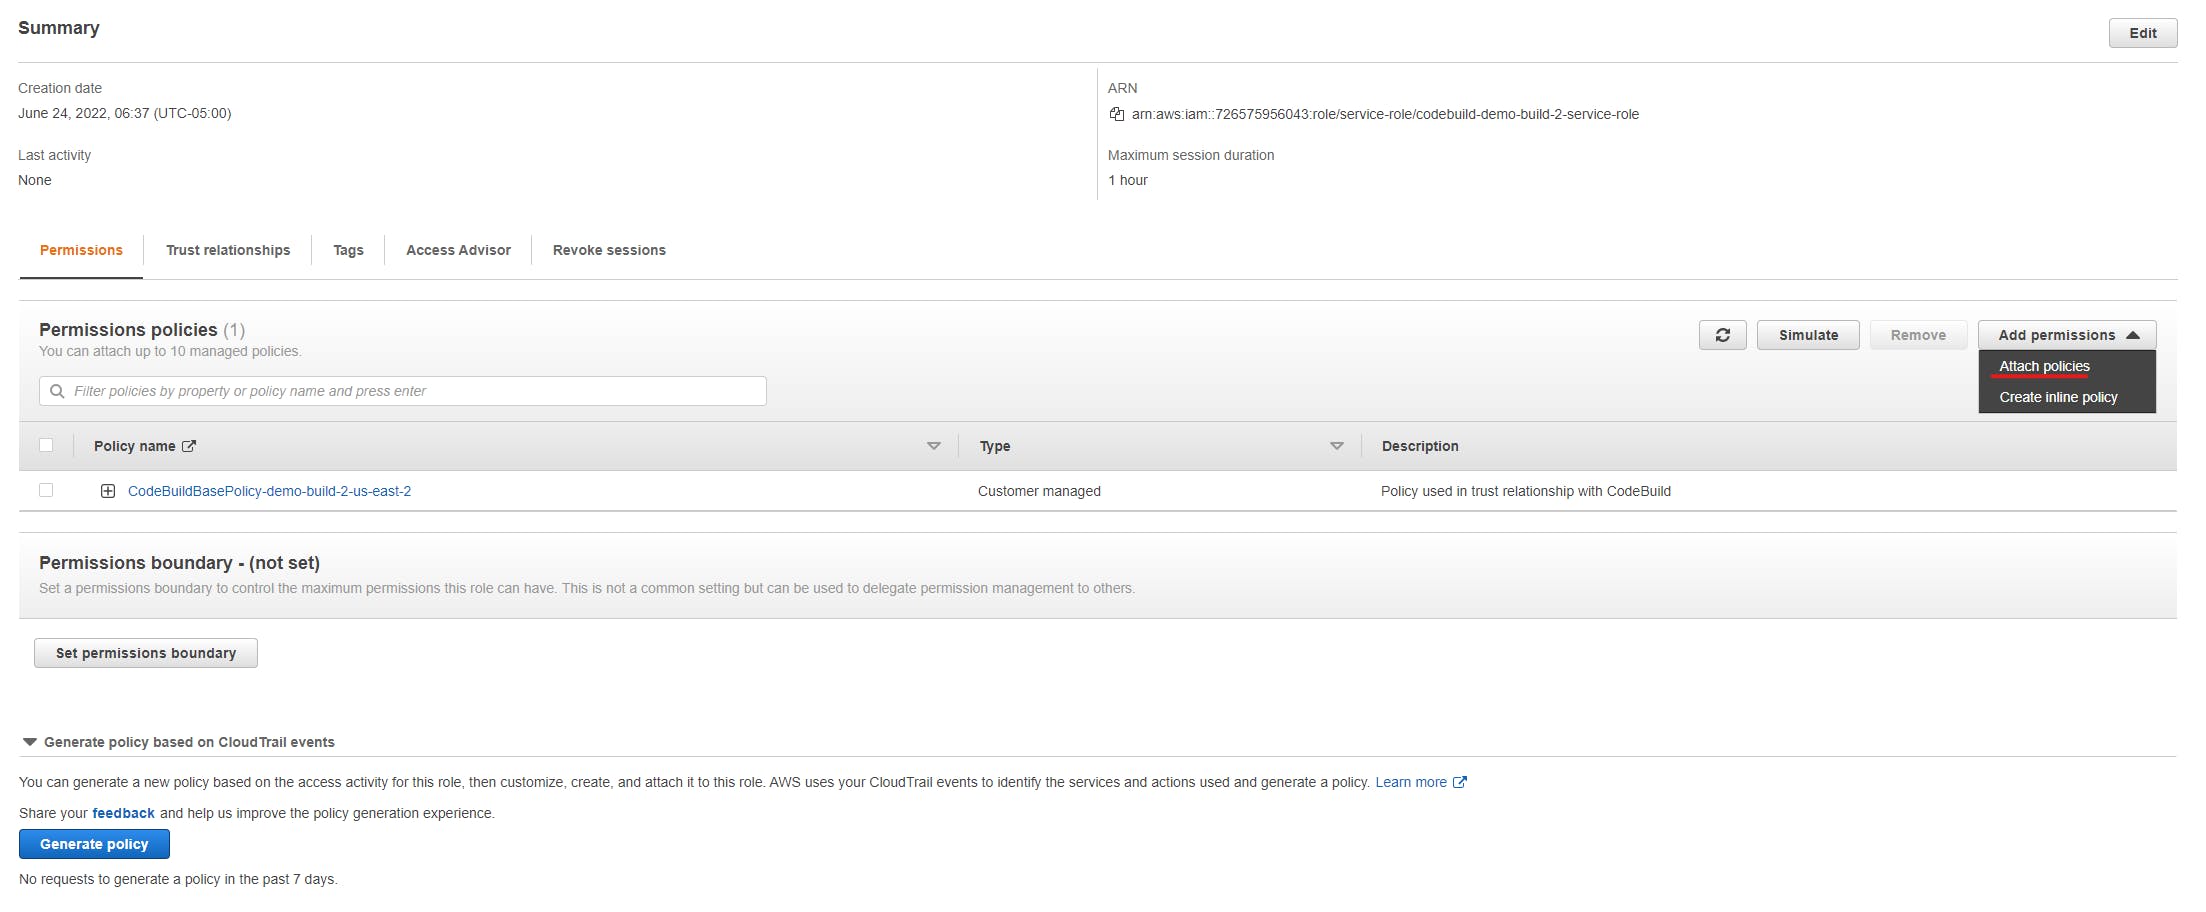
Click over the Attach policies, you will have something like:
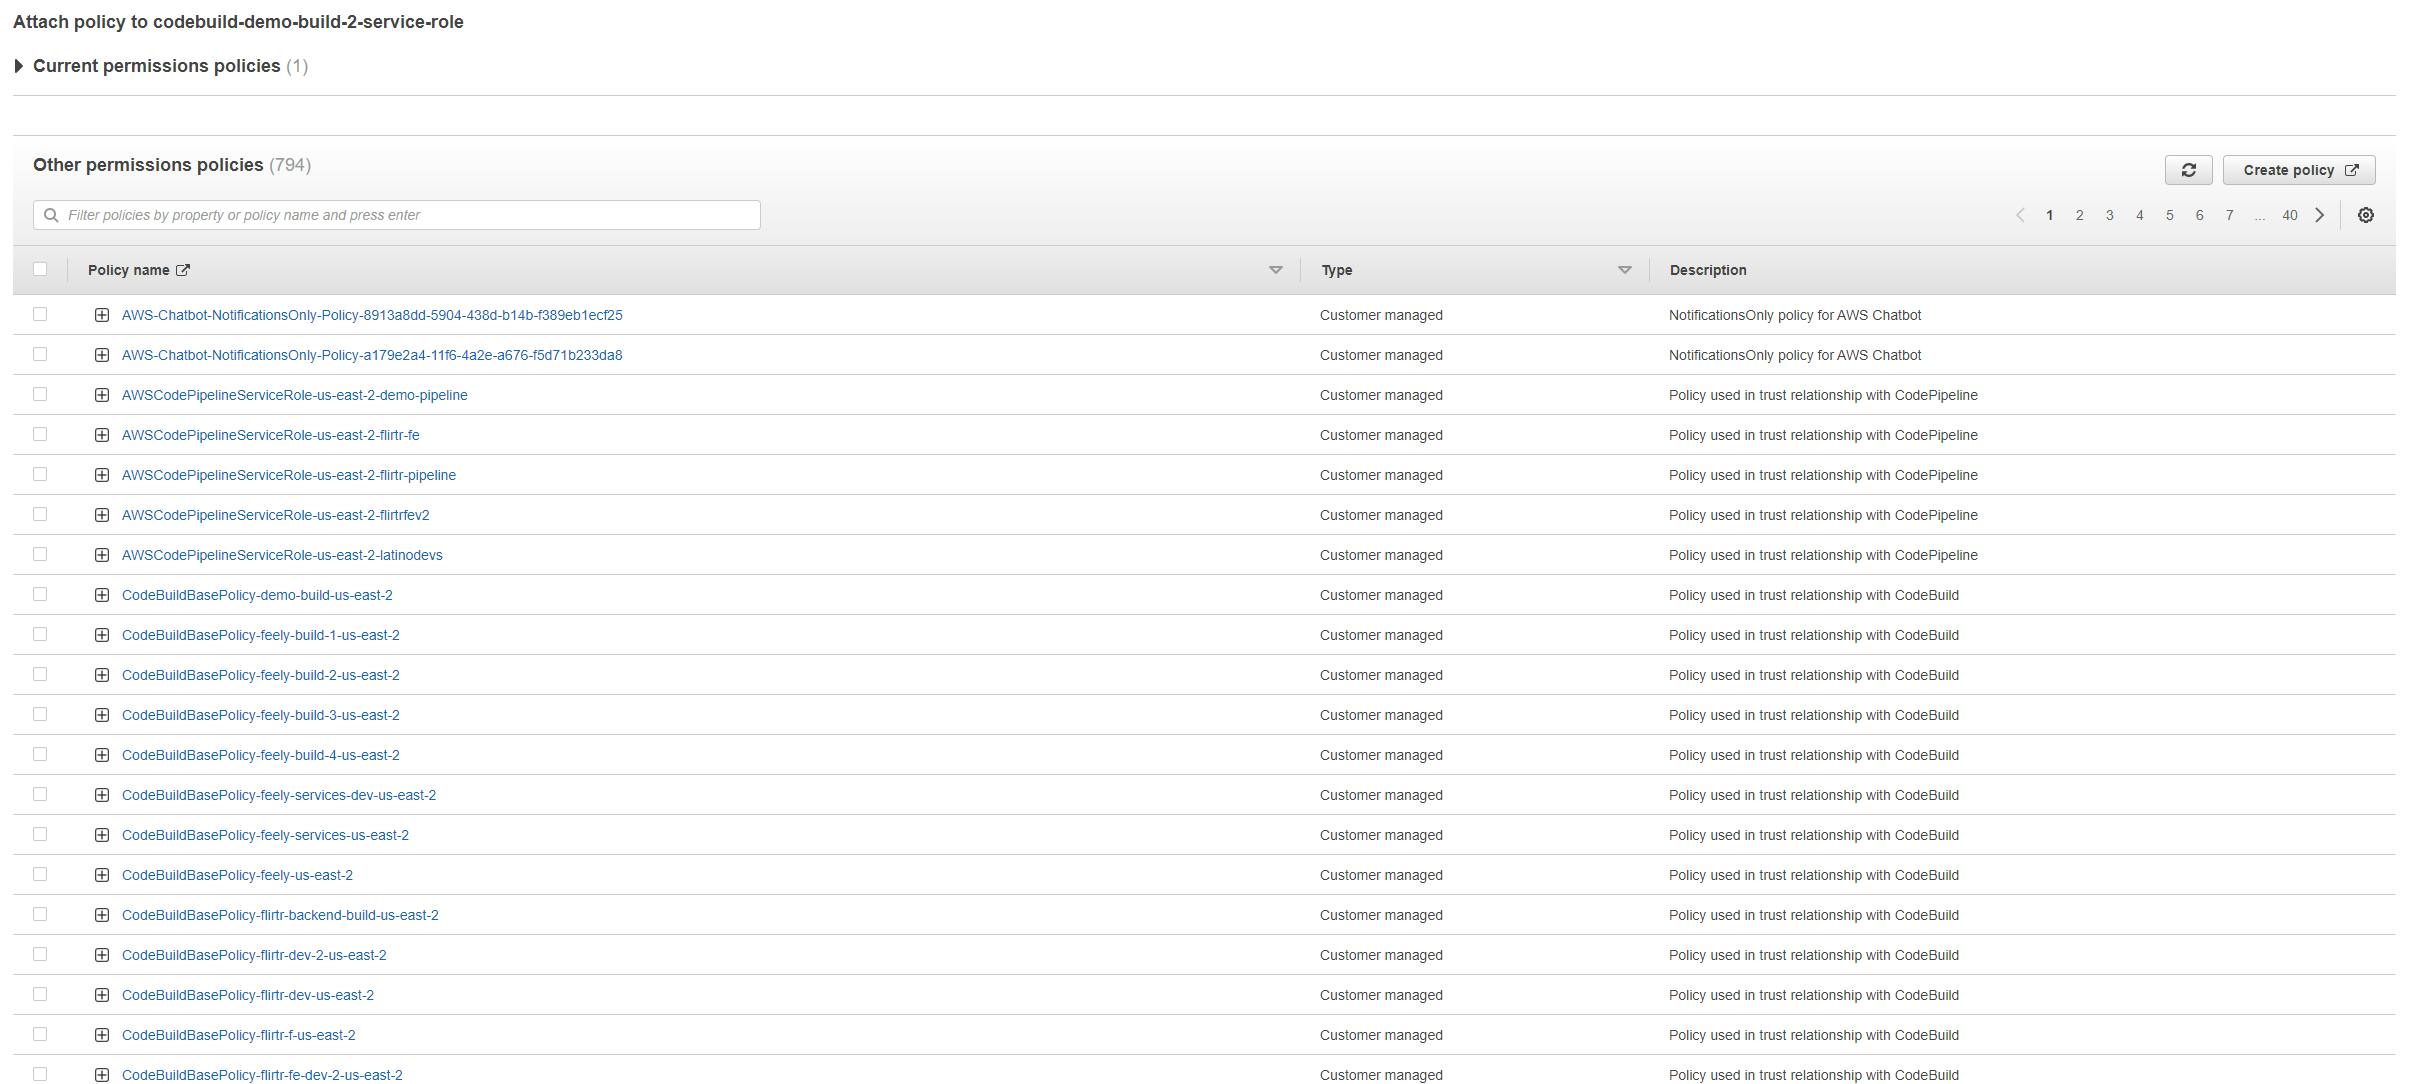
In the search box look for the AdministratorAccess policy (this is not so correct, you should add just the ECR policy but to not have any other problem just add admin access).
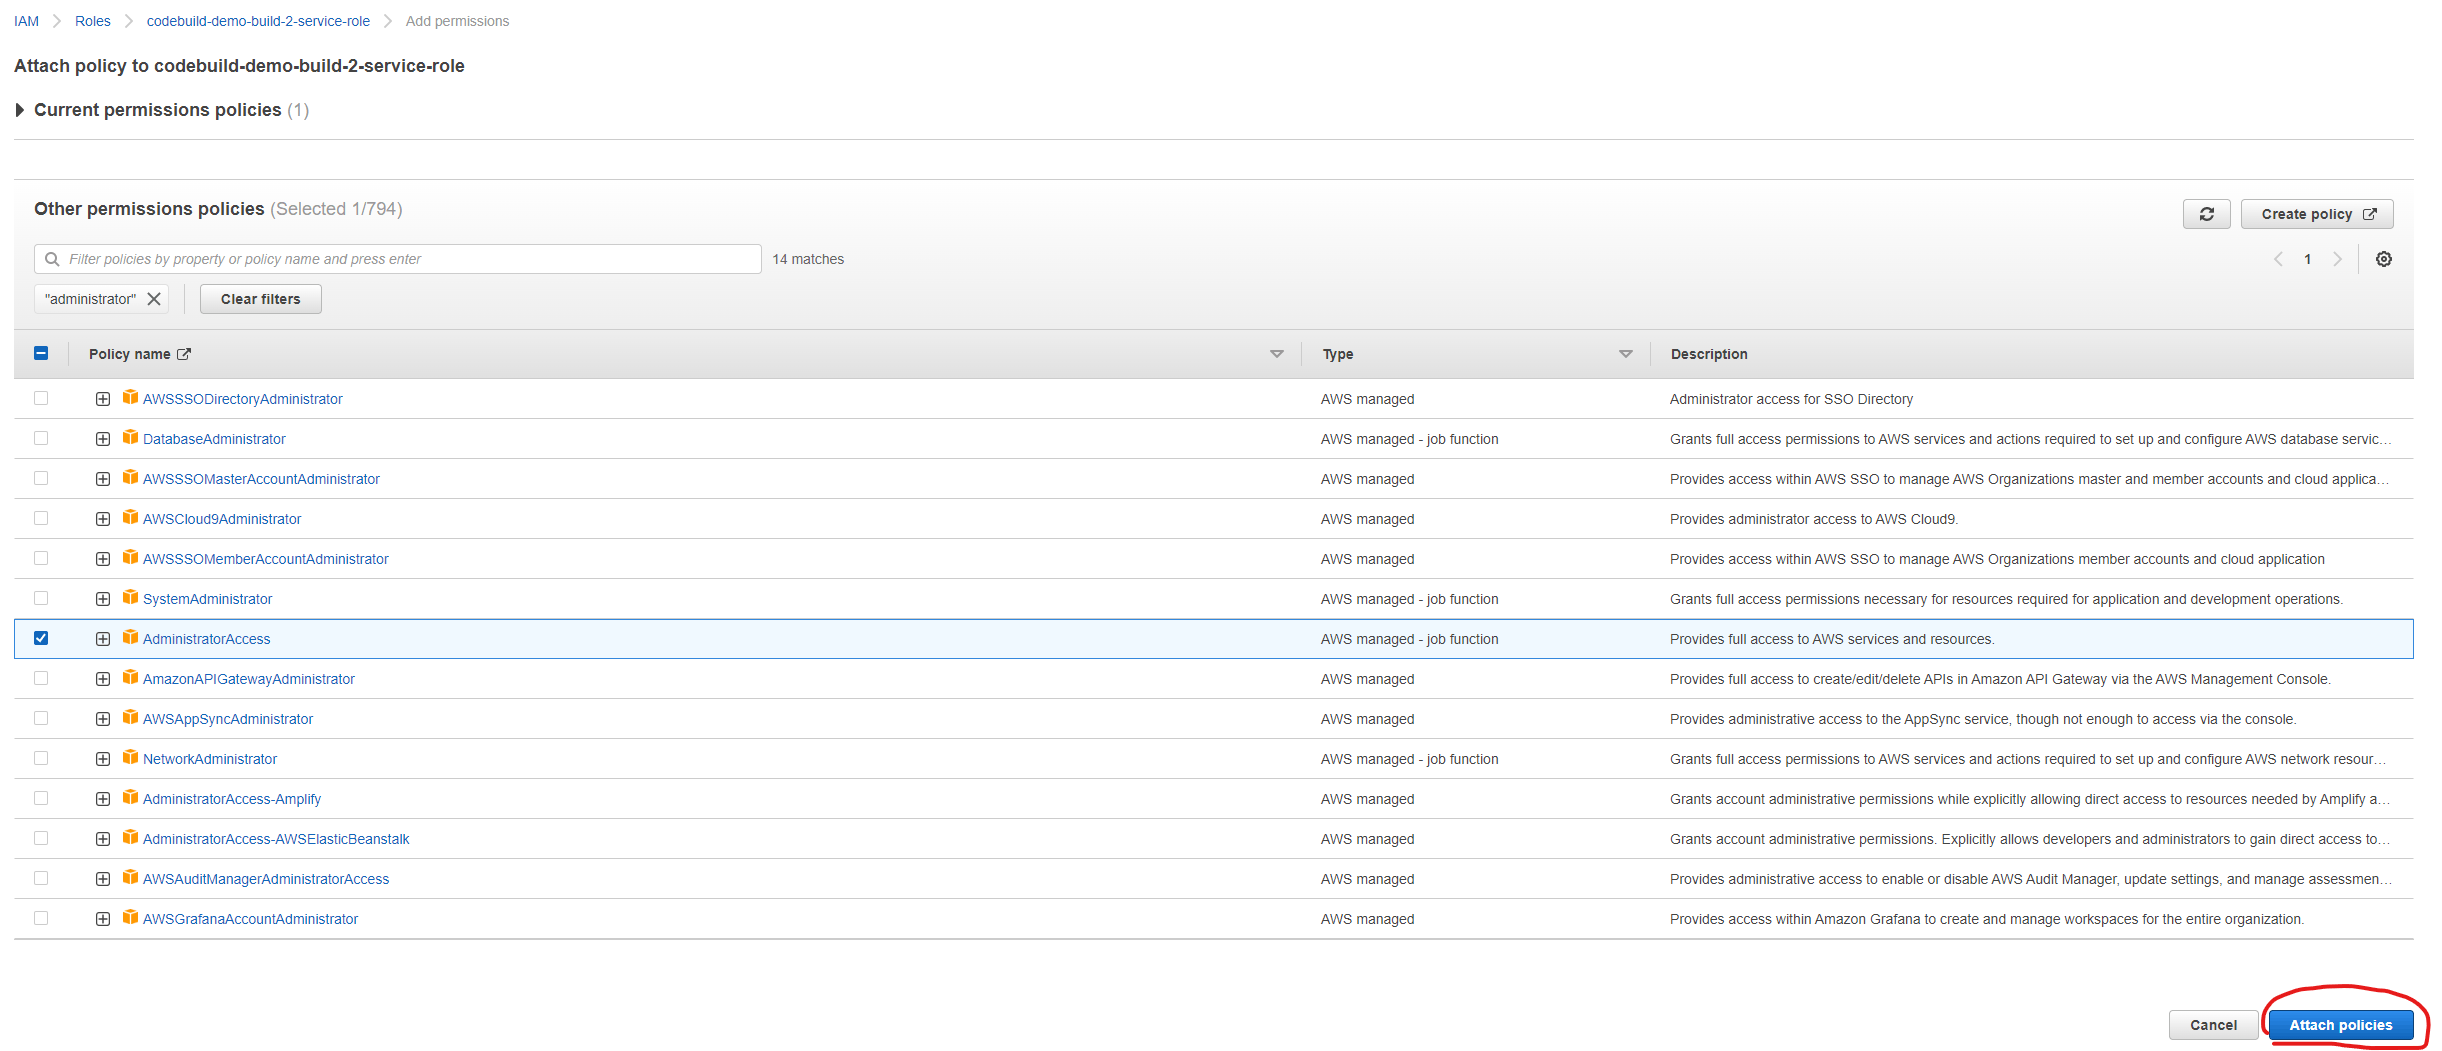
Now click over the "Attach policies" button. Return to the pipeline and click over the Release change button to see if now passes the build stage (I hope so...).
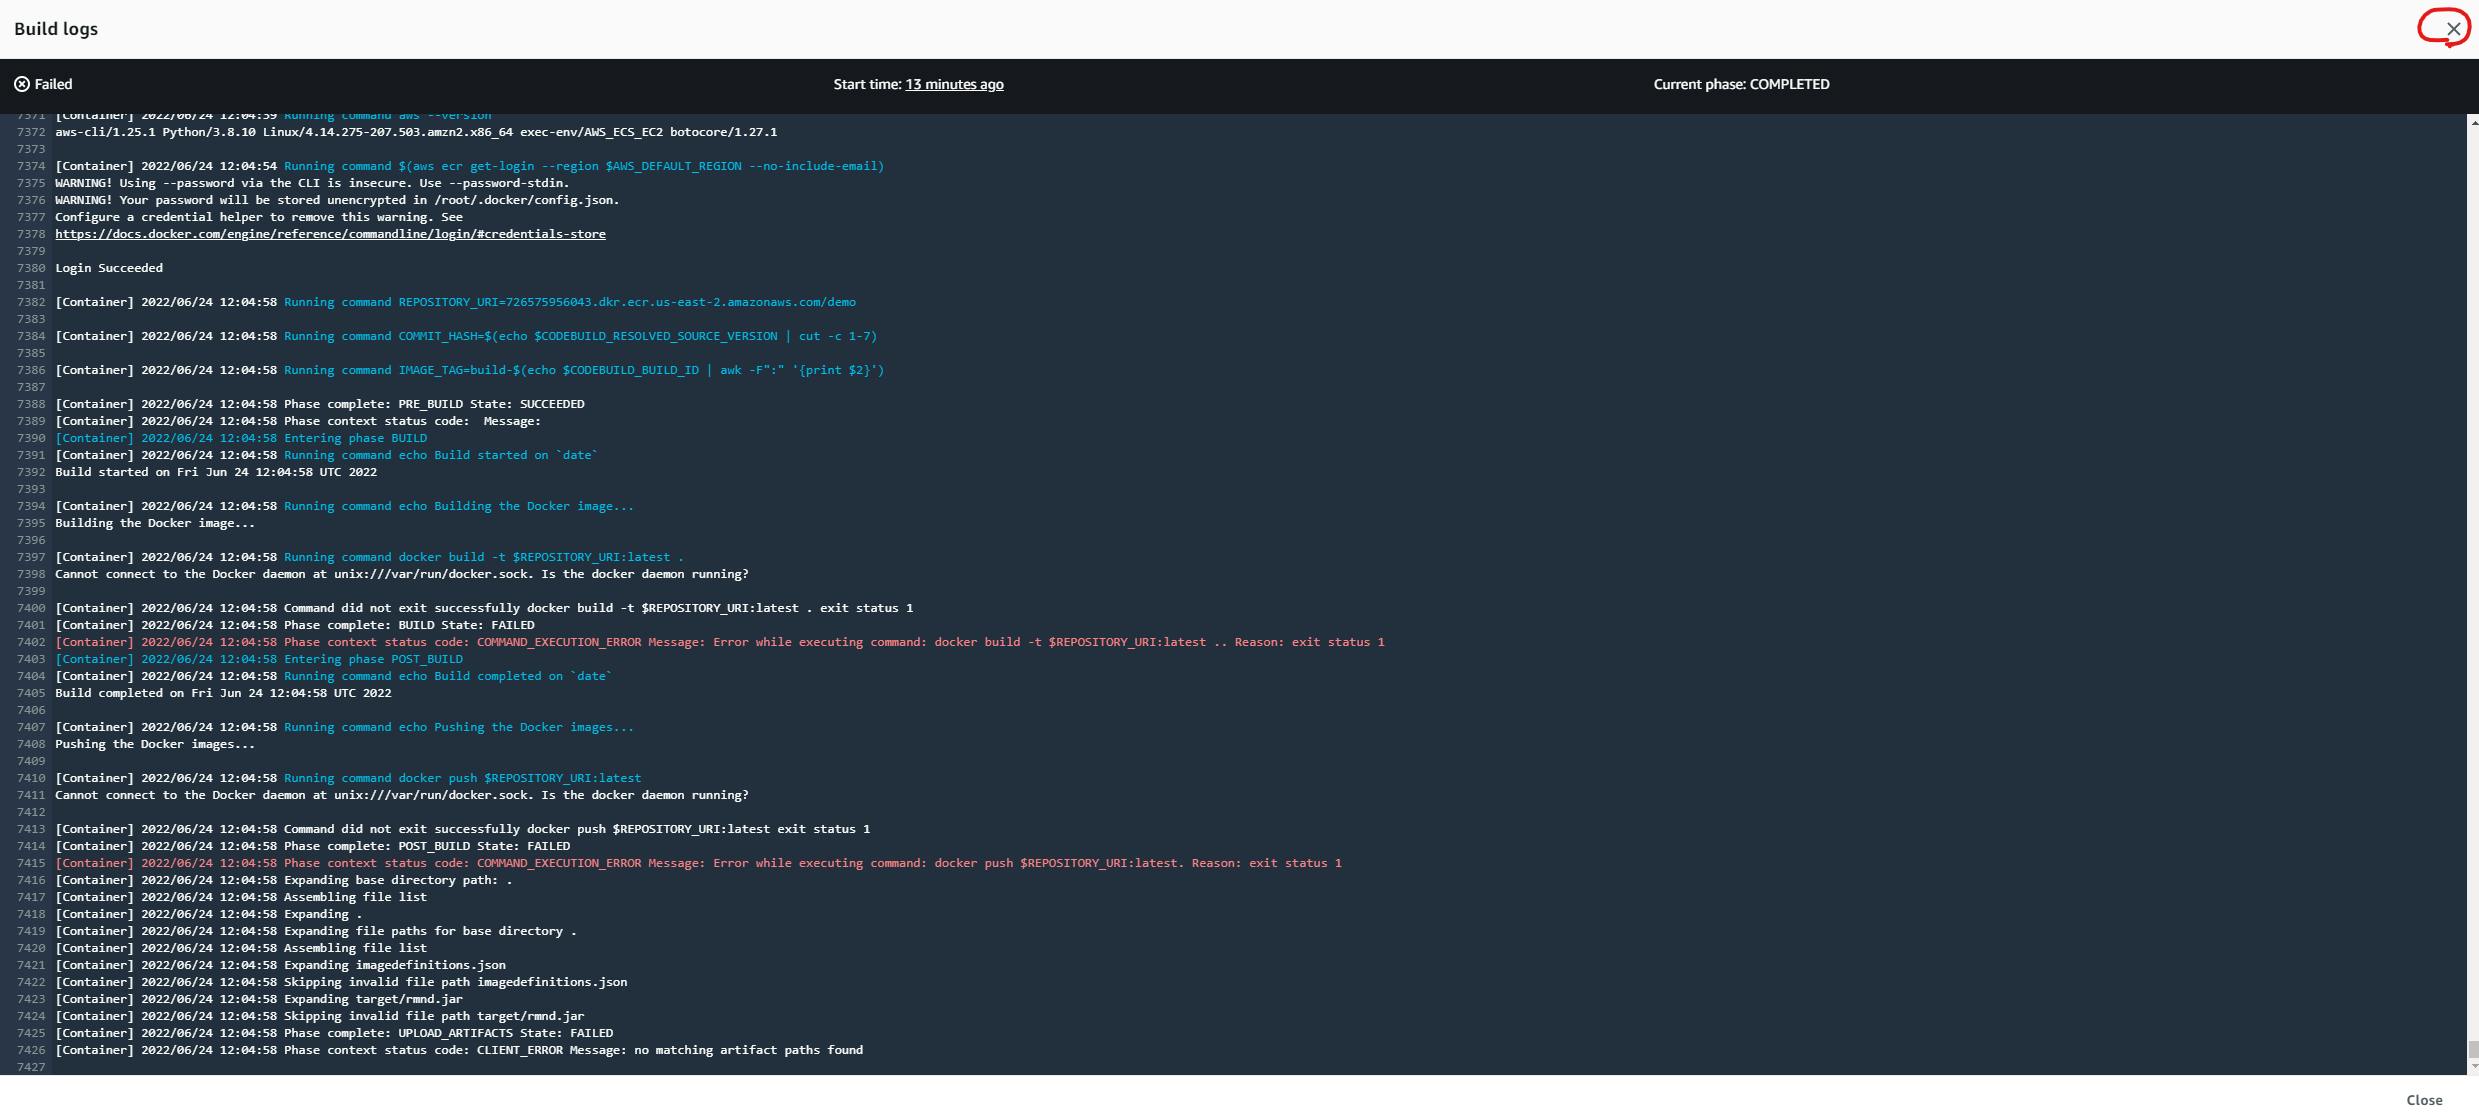
Aaaaaaaaaaaaaaaaaaaaaaand it failed (AGAIN!!!)
Ok, ok, calm down, let's see what happened again... Check the execution details and you will se the next...
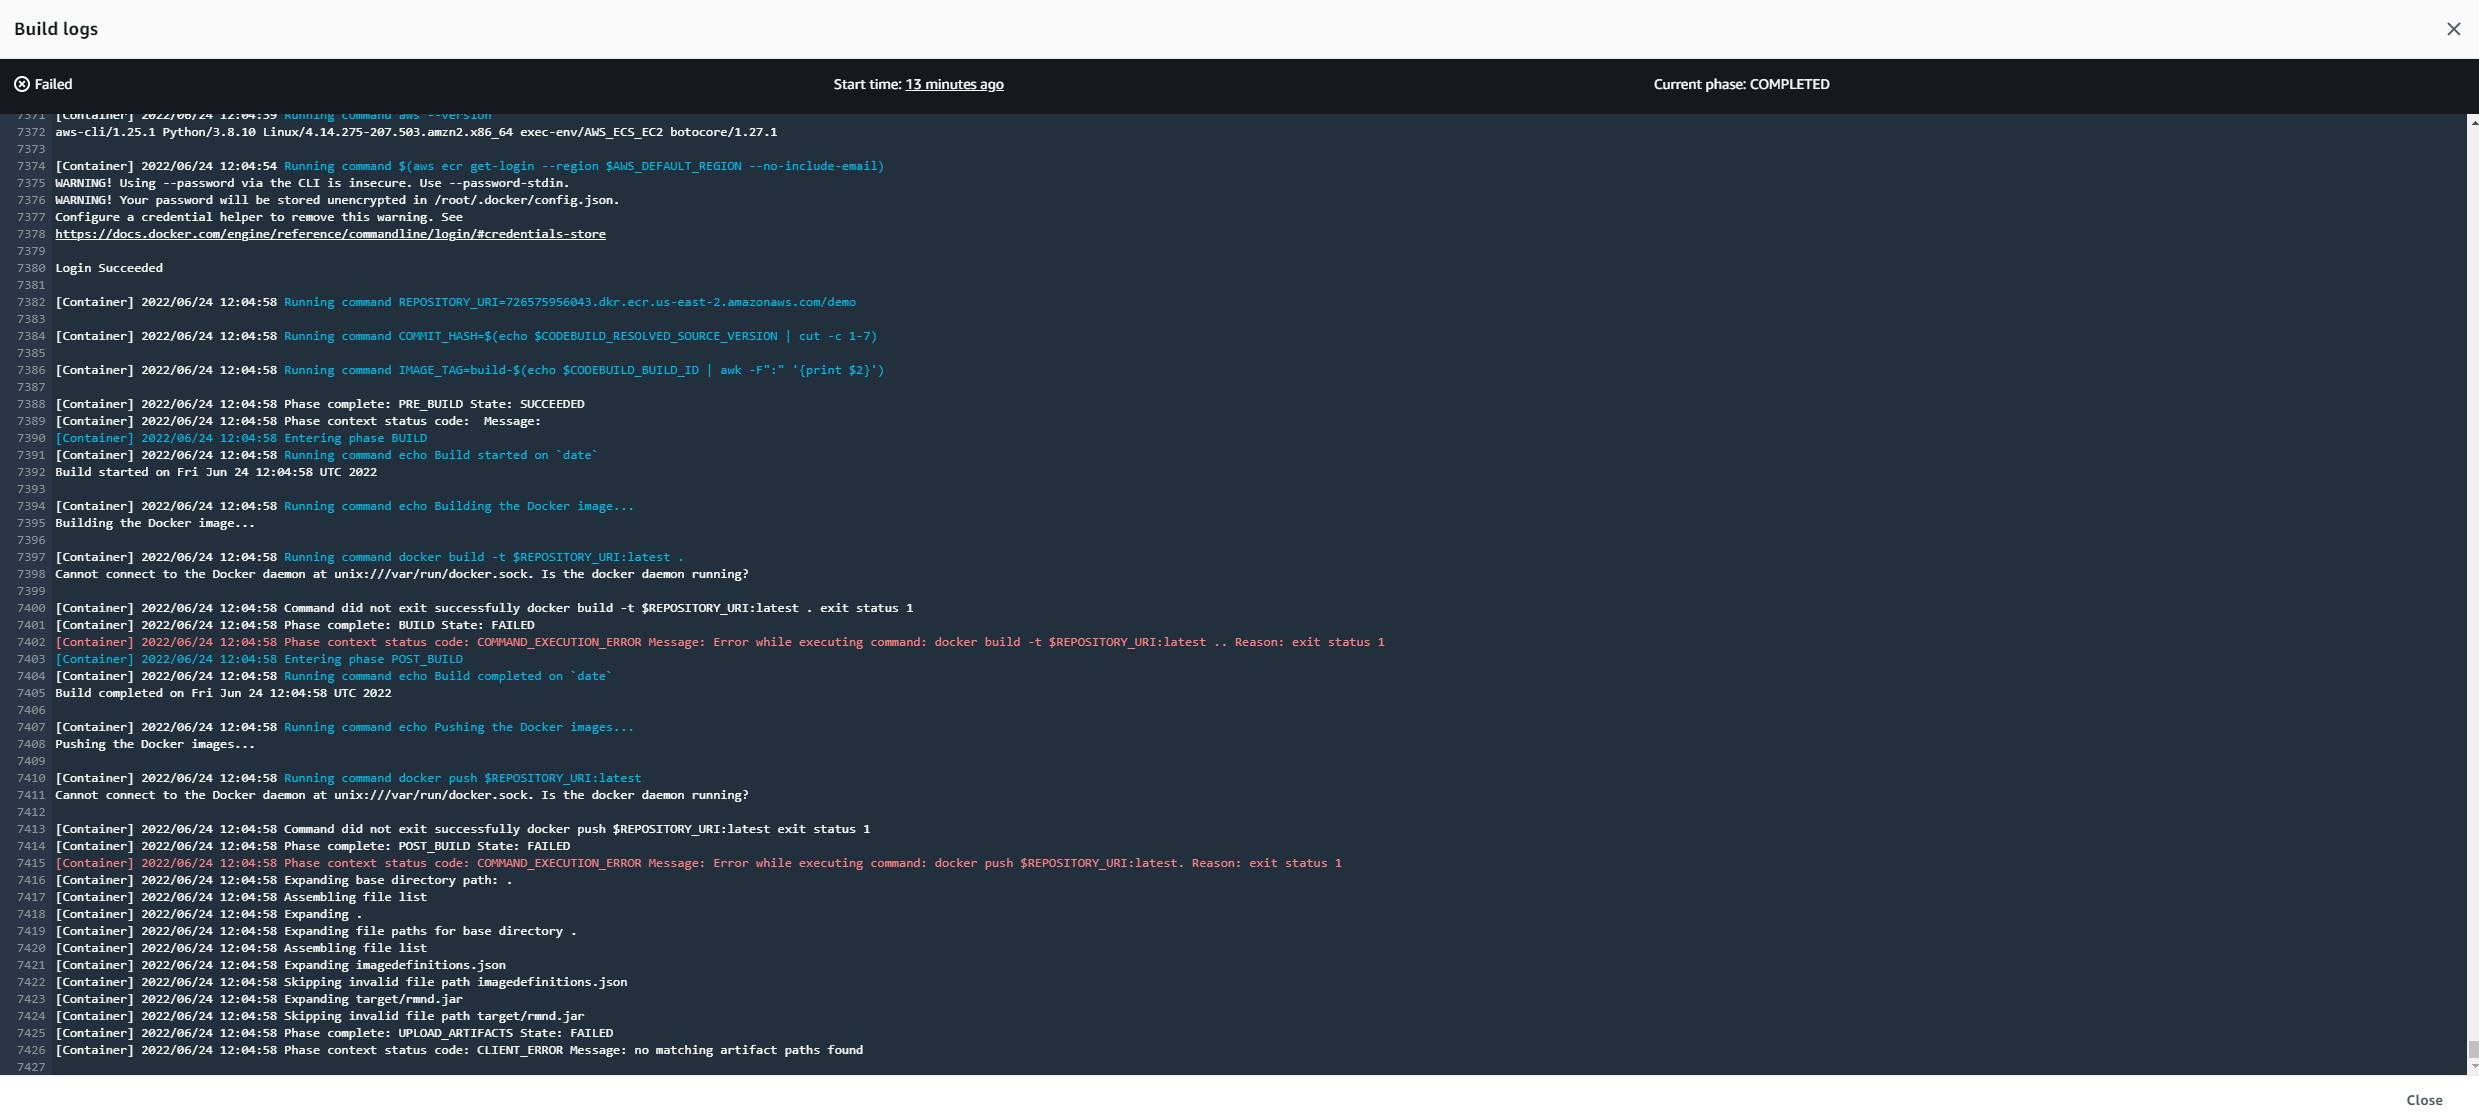
Phase context status code: COMMAND_EXECUTION_ERROR Message: Error while executing command: docker build -t $REPOSITORY_URI:latest .. Reason: exit status 1
Damn, that's weird, well not so much, what it's saying is that the machine that is trying to run the docker service is not allowed to do that, actually if you check carefully you will see a log that says: [Container] 2022/06/24 12:04:58 Running command docker build -t $REPOSITORY_URI:latest .
Cannot connect to the Docker daemon at unix:///var/run/docker.sock. Is the docker daemon running? So maybe the docker daemon is not running. So let's configure the build part to build docker images...
Editing CodeBuild to build docker images
Close the Tail logs
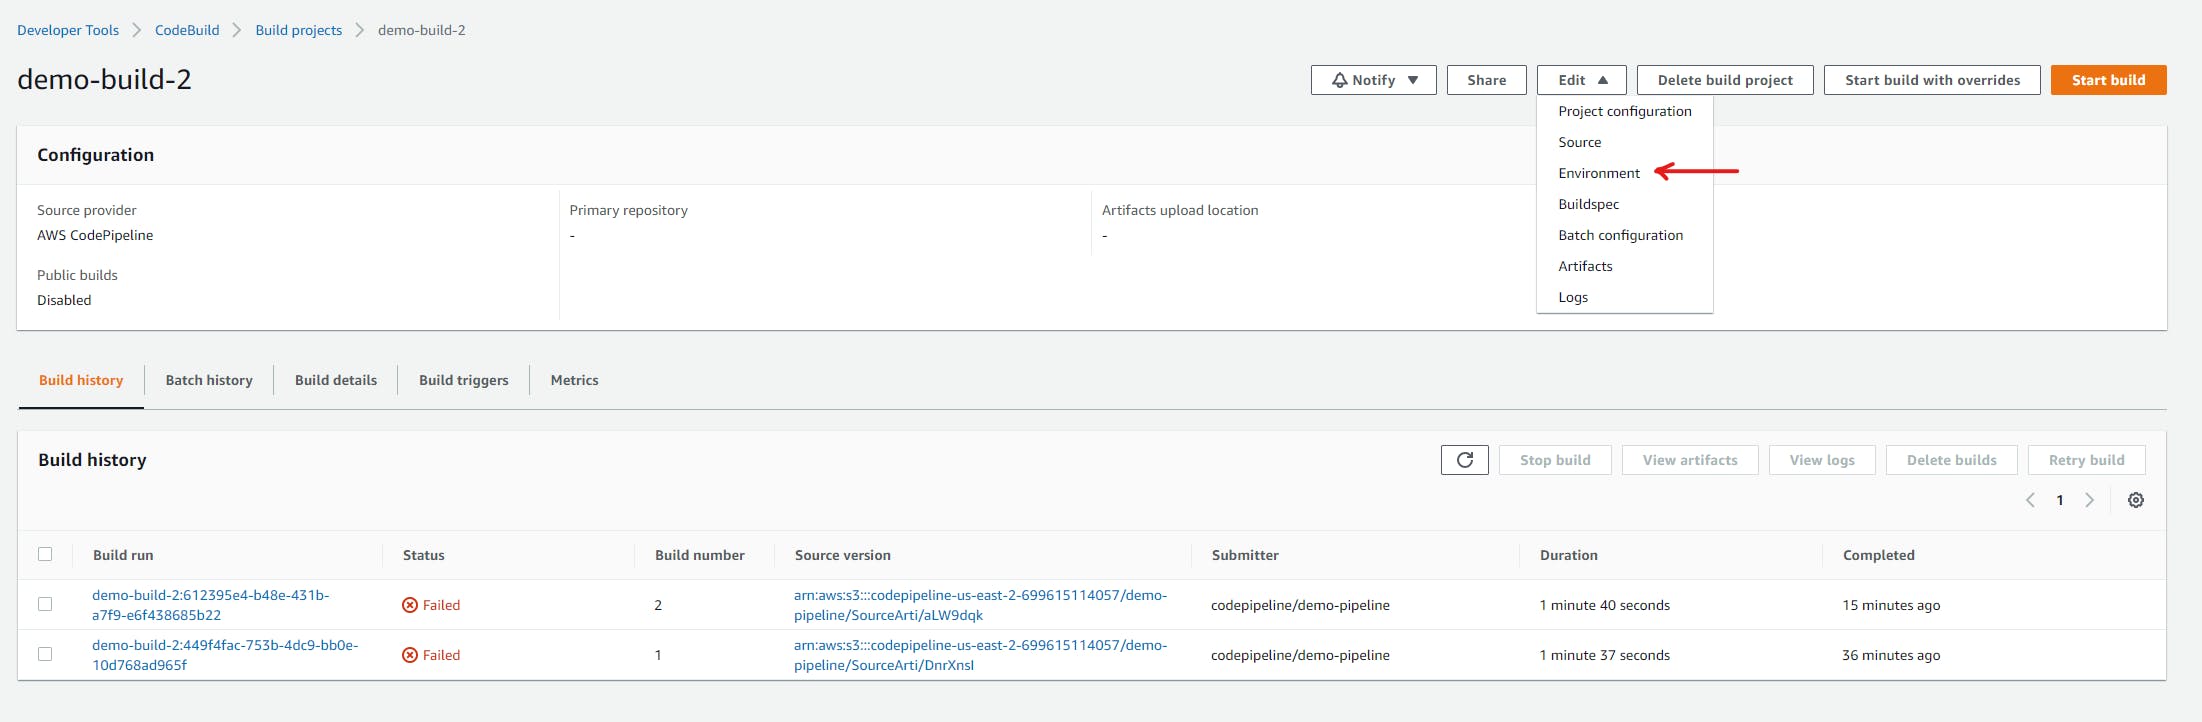
Now click over the name of your build:
Click over the Edit dropdown and then over the Environment part.
You will see something like:
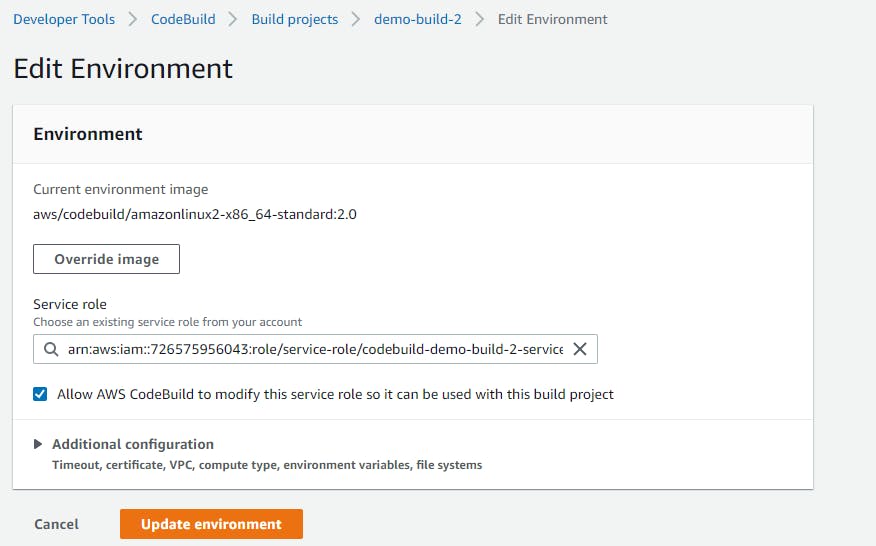
Click over the Override image button, now the form will expand like this:
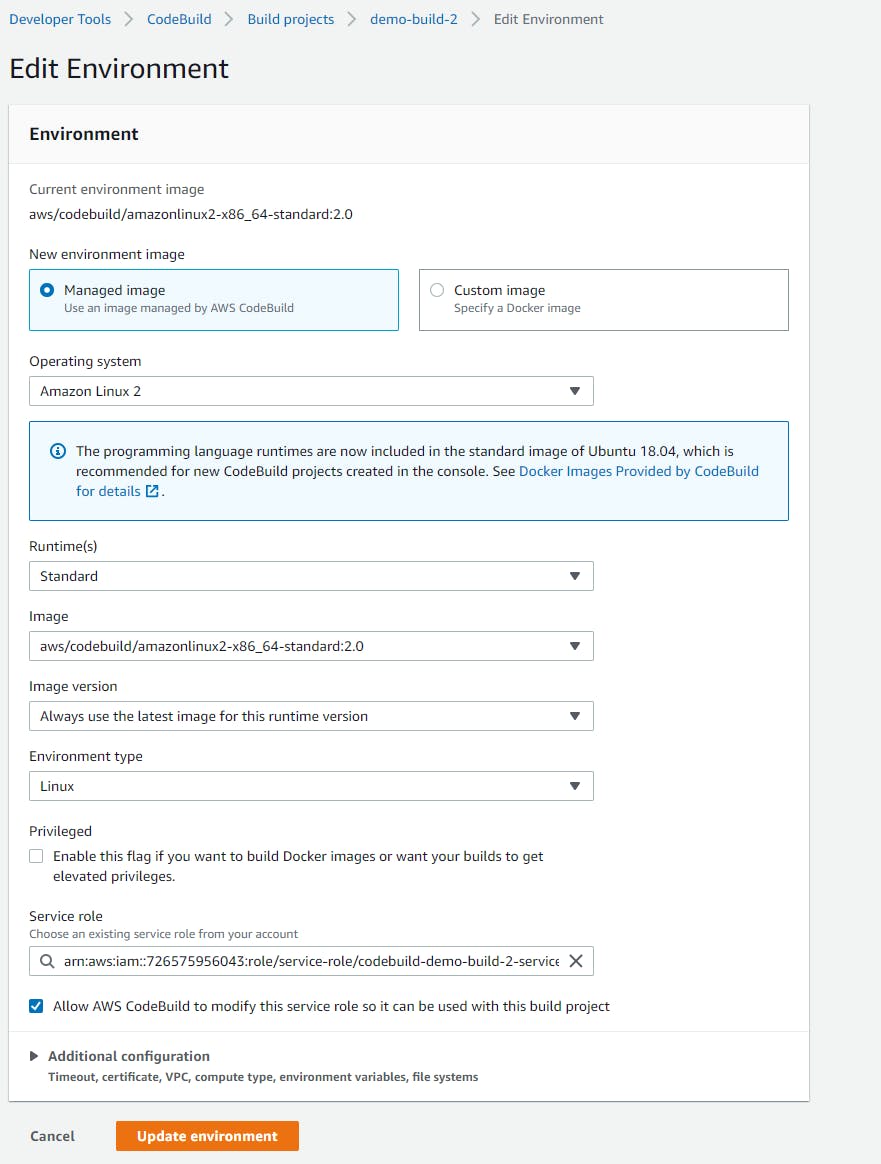
There is a part that says:

If you carefully it says that the build will be privileged to build Docker images so check that as:

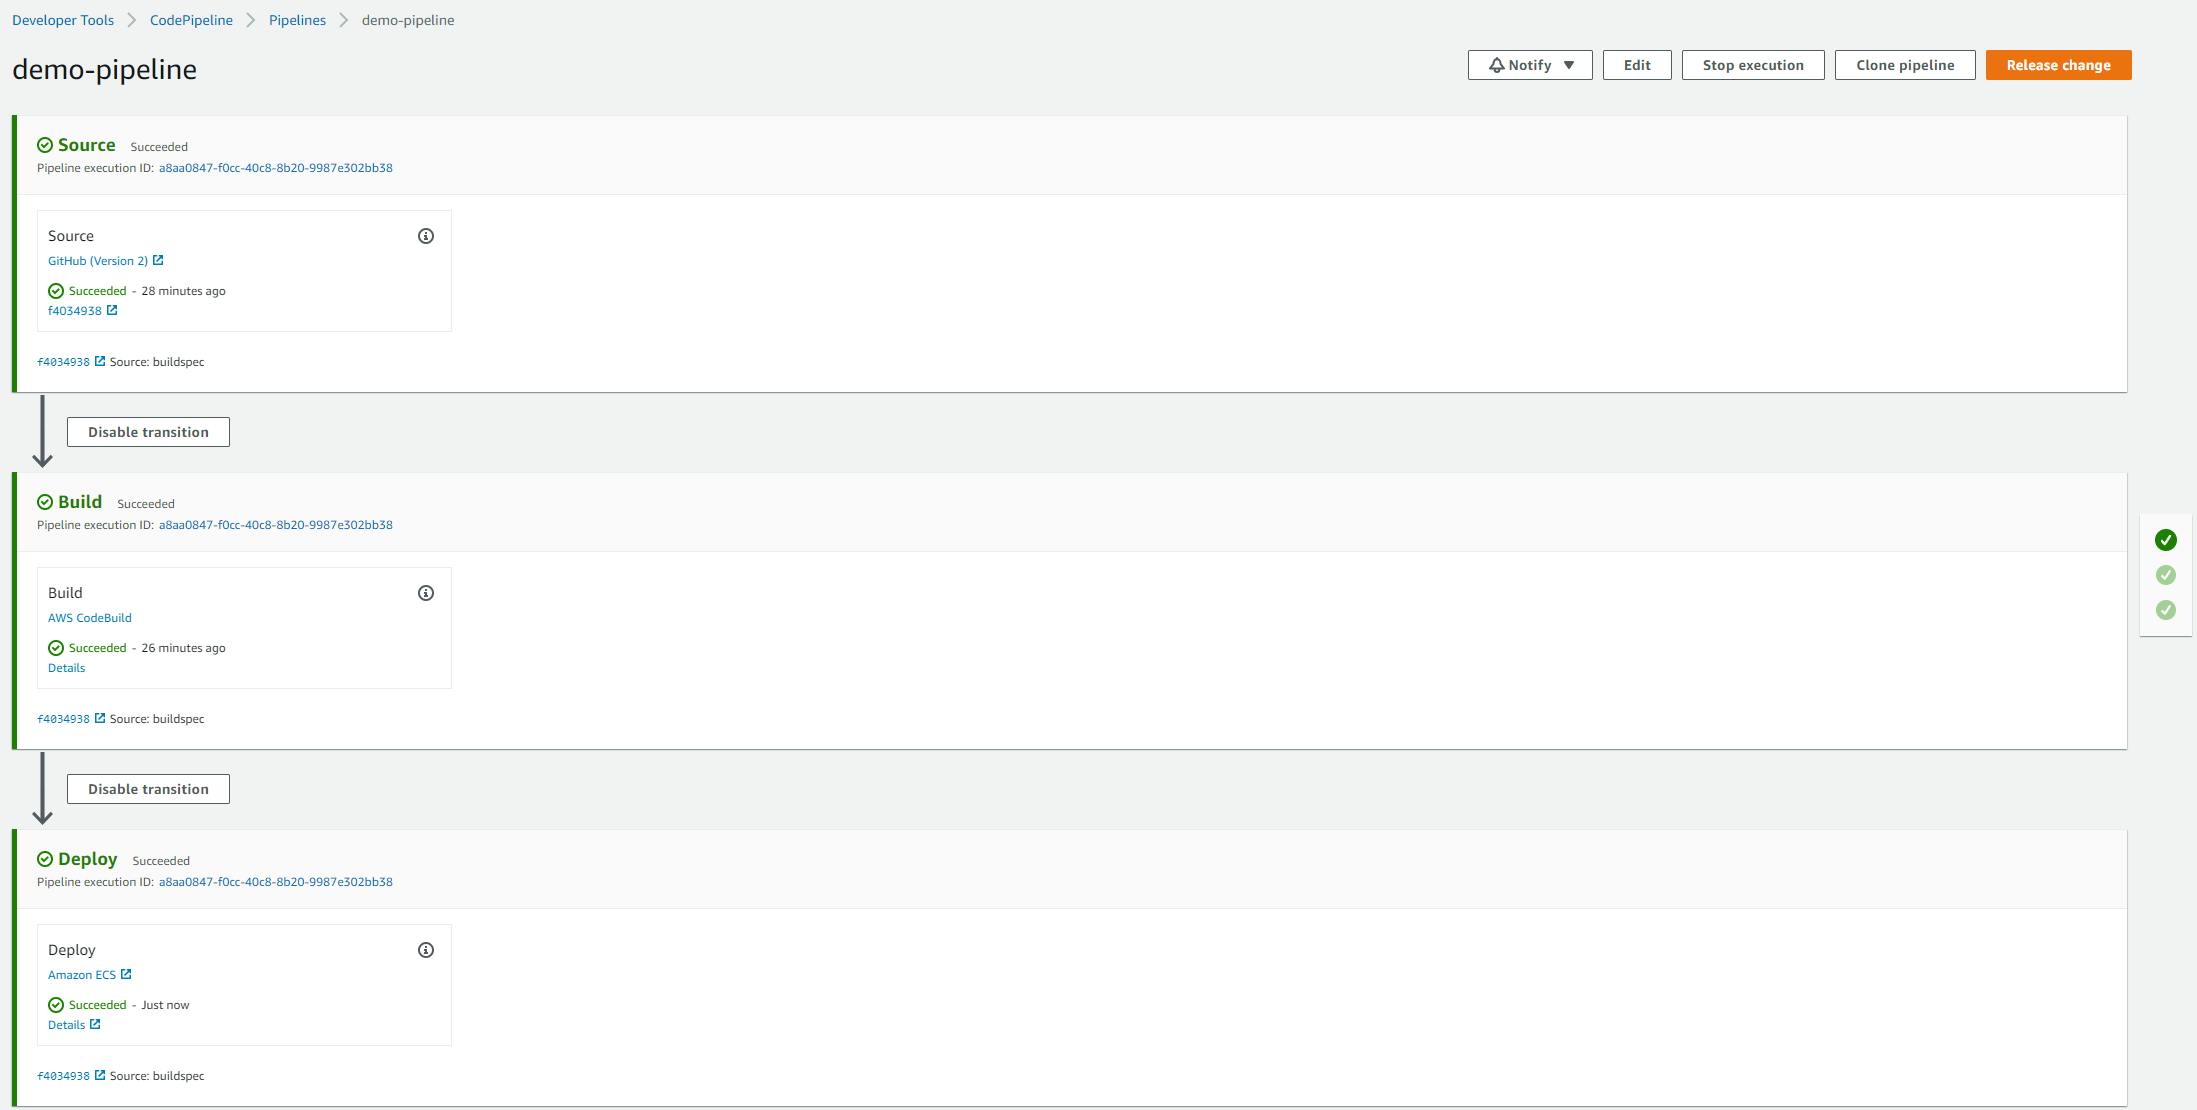
And then click the Update environment button. Now return to you pipeline and again click over the Release change button to check if now the build stage pass... (please god!!)
Yeeeeiii!!! the build passed and the Deploy too:
If you have any other problems, well you need to revisit carefully the last Chapters.
Also, one note, be careful with the name that you give to your container when creating the task definition in AWS ECS, the container should be named as the name of your application and the name of your service. If you find an error that says that the container "demo" can't be found is because the name of the container that you gave when creating the task definition was wrong, so, you need to create a new task definition with the correct name and a new service over AWS ECS using that new task definition.
Oh there is another thing, if you see that the deployment stage never ends but also does not fail is becase maybe your load balancer is trying to check the health of your service and maybe the service is not yet ready to respond with a 200 HTTP status to your load balancer, in order to fix, go to EC2 under the target groups and select yhe target group that you are using:
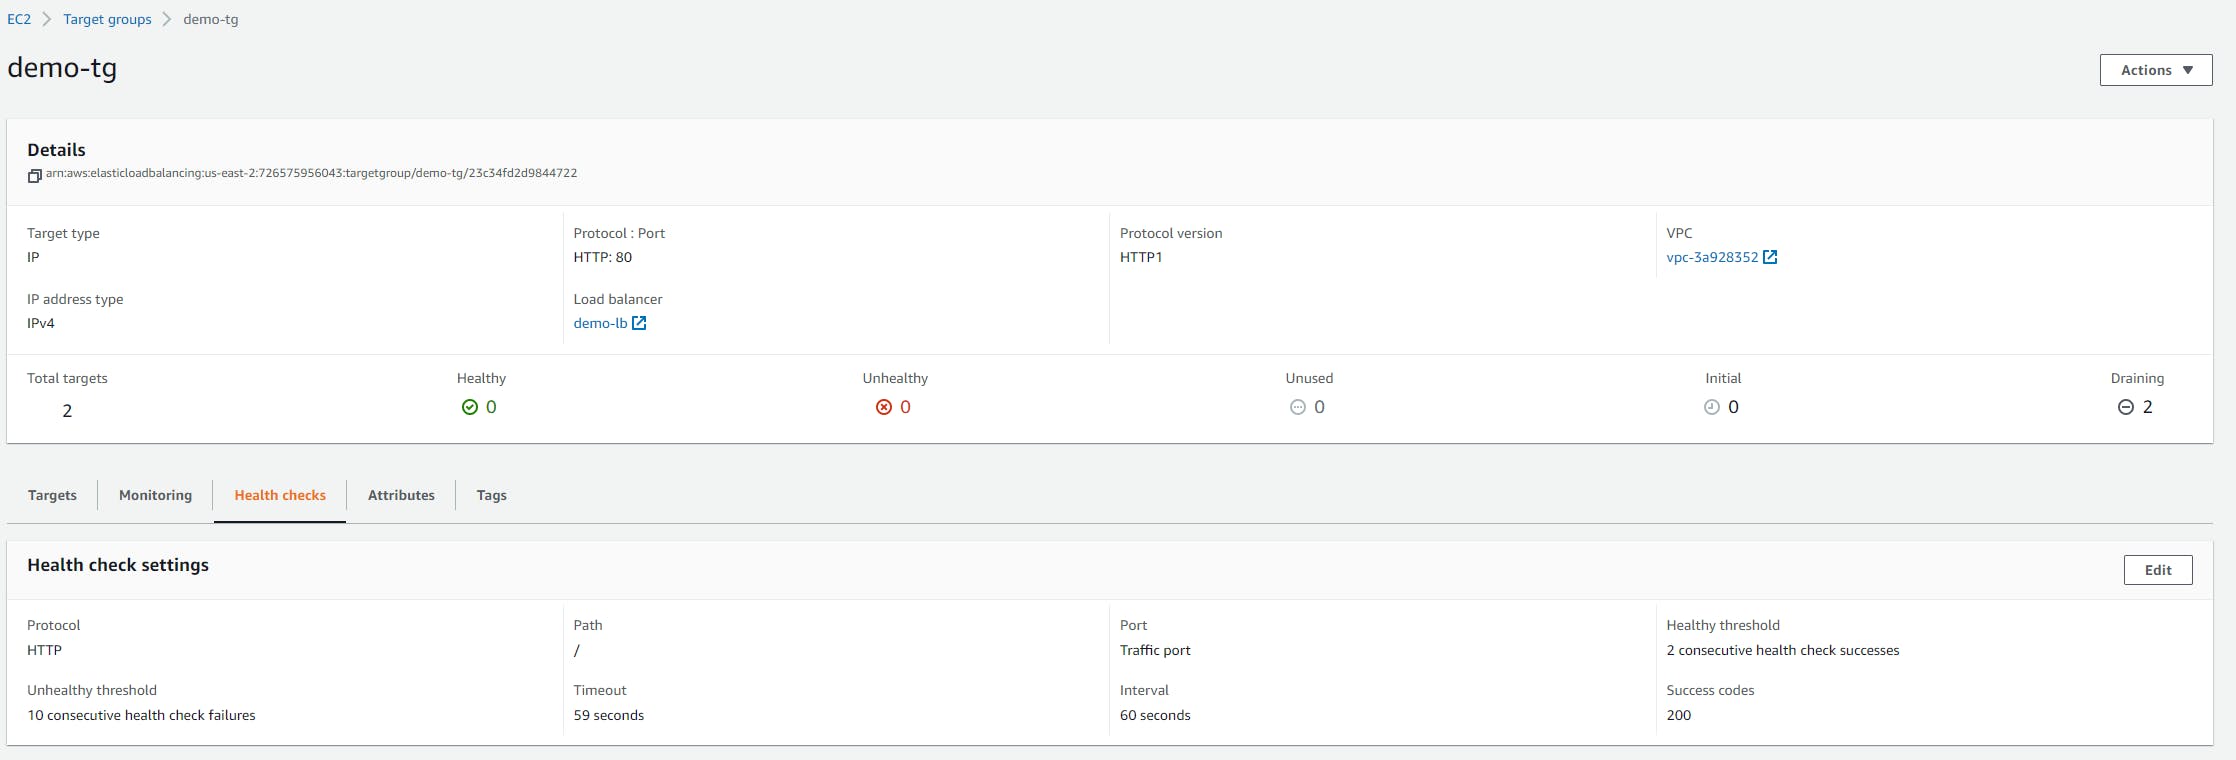
As you can see here I show you the Health check settings, try to give enough time to your service so it can be deployed correctly and the load balancer will check the health at a correct amount of time.
Happy codi... wait, not to much code here hehe, well happy DevOps if this can be called DevOps :P
Cheers!!!