Spring Boot + Docker + AWS | Pushing Docker image into AWS ECR
Chapter 3 | Pushing Docker image into AWS ECR
Before you start reading, you have to know that this tutorial series is designed to be the most simpliest and easiest way for begginers, our aim here is to get beginners to start and get dirty on this type of stuff, we are not considering that this will create a professional and complete structure of service or services that you can use on production but at least will help anyone out there.
Comming from Chapter 2, we now have an AWS account ready to go, today we are going to push the Docker image that we created on Chapter 1 into AWS ECR.
ECR stands for Elastic Container Registry, this is a palce where you can store your images (in this case a Docker iamge) publicly or privately (like Docker Hub). The objective is to create a resource that other services can consume. There are some services that uses an image as the principal resource to build a service, for example Kubernetes, which can create something called pod where the image is pulled and deployed with all the information that was given into the Dockerfile. Other services can be used like ECS (Elastic Container Service from AWS) or EKS (Elastic Kubernetes Service again from AWS), there are also the same tyoe of services in other cloud based platforms like Azure, Google Cloud Platform or why not Alibaba. For today, we are going to use ECS, why? well because the integration between all AWS services are easy to go and remember that this is our aim with this series. No more words, let's begin.
Remember the AWS console principal page? well, go!:

Once you are there, in the search box, write registry and you will see that some services listed in a IU, in first place you will see Elastic Container Registry:
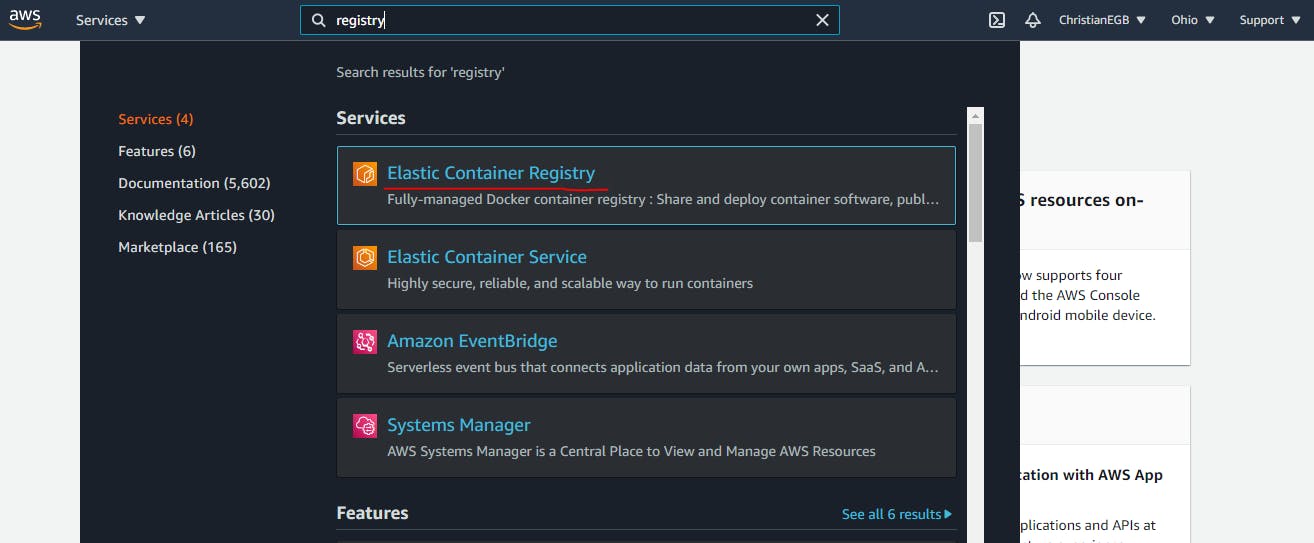
Click in that services and you will see a screen like the next one:
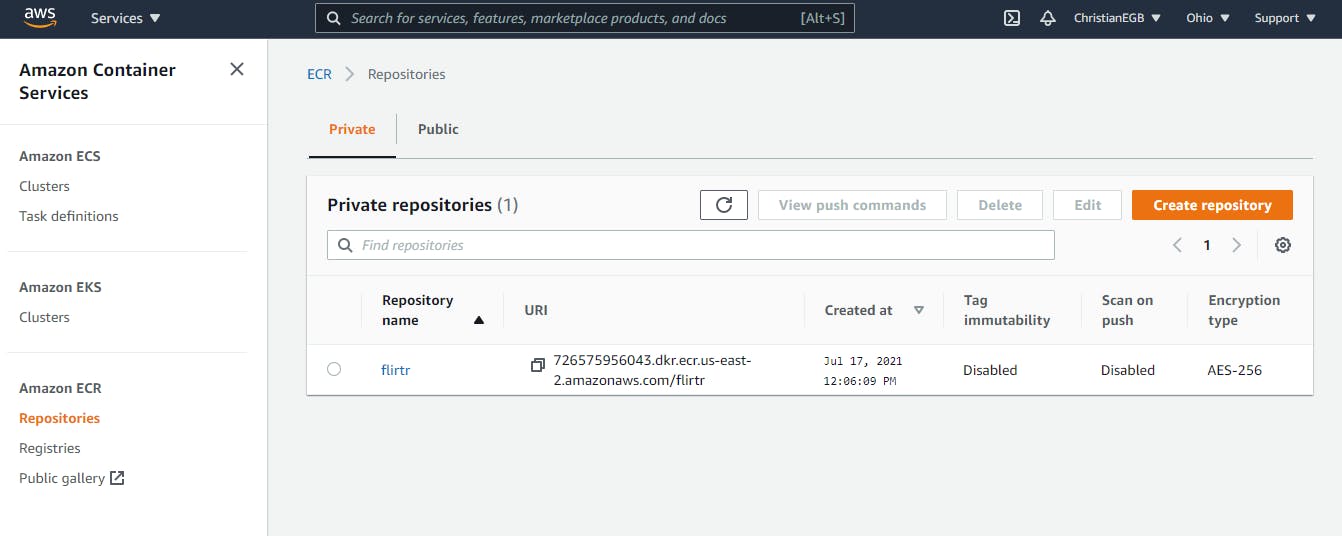
Check that in my case I already have a row in that table, for a repository called flirtr this is my own project (maybe in the future you will see it live :3). Ok so now, start by clicking in the Create repository button:

This will drive you to a page like the next one:
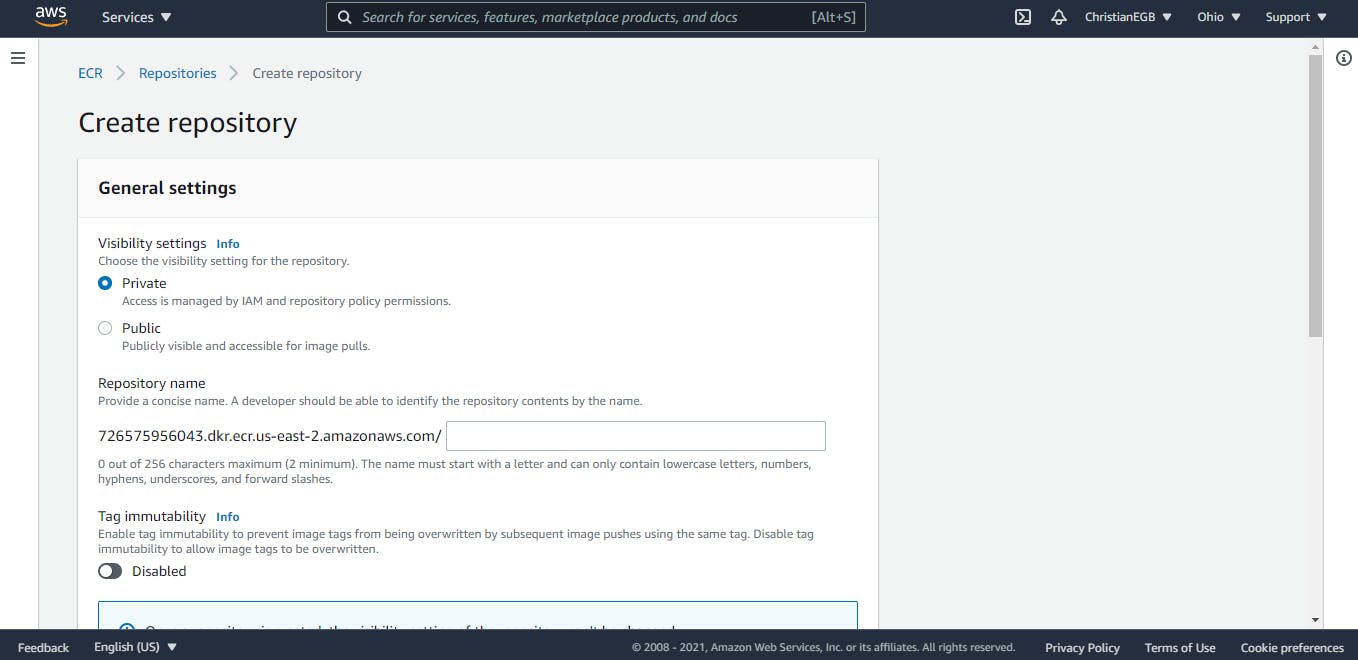
Now, in the part where it says Repository name create the name fo the repository that will store the image that you created on Chapter 1. Do you remember that in Chapter 1 I told you that to follow convention names will help us here? well, I really recomend you to put the same name that you put in the Spring Boot project, that should be the same name as the JAR file. in my case I will put the name hello-world since I have a Spring Boot project called hello-world and my JAR file has the same name. Also, check that the Visibility settings are in private since this repository will be used only by AWS services. At the end you have to have something like this:
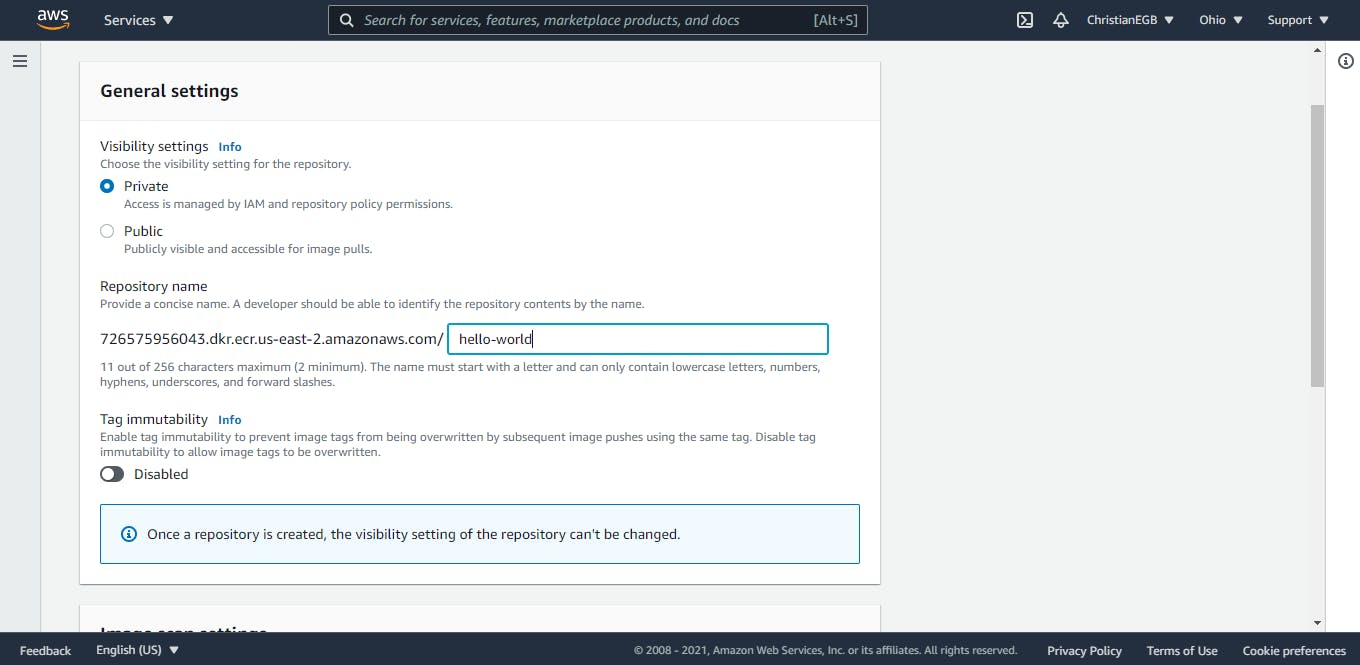
Leave all the other configurations as is and then just click on Create repository

This will drive you back to the list of repositories in the ECR main page, you will see also a green box that says Successfully created repository hello-world and also a new row in the table with the repository that you just created:
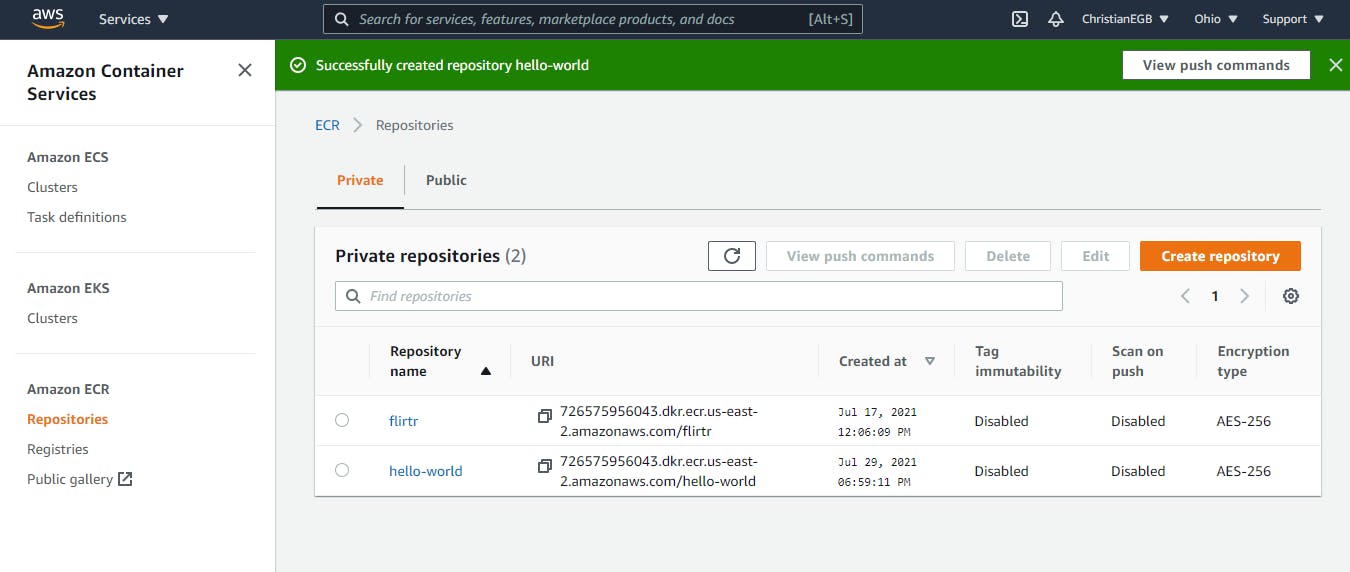
Next step will be to click over the hello-world repository, yeah, the new row that you created, you will see something like this:
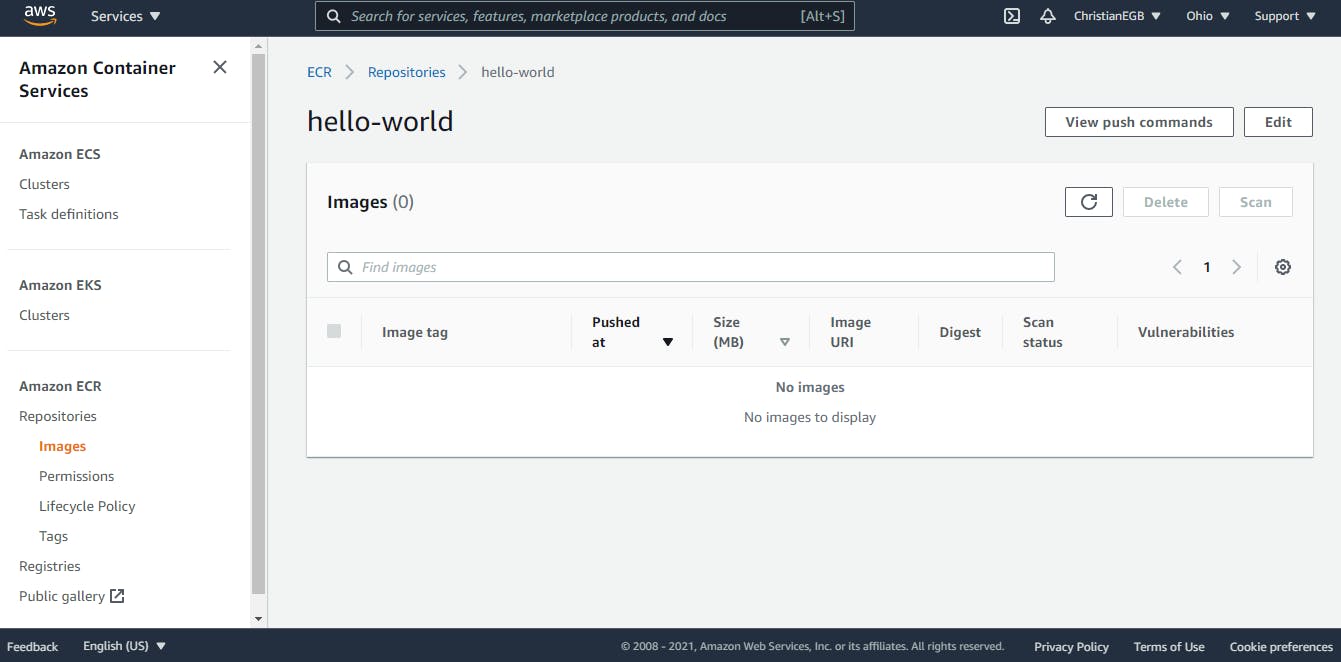
Ok, next, in the upper-right corner you will see a button that says View push commands, click it! This will open a new UI, like the next one:
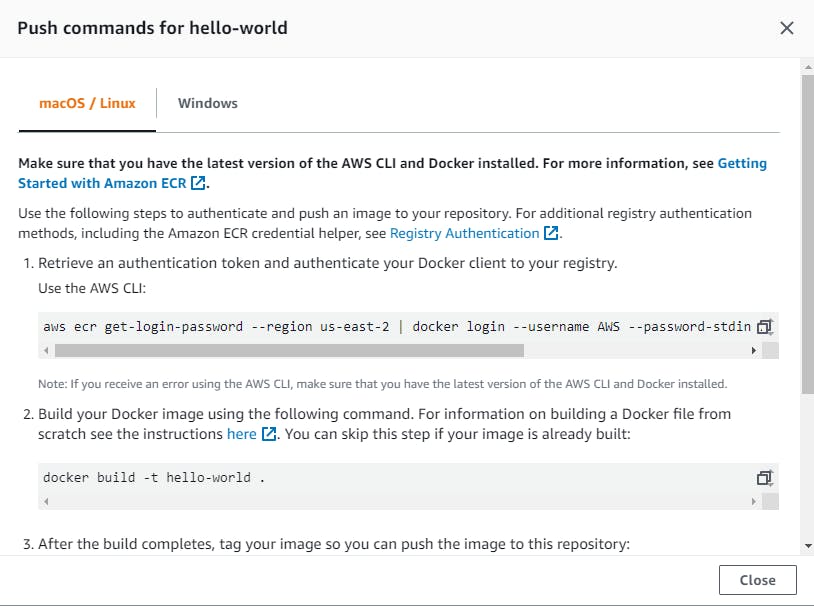
Ok, this is cool, now here you will see a lot of words hahaha, read it if you want but if not, the objective is to copy and paste into your CMD or console every single command that you can see here, there are 4, though, check below:
This command will help us to log in into AWS ECR from our CMD or console using the AWS CLI
aws ecr get-login-password --region us-east-2 | docker login --username AWS --password-stdin 726575956043.dkr.ecr.us-east-2.amazonaws.com
The second one will build our image, but, remember that this step was already done in Chapter 1
docker build -t hello-world .
The third one, wil rename the image that we created with a new name that will match the name of the repository that we created into AWS ECR, so it will rename my image that is called hello-world to a new name 726575956043.dkr.ecr.us-east-2.amazonaws.co.. as you can see (if not go back to previous steps) it matches the name that we put at the moment of the creation of the repository.
docker tag hello-world:latest 726575956043.dkr.ecr.us-east-2.amazonaws.com/hello-world:latest
The forth and last commant will push the new named image into our AWS ECR repository:
docker push 726575956043.dkr.ecr.us-east-2.amazonaws.com/hello-world:latest
And that's it. Now let's do it step by step and see the output.
Pushing process
Log in into AWS ECR using AWS CLI
Command:
aws ecr get-login-password --region us-east-2 | docker login --username AWS --password-stdin 726575956043.dkr.ecr.us-east-2.amazonaws.com
Output:

Creating the image (Not needed if you read Chapter 1) but anyway...
Command:
docker build -t hello-world .
Output:

Renaming the already created Docker image
Command:
docker tag hello-world:latest 726575956043.dkr.ecr.us-east-2.amazonaws.com/hello-world:latest
Output:

Pushing the new named image into AWS ECR
Command:
docker push 726575956043.dkr.ecr.us-east-2.amazonaws.com/hello-world:latest
Output:

And after the push finishes:

And that's it dev!!!
Checking the result in AWS ECR
Now return to your AWS ECR page, if you didn't change anything in the web page you are seeing the next UI:
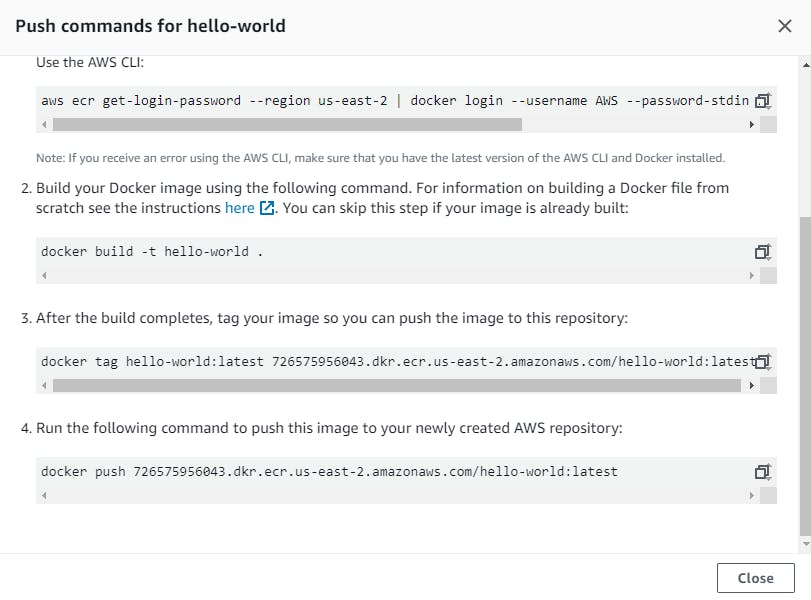
Ok, close it, now you will se the next UI again:
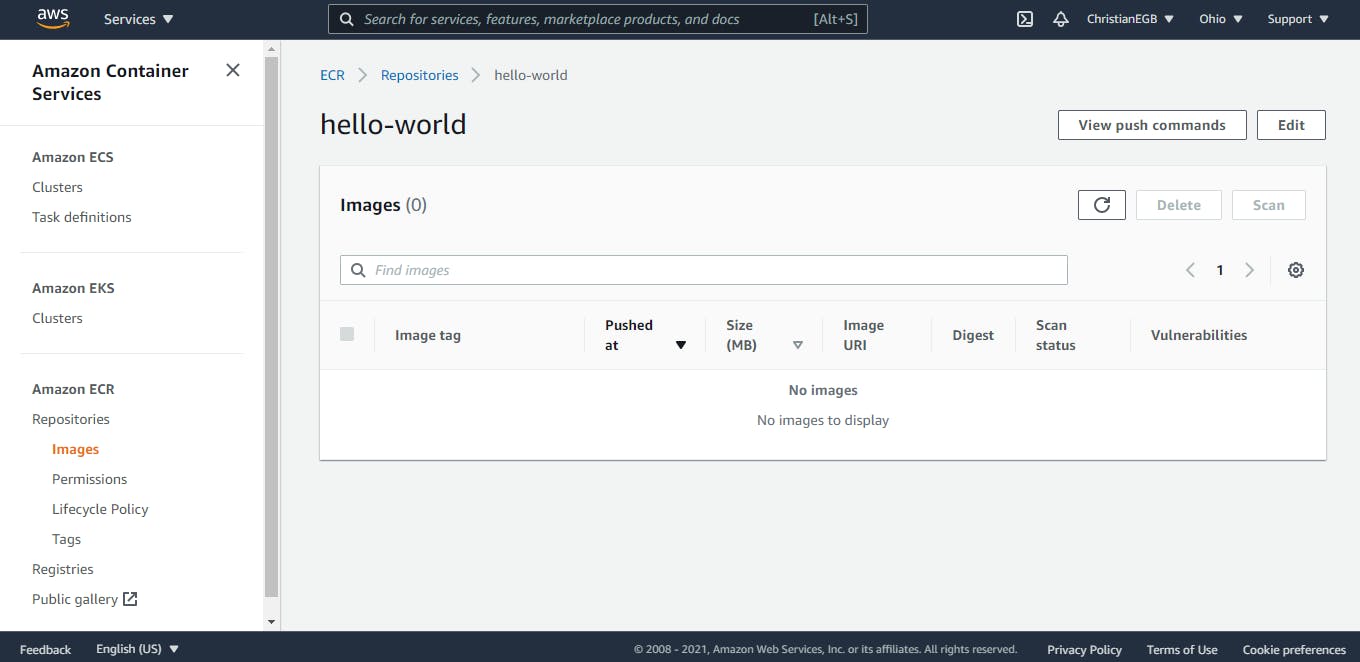
Yeah, wait, you are not seeing the docker image here, right? Don't worry dev, just go and click in the refresh button in the upper-right corner:

And there you go, your docker image it's now into AWS ECR.
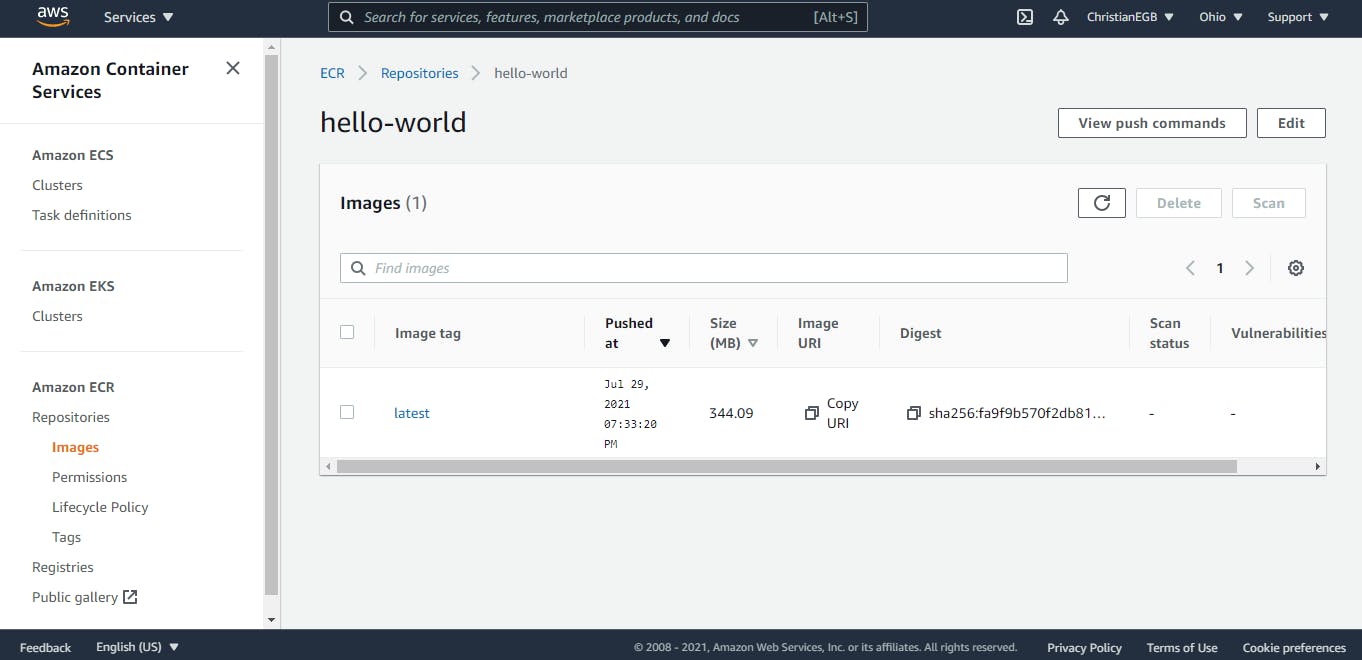
That's it for now, hopefully you are enjoying this series, because I am. Tomorrow we are going to deploy this image that is now into our ECR repository into a brand new ECS service, we are going to create a new cloud, a new service, a task definition for the service and so, it will be awesome. So see you tomorrow dev. <3
Also, if you want to know more about this type of topics please go and check out some tutorials in Amigoscode. We have a lot more regarding Backend and Frontend development and DevOps too!
