Spring Boot + Docker + AWS | Load Balancing
Chapter 5 | Adding a load balancer to your ECS service


Let's get up to date
Almost one year after my last post... nothing else to say about that, haha, I realize that maybe write is not for me BUT, guess what? I am writing again because I started to give some courses at a university aaaaaaand I have some students that need this information hehe, so here we go.
This time I will write a little example of how to create a load balancer inside AWS. The objective is to show how to create this taking into account the last 4 chapters where we were talking about creating and deploying services inside AWS using ECS. Remember that this tutorials are just ofr beginnners only since we are not adding more security implementations or even more scalability. We are creating this in order to you have an idea of how everything works and how you can implement some DevOps by yourself.
Ok. lets begin...
If you followed up the last 4 chapters you should have a service running over AWS ECS, we are going to wrok with the knowledge that we got in those 4 chapters, we are going to deploy a new service, so you need to follow the same steps of chapter 3 and 4 to do it. So we are going to show you some parts of that chapter but not everything again. We are going to put emphasys on the part where we add the load balancer. Now that you know all of this, let's f*ckng go!!!
Creating the load balancer
Application Load Balancer
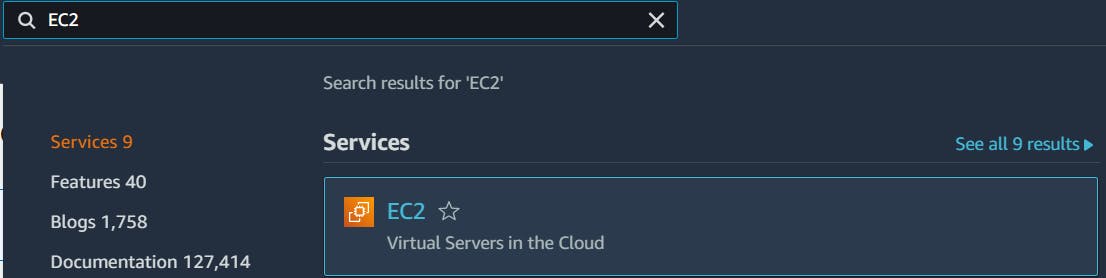
Please search "EC2" over the search box in your AWS console home page:

And choose the first option:
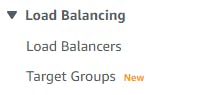
Once inside the EC2 dashboard, over the left side you will find a menu, please scroll down and find the option called "Load Balancing":
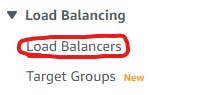
Then click over "Load Balancers":
Once you click you will see something like this:

To start creating your first load balancer please click over the blue button that says "Create Load Balancer"
You will see something like this:
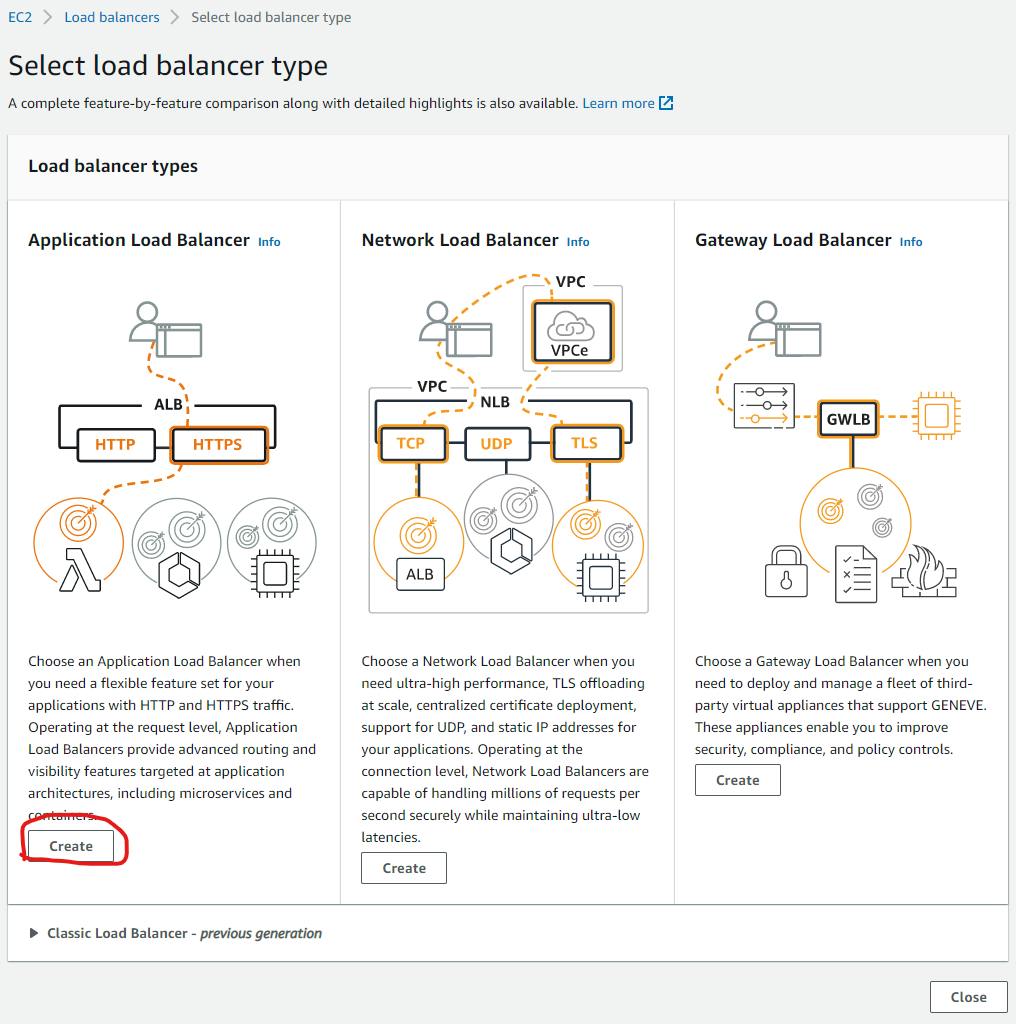
Then click over the "Create" button under the "Application Load Balancer", you will see something like this:
Now let's go step by step with every part of this creation tool.
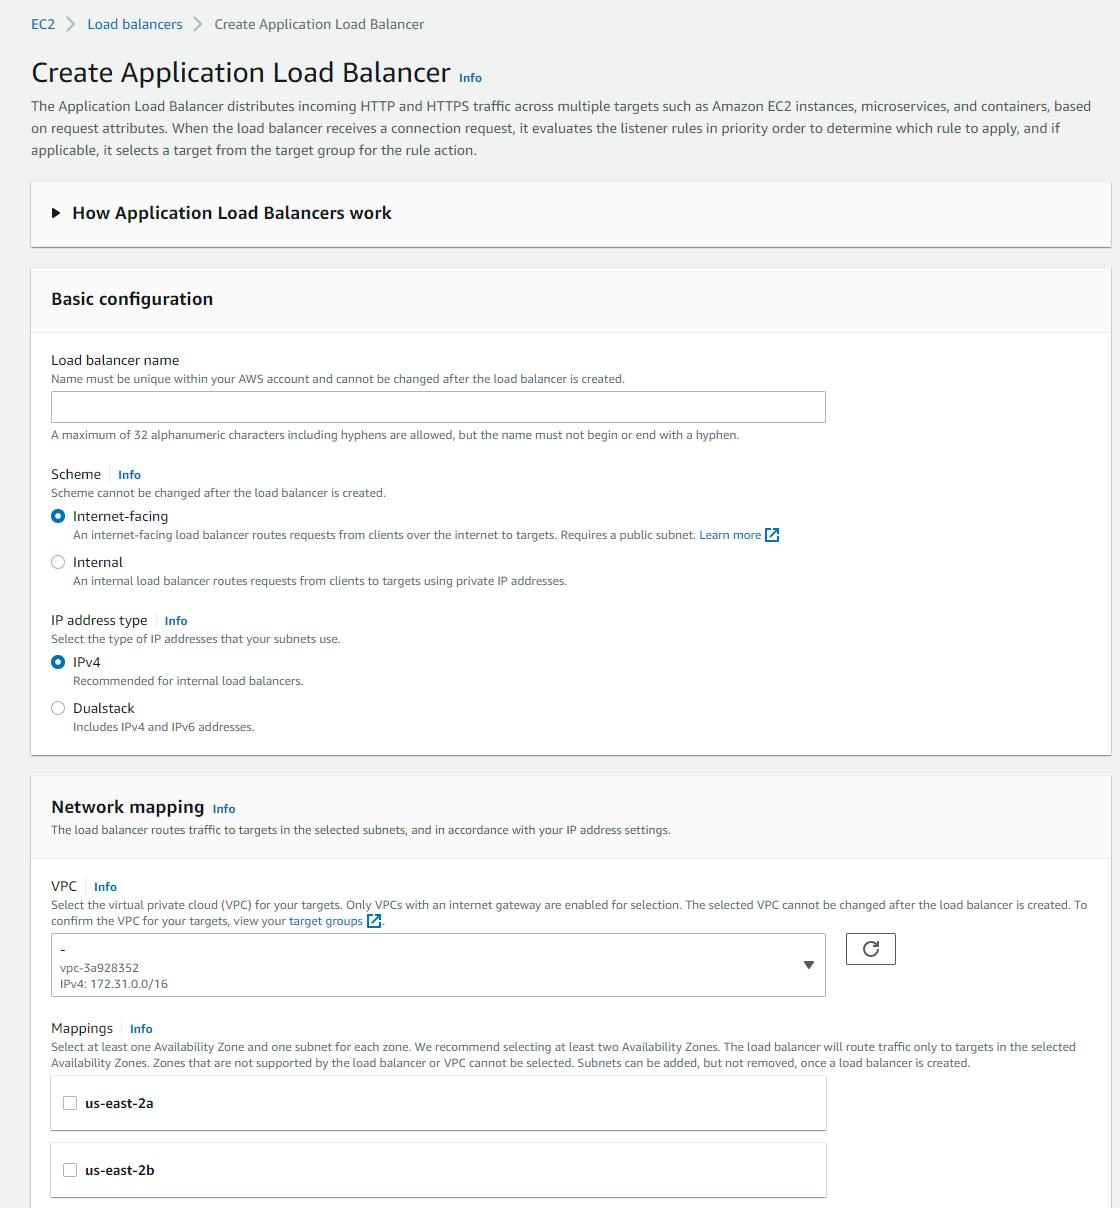
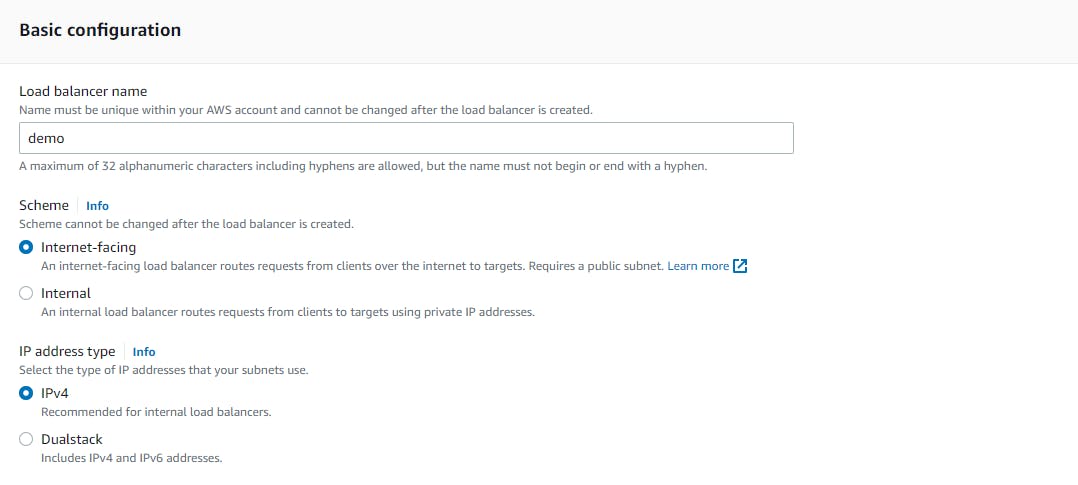
Basic configuration
For this part you only need to give a name to your load balancer, mine will be "demo":
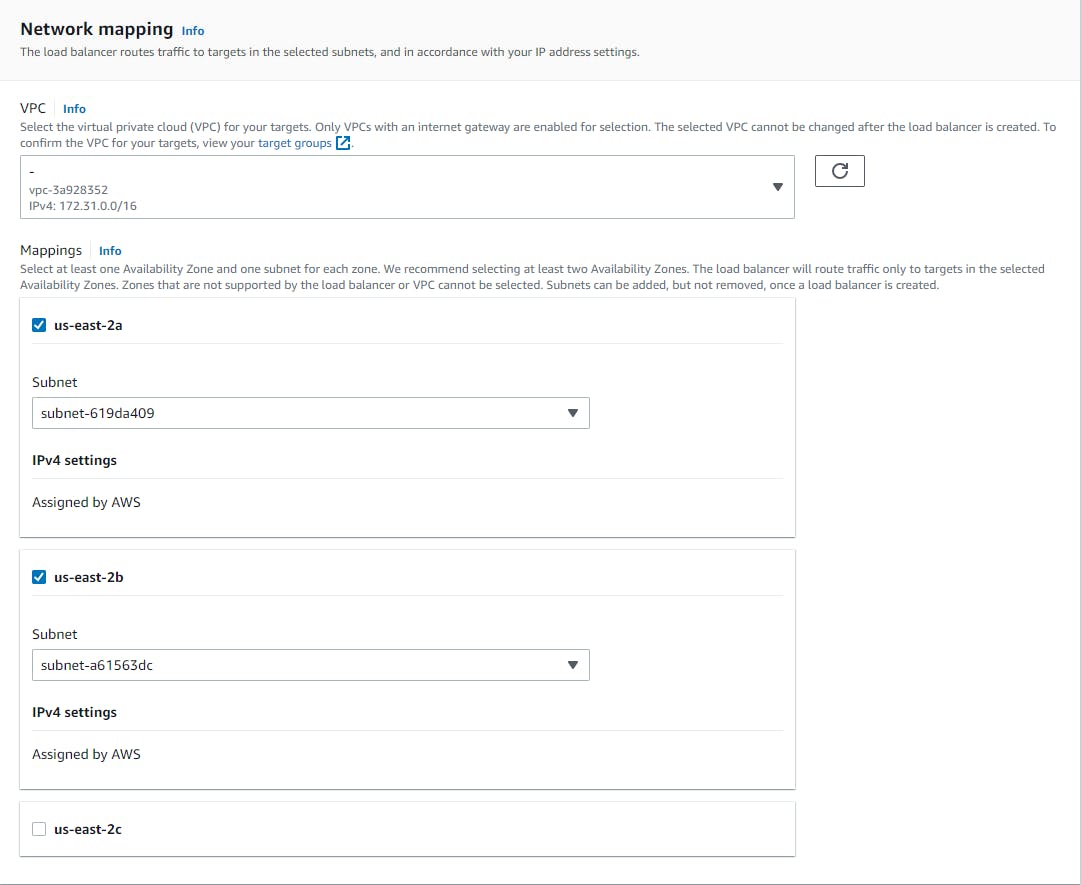
Network mapping
Choose the same VPC that we ware using to deploy our service in ECS, for this that will be the default one and of course the subnet a and b:
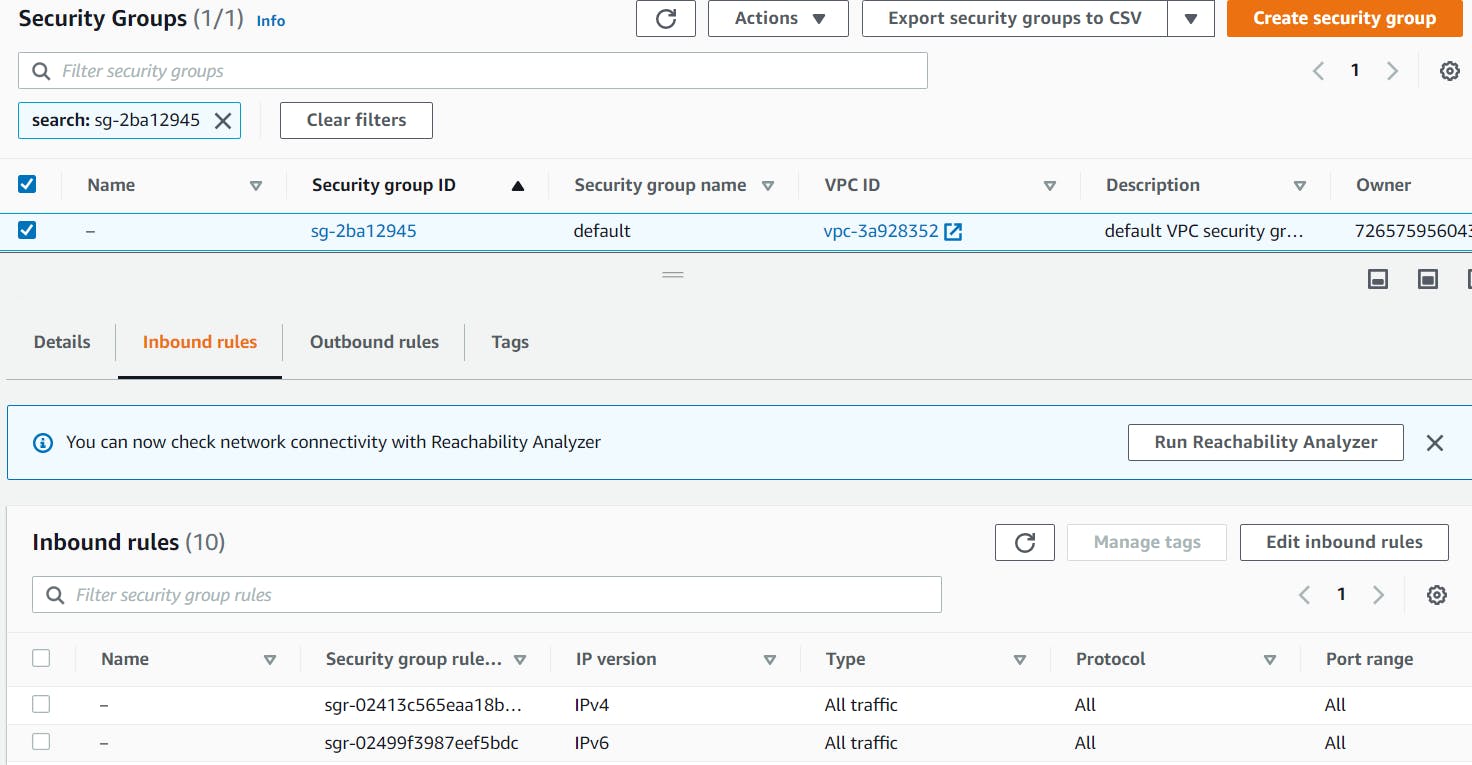
Security groups
Be sure that the security group that you are using contains the inbound rules just to be able to reach through internet, take a look to the next example so you can add the needed rules to be reachable.
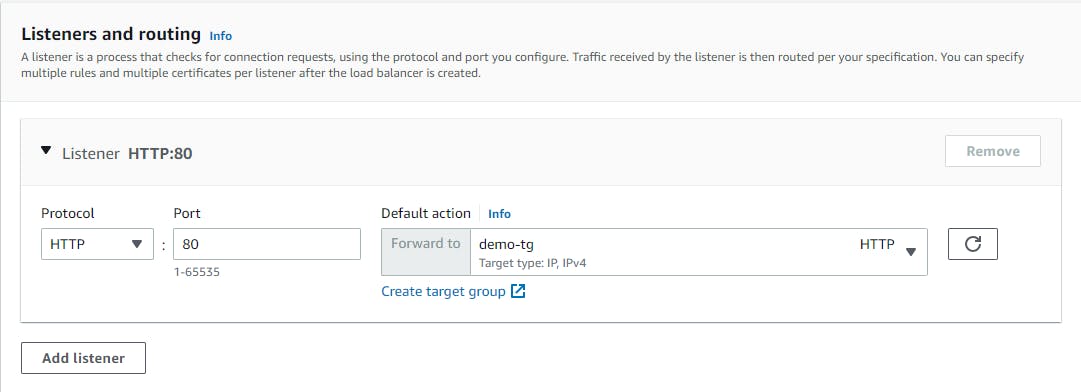
Listeners and routing
When a load balancer is created it need to be told to listen or route to a certain objective, that is how load balancer work, remember? they redirect the requests that are made to specific services using an algorithm (sometimes the Round Robin algorithm, there are some other, you can check more information about that here.
To redirect correctly the calls the load balancer needs something that can help it to find the correct paths, here is where we need to create something that is called "target group". Let's find out what's that...
Creating a target group
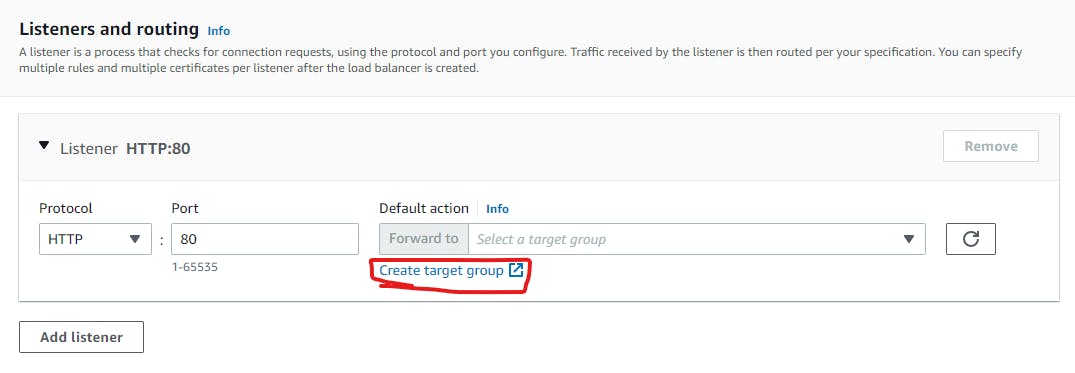
At the creation of the load balancer you need to create a listener, for this you need to create a new target group, please check to click over the link that says "Create target group", this link will open a new tab in your browser so you can create and configure a new target group in AWS.
Once you click, you will see something like this:
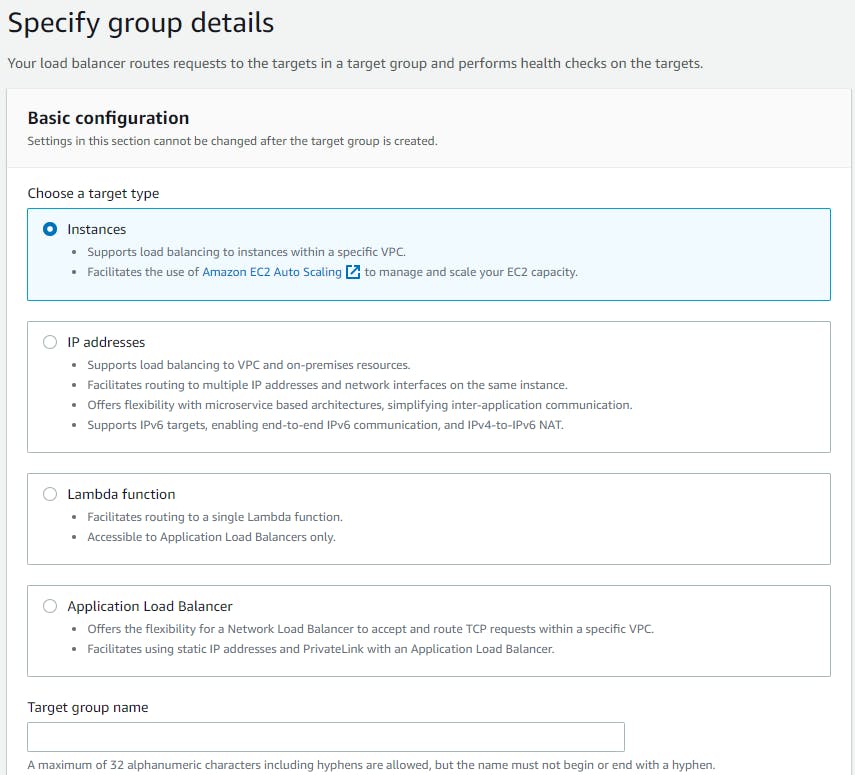
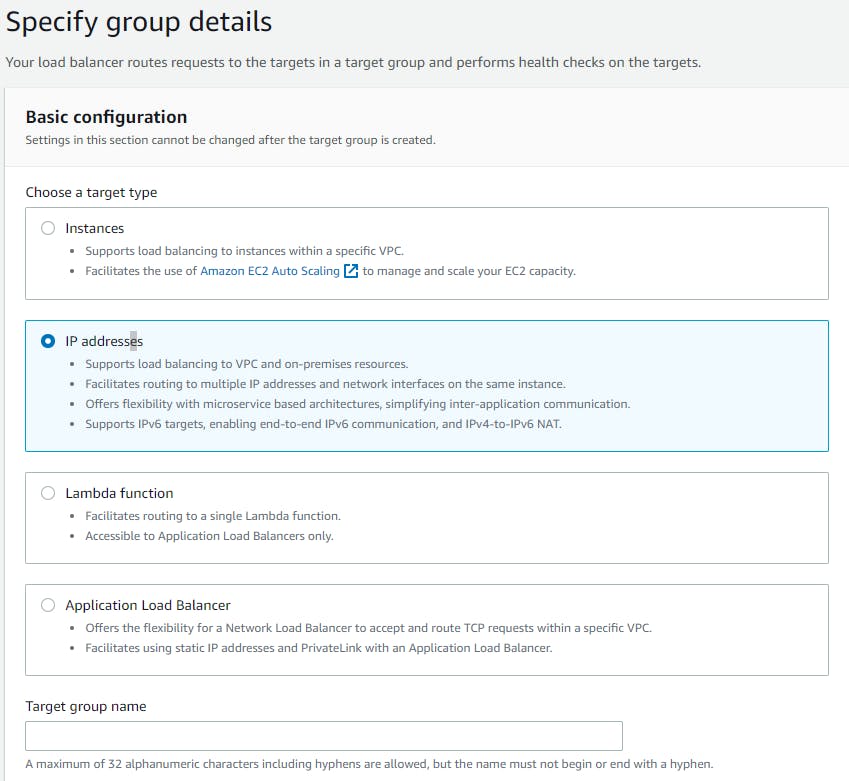
We need to change the target type to be IP addresses rather than Instance, so pick that one and you will have something like the next:
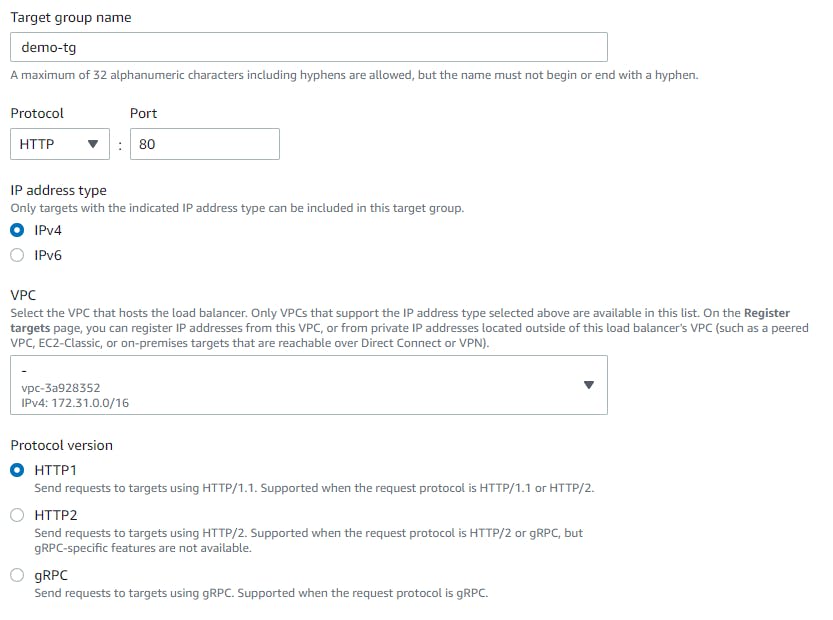
The please add a name for your target group, we chose "demo-tg" where "tg" stands for "target group":
Left the rest as is:
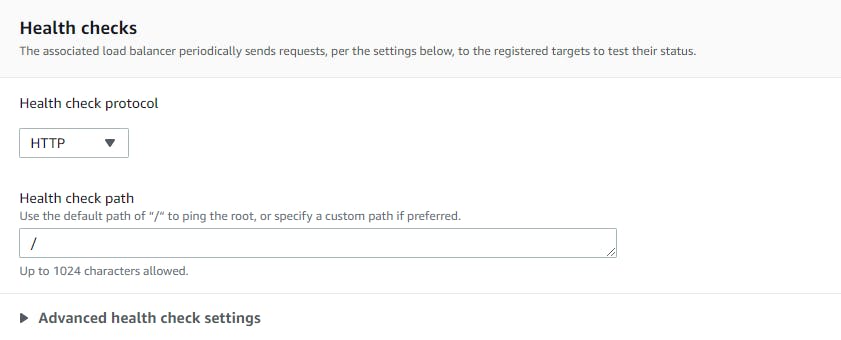
Health checks
A health check is a part in the target group where you specify a path (endpoint) in your service that will be reached by the load balancer so it can check that your service is running without any problem. For this you need to first think about to have an endpoint in your service that can serve as a health check so you can reach that endpoint and the load balancer can use it to check that the service is healthy.
For this example we are giving the master (parent) path as the health check but sometimes you can have something like "/health-check", so please refer to your service and check the best endpoint for you, then add that path to the input. Check our example, where we let the "Healtch check path" as "/" since that one is the one that we are going to use in our service, this path in our service returns a 200 HTTP status whenever is called and it only returns a string saying "All OK".
Let the rest as is and click over the "Next" button
in the next page left the rest as is:
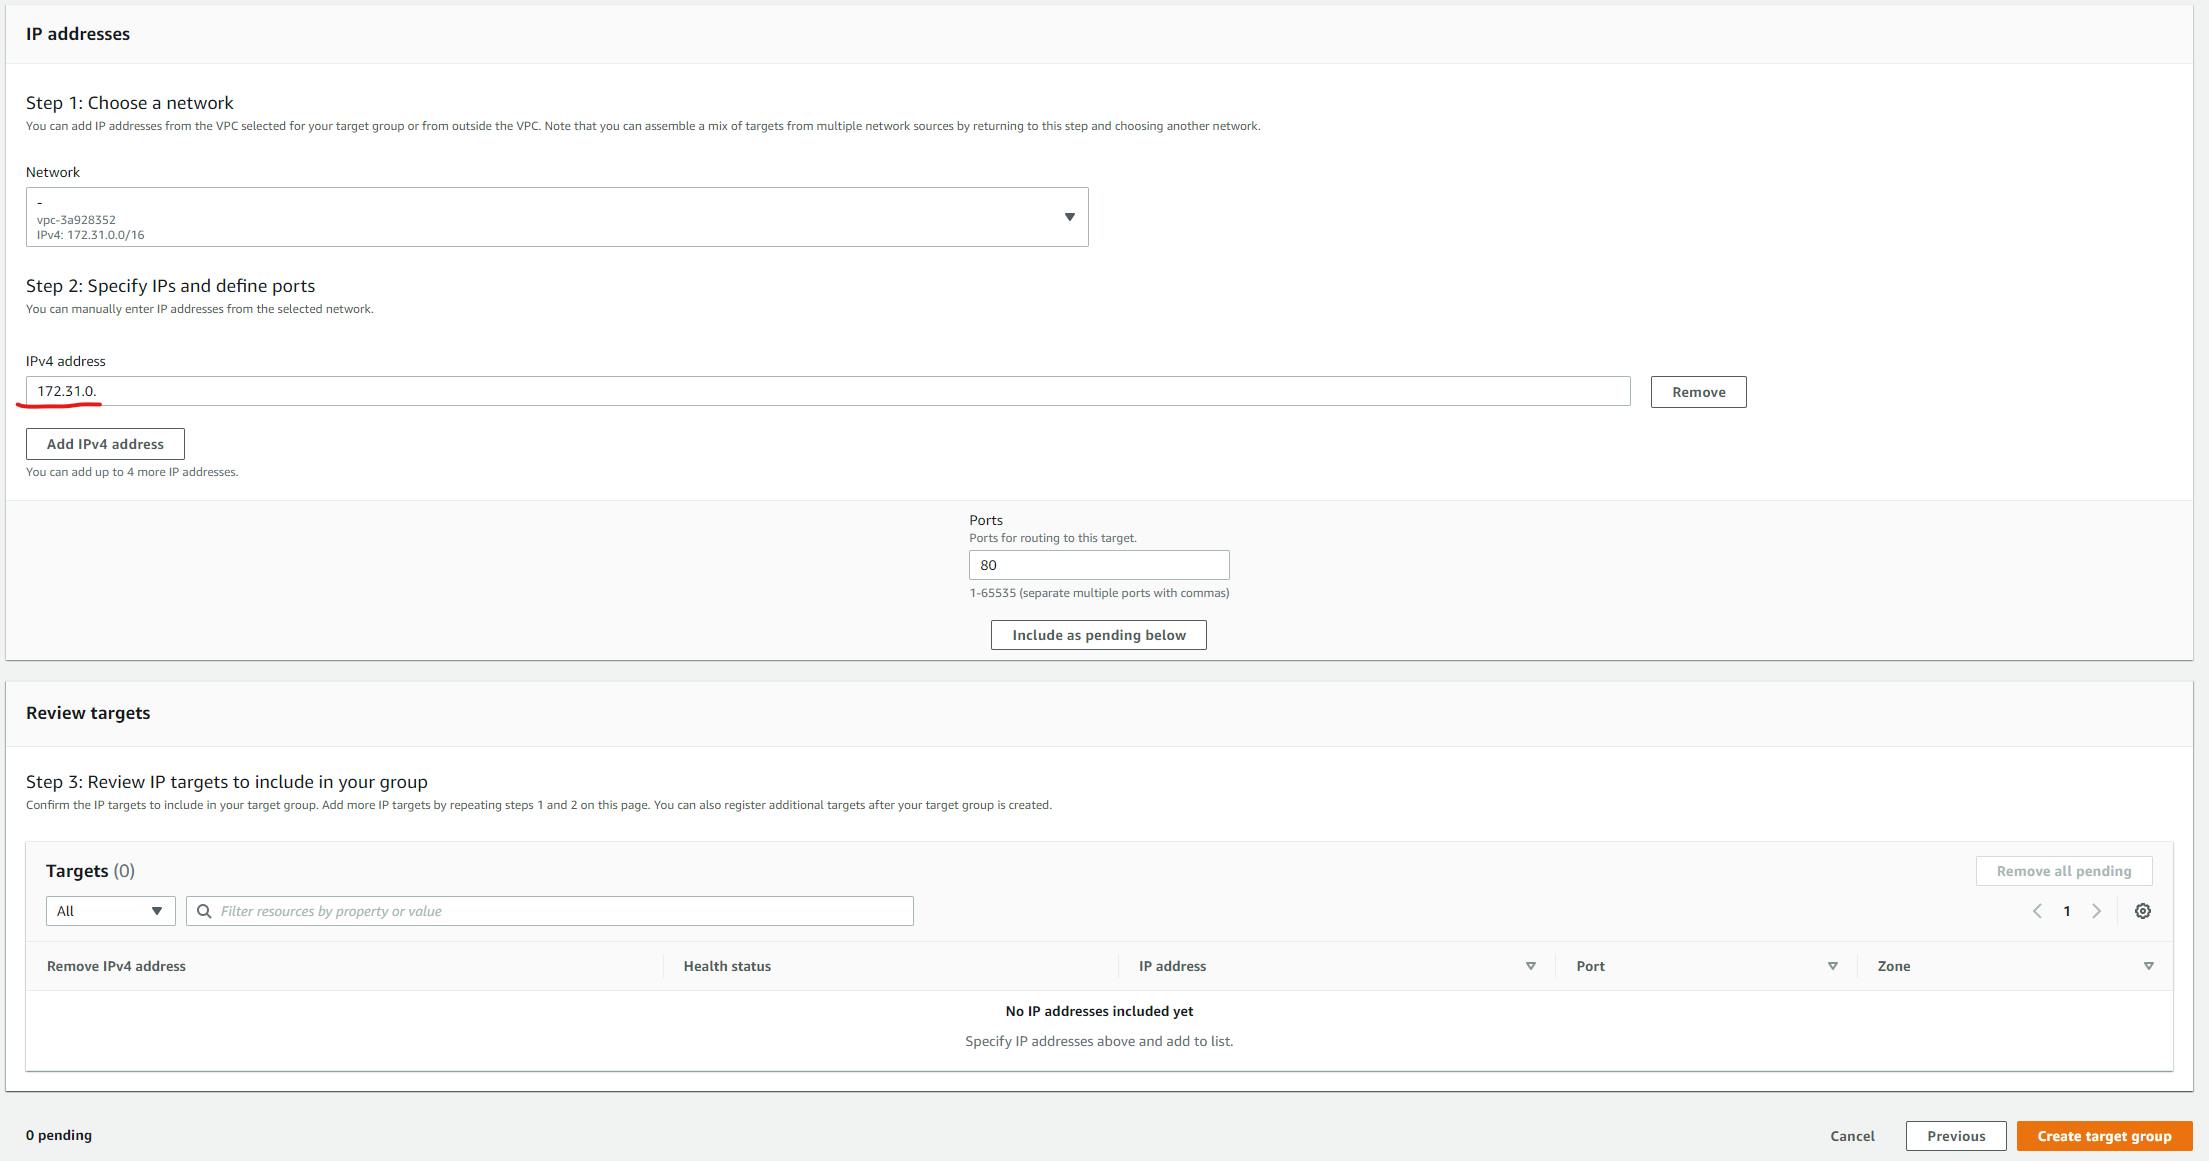
Just a quick note: The part that says IPv4 contains the two first digits of the IP address where your serviice inside AWS will live, this is given by the VPC that you are choosing, this one need to match the same VPC that you are using when creating your ECS service, you can have problems if you don't check this, so be careful
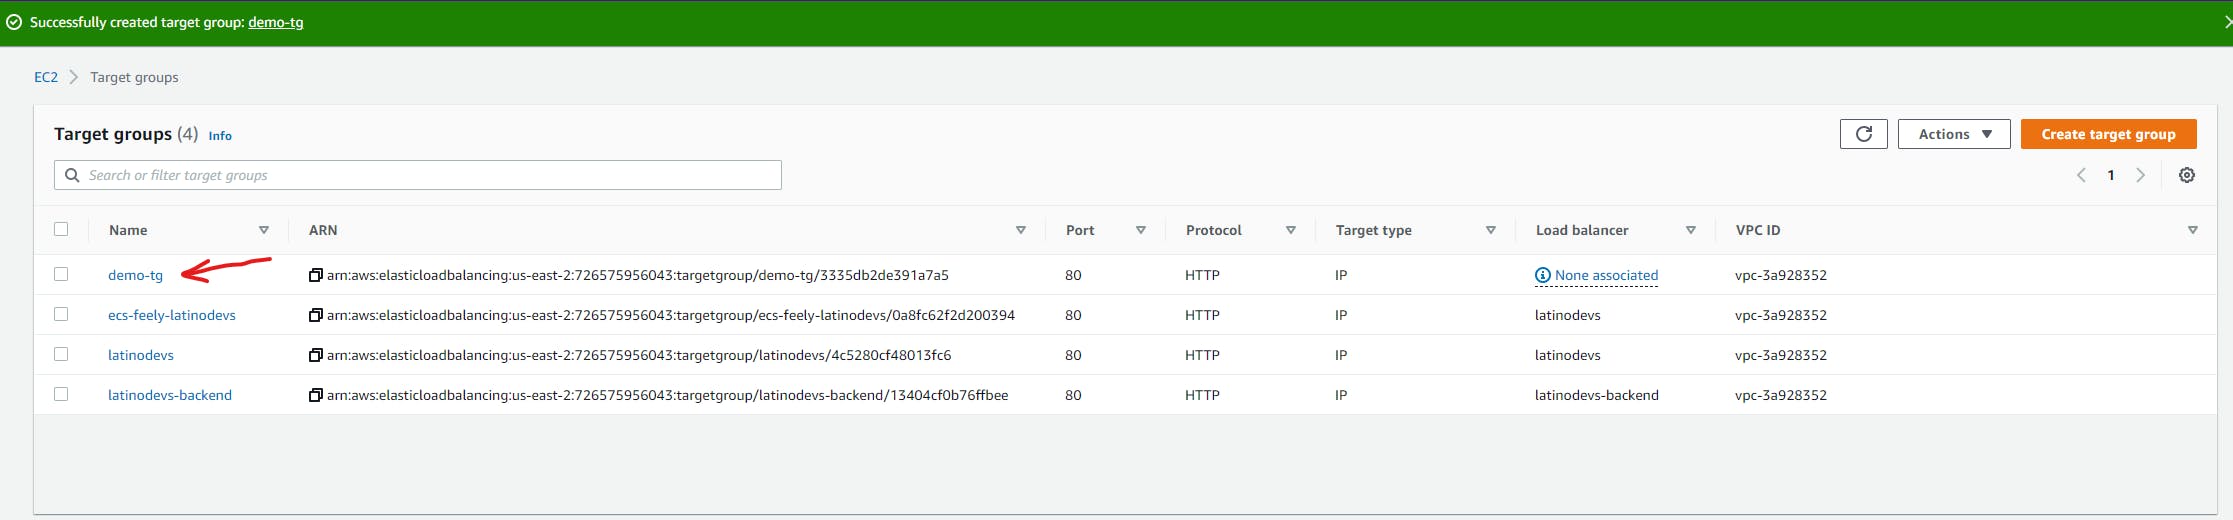
Now click over the "Create target group" button.
You wil see your new target group created:
Now you can go back to the previous browser tab where you were creating the load balancer and choose the new target group:
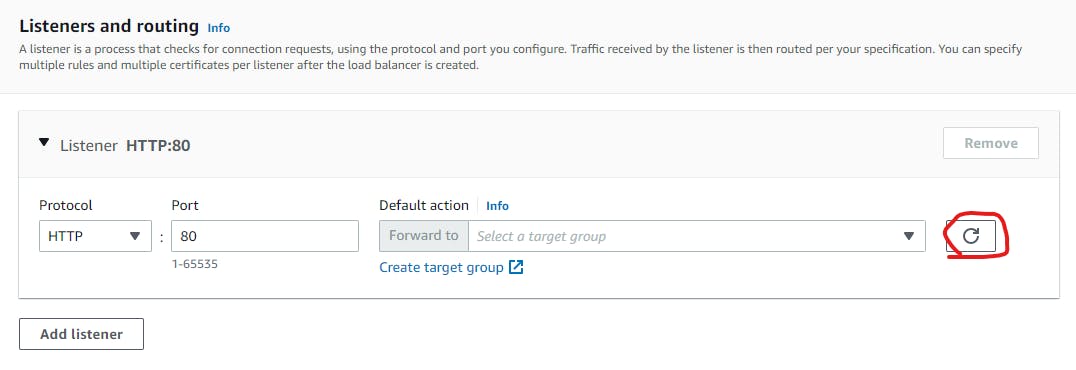
Remember that view? well hit on the refresh button just to see now the new target group that you have created.

In the dropdown menu you will have the name of the new target group, choose that one!
Now you have something like this:
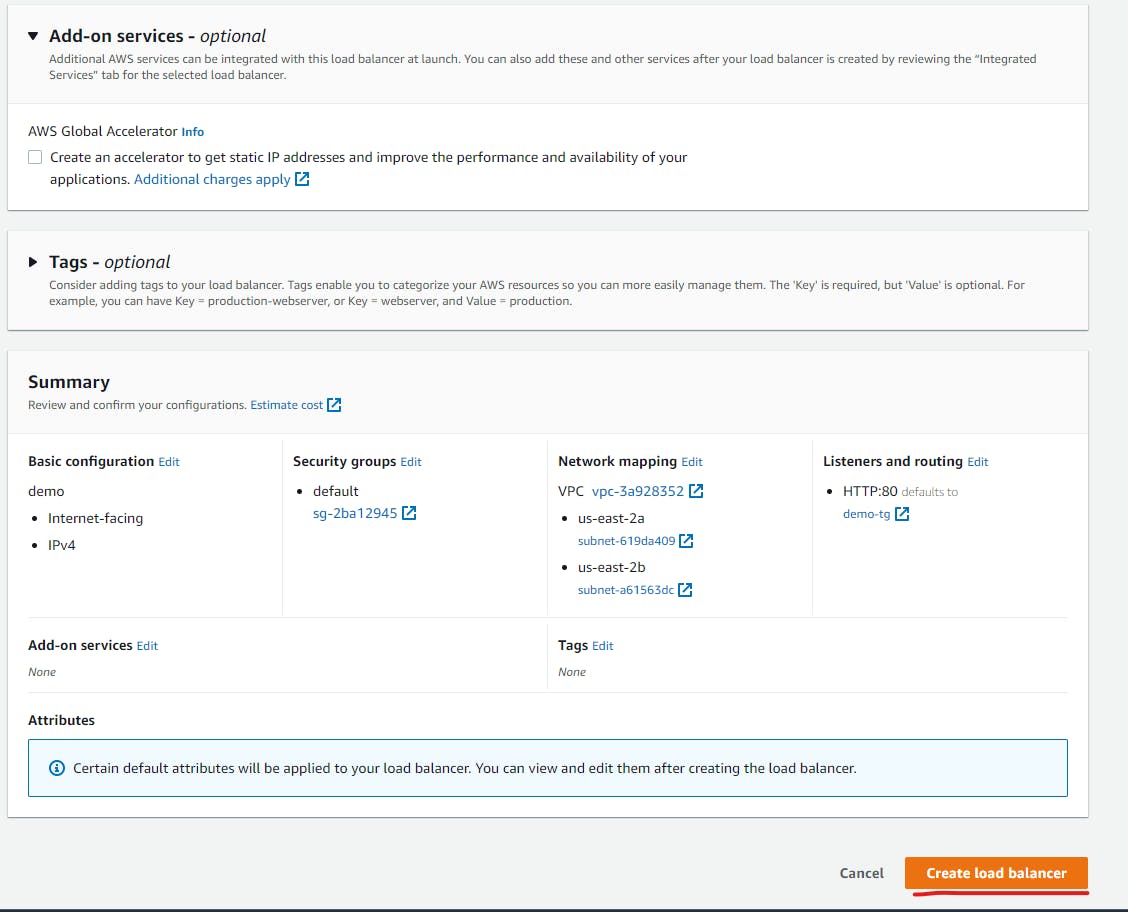
Let the rest as is and click over the "Create load balancer" button:
You will see something like this:
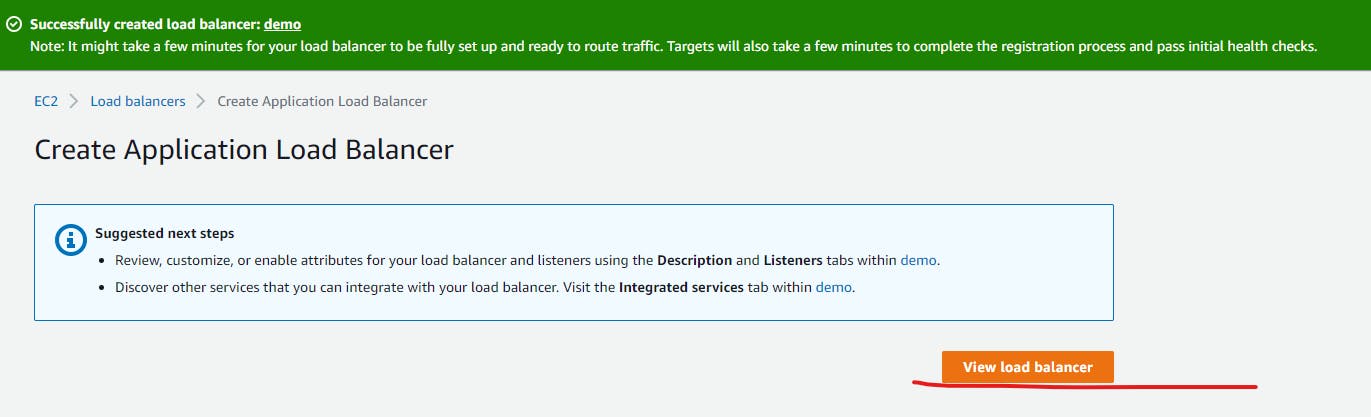
Just click over the "View load balancer" button.
And there you go, you have your first load balancer:

Repeating steps
Remember that I told you that you are going to repeate steps? well now is time to remember, go and check Chapter 3 and 4 where you create a task definition and a service but pay attention to a specific steps at the moment of the creation of there service.
We are not going to pass through the entire process of creating a service again but just the part that we care of...
Adding the load balancer to an ECS service
Now there is one part at the moment of the creation of the ECS service, the Configure network part. In here you will find one part that says Load balancing, it looks like this:
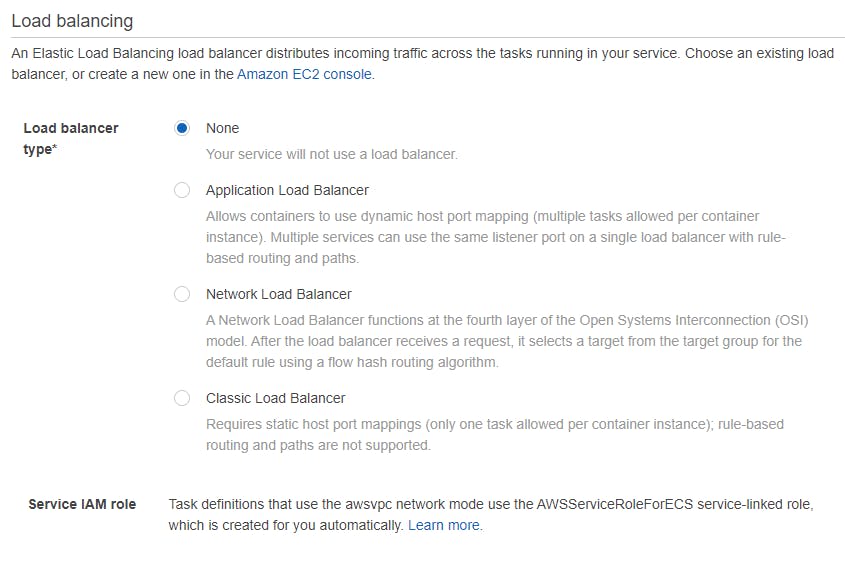
There is a part that says "Load balancer name" please choose the name of the load balancer that you created, in our example was demo.
Now, let's add the load balancer that we have created earlier. Choose "application load balancer" and the view will change like the next:
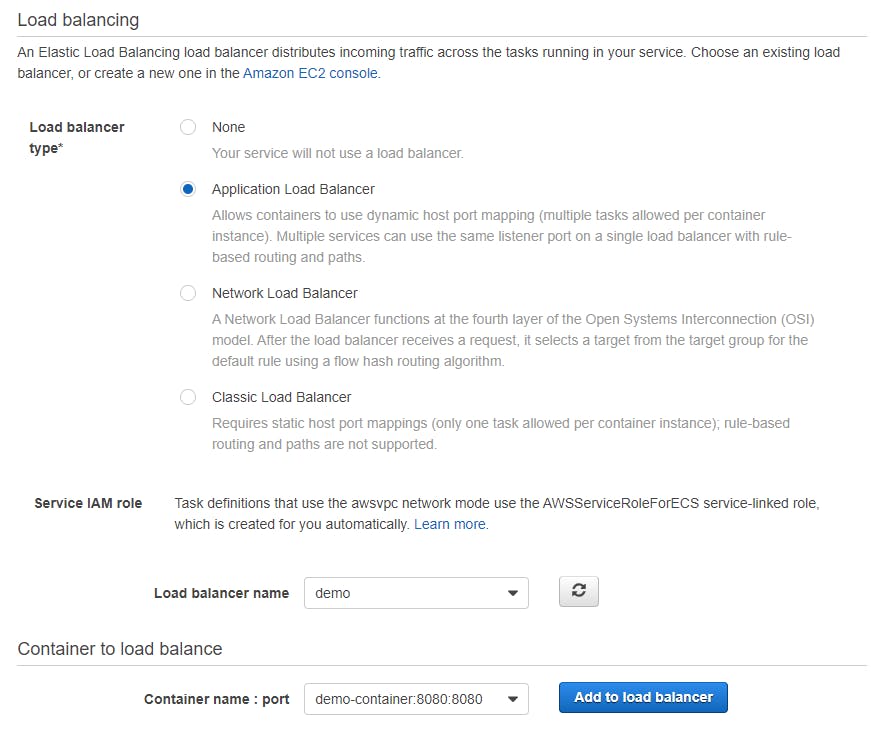
Now, click the "Add to load balancer" button, and a new view will be diplayed:
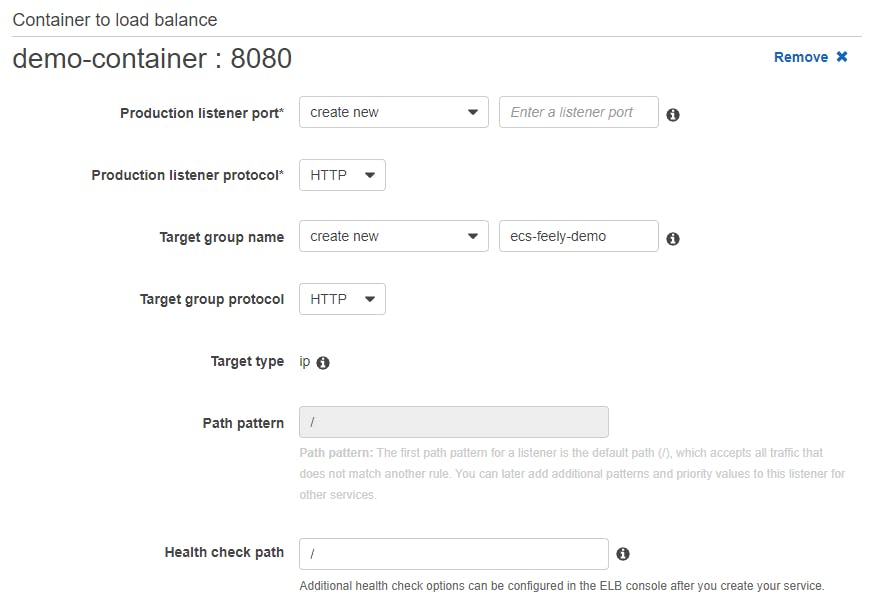
Display the Target group name dropdown and choose the target group that we created, if you remember, the name was "demo-tg", once you do that all the configuration of the target group will be set automatically. At the end, having something like this:
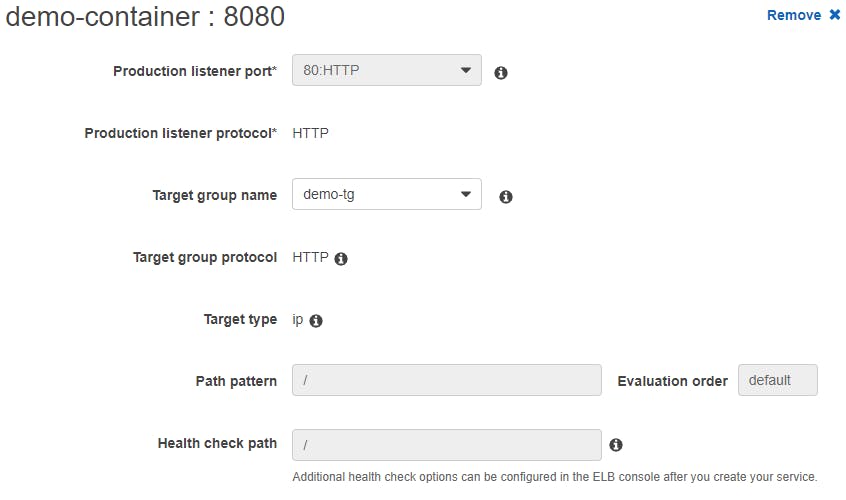
Now continue creating your service as always.
Checking the load balancer DNS
Returning to EC2 over the load balancers list, you will see something like this:

We have our "demo" load balancer and we now can check that it works, of course first be sure that the ECS service is running by consuming the public IP address, then choose the correct load balancer by clicking over the corresponding check box:

At the bottom you will see something like this:
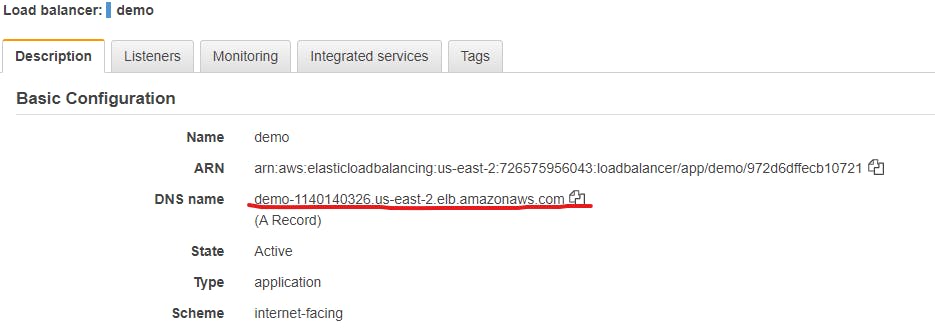
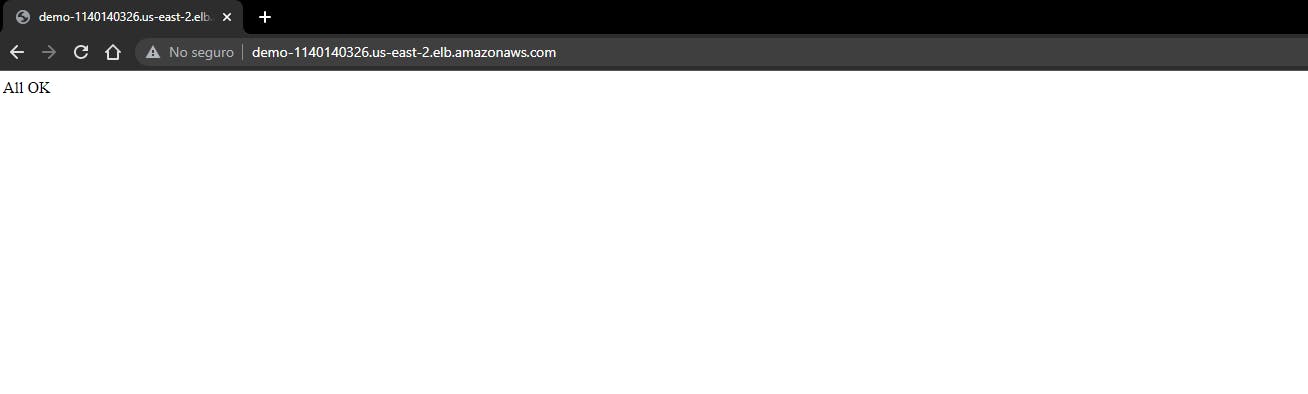
We care about the "DNS name", we can copy that and paste it in the browser just to consume the health check that we have, now rather than consume a public IP address you are going to consume this new DNS name.
And there you go:
Congrats!!!
See you in the next chapter :)